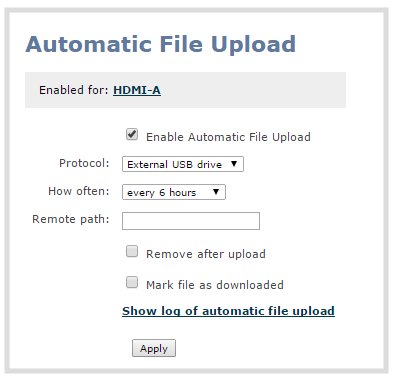
Enable and set timing for AFU
After configuring the channels and recorders to include in your AFU schedule, you must enable AFU and configure the frequency of transfers.
Files saved before you complete automatic file upload configuration are not part of the automatic upload. Manual file transfer is required for these files. See Download recorded files manually.
To enable and configure frequency automatic uploads:
- Login to the Admin panel as admin. See Connect to the Admin panel.
- Select Automatic File Upload from the Configuration section; the Automatic File Upload configuration page opens.

If your screen does not indicate that AFU is enabled for at least one channel or recorder, return to Choose files to include in AFUEnable and set timing for AFU.
- Select the Enable Automatic File Upload checkbox.
- Specify how often automatic updates should happen.
The first transfer occurs after the specified amount of time expires, or after the current file completes recording (i.e. if the value is set to every hour and five videos are saved the first hour, those five videos are uploaded after the first hour, and one hour later the videos saved in the second hour are uploaded).
The following table describes the available options.
Automatic File Upload Interval Options
| Name | Description |
|---|---|
| On file rotation | The |
| Every hour | The |
| Every 6 hours | The |
| Every 12 hours | The |
| Every 24 hours | The |
- Indicate the remote path, if desired. If no path is specified, the files are copied to the root folder of the destination file system.
If the remote path does not exist on the remote server or USB drive, the file transfer fails.
If desired, check Remove after upload to have the files deleted from local storage when upload completes.
If desired, check Mark file as downloaded to have the color of the file link in the recording list change to show the files are downloaded. This only applies if the files are not deleted after upload is complete.
Select the protocol or destination for upload. The following table describes the options.
Automatic File Upload Interval Options
| Name | Description |
|---|---|
| FTP Client | The |
| RSync Client | The |
| CIFS Client | The |
| SFTP Client | The |
| SCP Client | The |
| External USB Drive | The |
Follow one of the procedures below to configure your selected protocol or transfer type.

