Live video mixing / switching
Standalone VGA Grid supports live video mixing (also known as live video switching) while you are capturing, streaming and recording. Video mixing is a great way to create dynamic content for your viewers and recordings. With Standalone VGA Grid, switching happens in less than half a second ( < 500 ms)!
This means you can start your stream with a video source showing a countdown, move to a single-camera view, then switch between multiple cameras or multiple layouts with more than one source, and end again with a thank you message for attendees. (Layout switches made in your channel are reflected in both the live stream and recording. )
For example, your stream could look like this:

Before you can switch between layouts, make sure you have your custom channel with layouts created. See Create a custom channel or layout.
Now on to the fun part!
There are
Performing live switching in one interface (e.g. Epiphan Live) does not dynamically update the visuals in the other interface (e.g. the Admin panel).
Switching / mixing using the Admin panel
Switching live video inputs, or video mixing, is fast and easy using the Admin panel. For best results, you may wish to be in a location where you can see the live action, and have a solid understanding idea of what is in each of your layouts. Good layout names can help with this. See Rename a layout (custom channel).
To do live video mixing:
- Login to the Admin panel as admin. See Connect to the Admin panel.
- Follow the steps in Custom channel layout editor or Create a custom channel or layout to get to the channel layout editor.

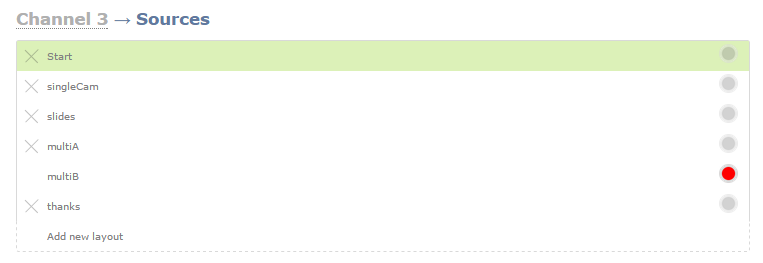
- The currently active layout has a red button in the right-most column.
- Touch the empty circle for another layout to make it the active layout; the layout changes in the live stream (and recording), and the new row gets the red button.
- Continue to switch layouts as needed for the duration of your event or recording.
Switching / mixing using Epiphan Live
Epiphan Live is a simple and easy to use interface which is used for confidence monitoring, streaming/recording control and live switching. (See Epiphan Live for more information.)
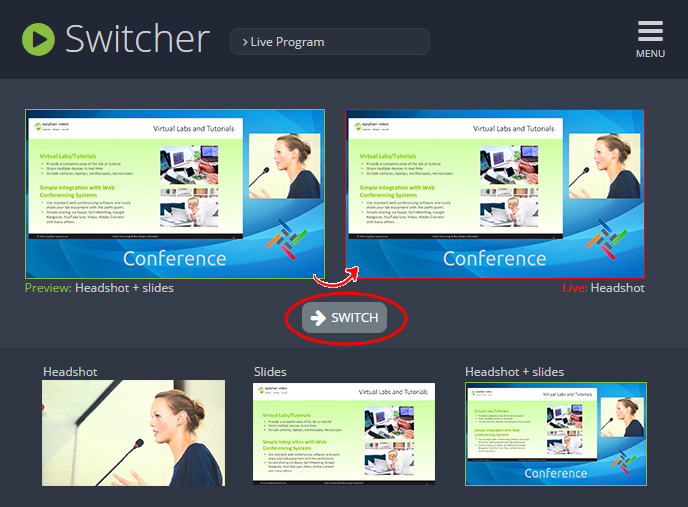
Within Epiphan Live, the Switcher view allows you to seamlessly switch between a channel's custom layouts while live streaming and/or recording.
To switch a layout while live streaming and/or recording using Epiphan Live:
- Log in to Epiphan Live; the Dashboard view opens by default. See Accessing Epiphan Live.
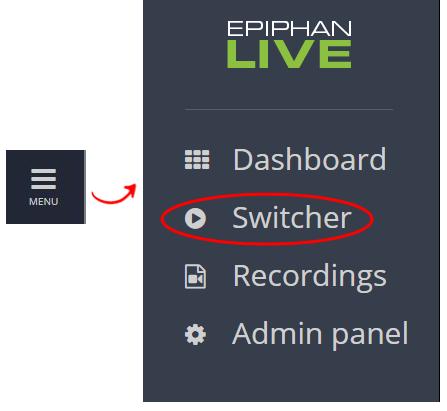
- Click the Menu icon in the upper-right corner of the Dashboard screen and click Switcher to navigate to the Switcher interface.
- Click the text box next to the "Switcher" header and select your desired channel from the dropdown list (the text box will appear blank if this is your first time configuring the Switcher interface). Note that in the channel dropdown list, channels containing only a single layout are grayed-out and are not selectable.
After selecting your channel from the dropdown, the Switcher interface appears with all of your channel's layouts displayed along the bottom of the page.

The layout currently being streaming and/or recorded is displayed in the Live view panel on the right side of the interface (see Understanding the Switcher interface).

- Click on your desired layout at the bottom of the page to dock it in the Preview panel. This is the layout that will be switched into your live stream/recording.
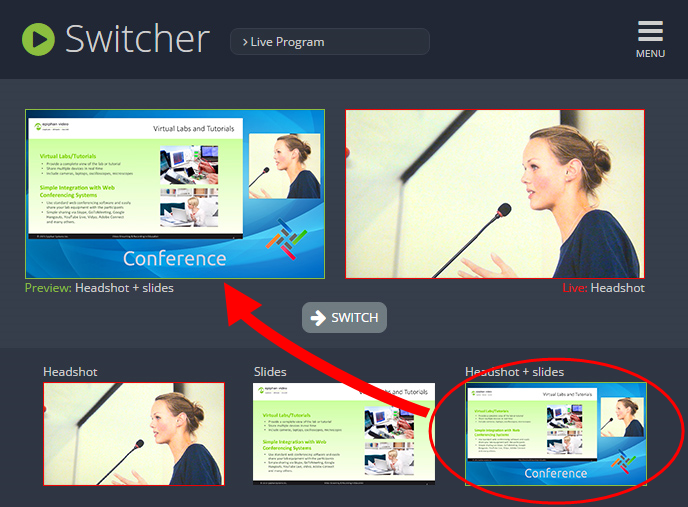
- Click the Switch button in the center of the screen to switch your layout in the Preview panel into your live stream/recording.