Add an image (custom channel)
You can use images in your custom channel layouts to create a background for your source, to add your corporate logo, or to add relevant information about the event you're streaming.
Standalone VGA Grid supports png (PNG) and .jpg (JPEG) images. You can upload any image from 16×16 pixels to a maximum resolution size of 3840×2160, however it's strongly recommended that you upload exactly the size you need to avoid having your image scaled.
In earlier releases, there were separate procedures for adding backgrounds and logos to a channel. These actions are now both considered adding an image to a custom channel layout and can be accomplished with the steps below.
You can add a picture to a layout on an existing channel or you can create a new channel. If you're not sure how to create a channel or a layout, start by reviewing the first few steps in the topic Custom channel layout editor
To add a picture to your layout:
- Login to the Admin panel as admin. See Connect to the Admin panel.
- Follow the steps in To upload an image or Create a custom channel or layout to upload your image, if not already uploaded. If you like, you can also use the drag and drop technique described below.
- Follow the steps in Custom channel layout editor to get to the channel layout editor.
- From the channel layout editor, click Add item; a drop down box appears. (If you have any other items already in your layout, the new item appears at the top of the list.)
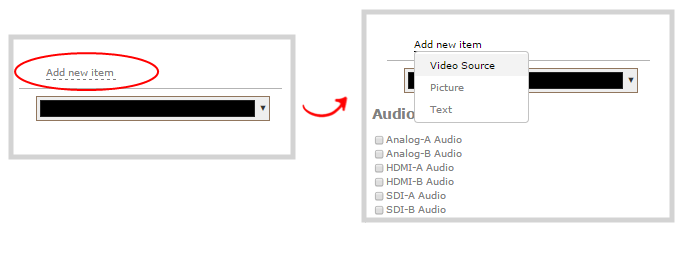
- Select Picture; the Picture Settings section appears on the right side of the page.
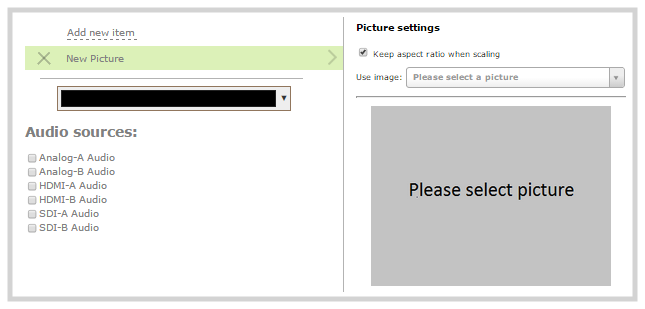
- If you haven't already uploaded your image, you can drag and drop it from your desktop to the gray Please select picture box. (Note: no warning is displayed if the image is too large or will replace another file).
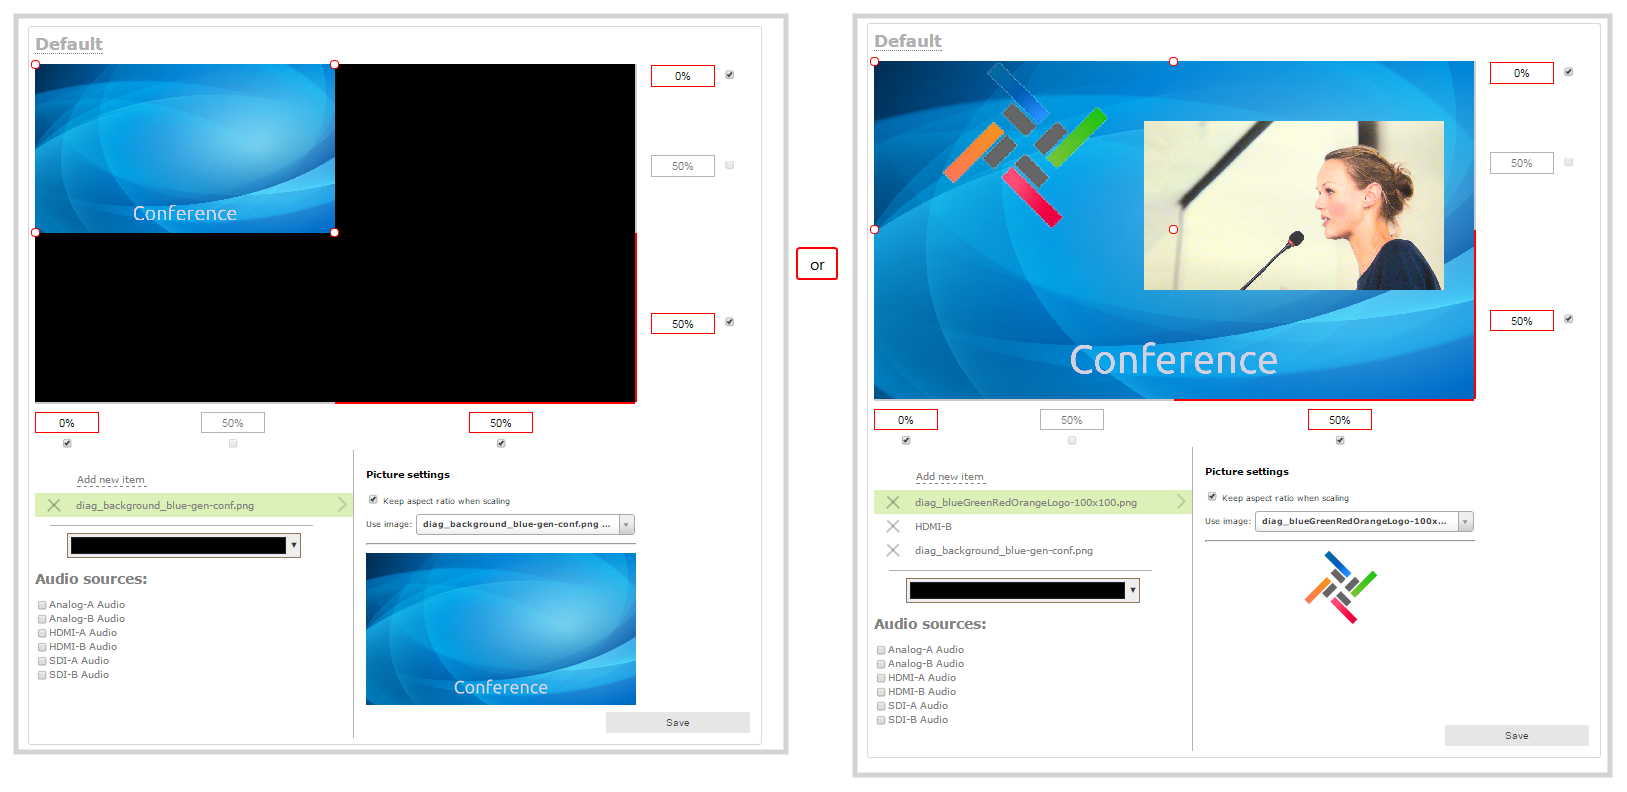
- If you have already uploaded the image, click the Use image drop down to select an image you have uploaded to the system;
- Your picture appears in the Picture settings preview and is added to the layout area. It is selected for sizing and positioning.
If your uploaded image does not appear in the list, ensure it doesn't exceed the maximum resolution size of 3840×2160.
- For best results, keep the Keep aspect ratio when scaling checkbox selected in the Picture settings box. (This is selected by default.)
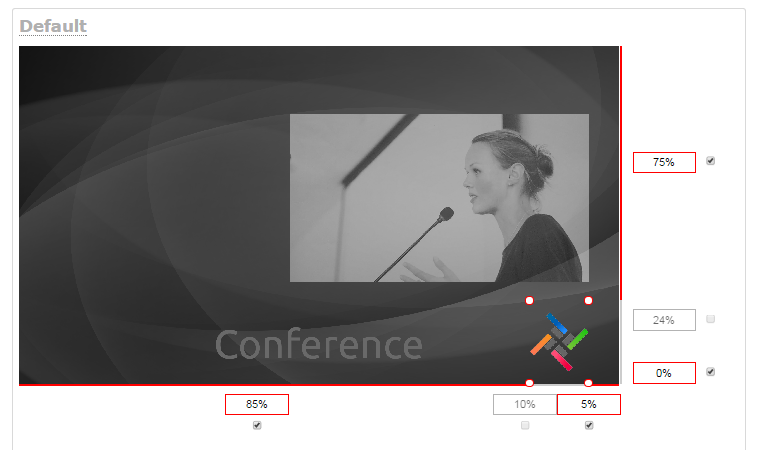
- In the layout area, use the mouse, the keyboard or the manual position value fields to position and resize your image. For background images, click and drag to fill the full layout area. See the note below for more information on positioning techniques.
- If needed, re-order the items in your layout by clicking and dragging items in the item list (under the Add new item link).
For example, if you added your background image after adding a video source, the background image conceals the video source. To fix it, drag the video source item above the background image item in the list, or vice-versa.
- When your layout is complete, scroll to the bottom of the page and click Save to save your work.
Other things you may want to add to your layout:
- Add a video source (custom channel)
- Add an audio source (custom channel)
- Add a text overlay (custom channel)
- Delete or move a layout (custom channel)
- Set the background color (custom channel)
- Rename a layout (custom channel)
A note about item positioning and sizing
There are four ways to position and size items in the layout area
- using the mouse
- using the keyboard
- using the manual positioning values with percents
- using the manual positioning values with pixels
To use the mouse:
Click and drag to move the item. Click and drag the red and white circles to resize the item as you wish. Using this method you can make quick changes that are in increments of approximately 5% of the width or height of your layout area. For more refined movements, hold the down the Ctrl key on your keyboard while dragging the item with the mouse.
To use the keyboard:
Use the arrow keys on the keyboard to move the item up, down, left or right in the layout. Changes are in increments of approximately 5% of the height or width of the layout area. Make more refined movements by holding down the Ctrl key on your keyboard while pressing the up, down, left or right keys. You can also hold the Shift key while using the arrow keys to control the size of the item on the layout. Hold both Ctrl and Shift for fine-grained size control.
Using percents:
Specify a whole number, followed by a percent sign (e.g. 4%) in any of the manual positioning fields. See Resize and position layout items using percents or pixels (custom channel) for more information.
Using pixels:
If you need to specify an exact amount in pixels (rather than percent) you can type a pixel value in any of the positioning value squares followed by the characters px (e.g. 56px). You can mix and match pixels and percents changing only the boxes you want to use pixel values. At any time you can switch back to percents by typing a percent. See Resize and position layout items using percents or pixels (custom channel) for more information.
