Create a simple channel
Channels arrange the output from sources into a viewable and recordable stream. Although there are may ways you customize a channel, this procedure walks you through the most basic channel setup with a single source. For multiple-source channels and advanced layout editing see Add channel metadata. (You can always update this channel later to use multiple sources or multiple layouts.)
After creating this channel you'll be ready to stream it using the system default settings. Instructions to configure encoding, branding and CDN streaming are described in separate procedures.
To create a simple channel:
- Login to the Admin panel as admin. See Connect to the Admin panel.
- Ensure that your choice of
- From the Admin panel, scroll to the Channels menu option. A list of existing channels, if any is displayed.
- Click Add channel located at the bottom of the list; the Sources page opens.

- You're automatically editing the Default layout in the channel layout editor. (By default a 16:9 visual layout editor with a no-signal image is shown.)
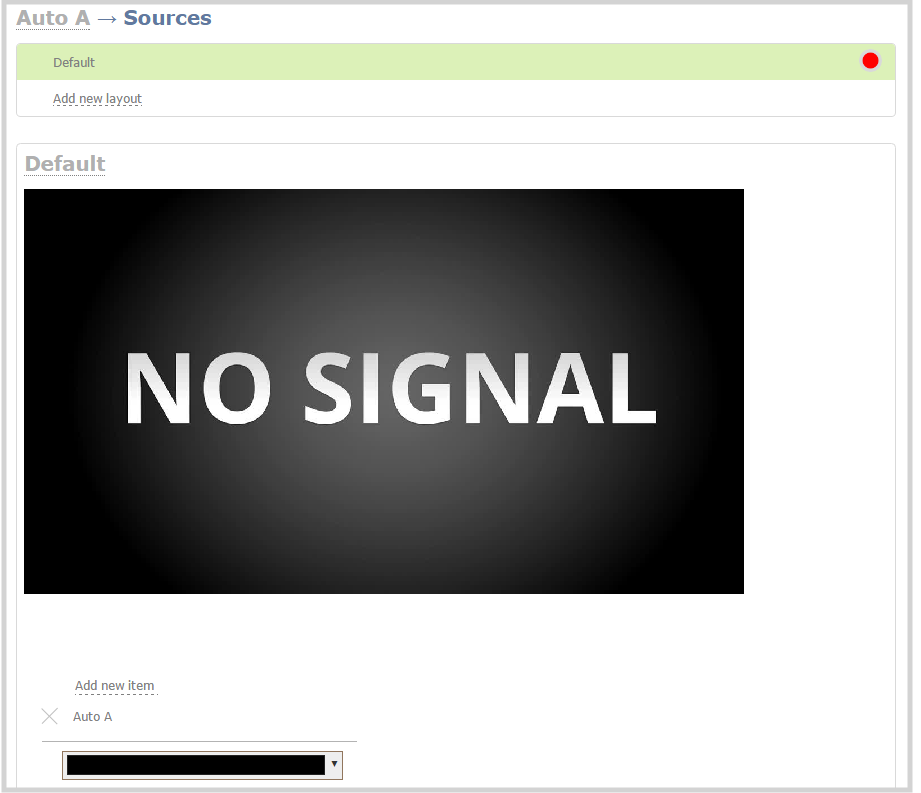
- Click Add new item to add a layer to the layout; a drop down appears allowing you to choose the kind of item to add to your layout.
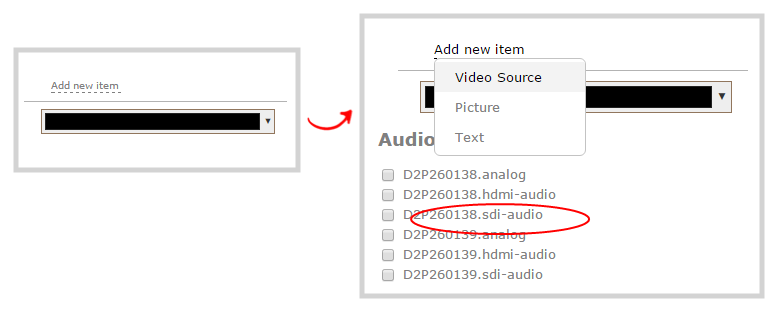
- Select Video Source from the drop down; the new item is added to the layout and the Source settings box appears on the right side of the page.
- Click the Source drop down and select your source; your source appears in the visual layout editor above.
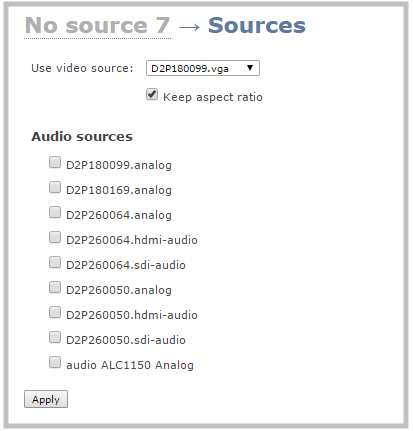
- For best results, keep the Keep aspect ratio when scaling checkbox checked in the Source settings box.
- Click and drag the red and white source handles in the visual editor or type in the percentage text boxes at the side to re-size the image as you wish. For a single source channel, using the full layout is usually best.
- If audio is desired, scroll down and choose an audio source from the displayed list.
- Click Save at the lower right corner of the page; the layout changes are saved.
Because this is a single-source channel with only one layout, the channel's name is updated to display the source’s name next time you view the channel. Click the channel name to refresh and view this, if desired. If you wish to change a channel's name directly, see Rename a channel.
Your channel is ready for basic streaming and recording.
By default (on a new channel), when the source doesn't have a 16:9 aspect ratio, the system automatically detects the correct aspect ratio and updates the layout after you leave and return to the layout editor screen. This happens because the encoding page has the Use current signal resolution as frame size setting selected by default. If you want to change the aspect ratio for your channel, see Configure encoding .
There are a lot of creative things you can do next with your channel, including creating more layouts and editing this layout to add images and more sources. See Create a custom channel for more information.
