

Here are some quick steps. For detailed instructions to connect your Webcaster X2 and start streaming, see the Quick start guide.
Connect your camera or other HDMI source to the HDMI IN port on the side of Webcaster X2. You can also connect a 720p USB webcam to the USB port that’s located beside the HDMI IN port and use two video sources at the same time, but you need to enable the beta USB camera feature for the webcam to work.
TIP: When the USB camera feature is enabled, you can connect a USB keyboard to Webcaster X2 and switch between the two video sources and use different layouts, like: PiP, side-by-side and more!

Alternatively, you can connect to the network using Wi-Fi, but first you need to configure the Wi-Fi settings on Webcaster X2 using a connected external monitor and mouse (and optionally a USB keyboard).
Connecting a monitor to the HDMI OUT port and a mouse (and keyboard) to one of the available USB ports lets you configure settings like the Wi-Fi, enter a password if you need to connect through a captive network (like at a hotel), change the default video title for the live stream, choose a specific Facebook group to stream to, change the default streaming resolution and bit rate, as well as other preference settings.
TIP: You don’t have to connect a monitor and mouse to quickly start a live stream directly to your Facebook timeline, YouTube account, Twitch channel page, your AV Studio account or to any one of the other third party apps like Switchboard Cloud. If you’ve already paired Webcsater X2 to your chosen streaming platform, you can start and stop streaming with a single press of the multi-function power button.
If you simply want to start streaming right away without making any configuration changes to Webcaster X2, just connect the power and double-press the multi-function power button on the side of Webcaster X2 to toggle between Facebook, YouTube, and all the other available third party streaming platforms until you see the one you want displayed.
![]() multi-function power button
multi-function power button
On Webcaster X2’s front display, a device code or stream URL (depending on the platform selected) appears beside the streaming platform’s logo. Use that to pair Webcaster X2 to the streaming platform following the instructions for that specific platform. See the Webcaster X2 online user guide for more specifics.
Once Webcaster X2 is paired, press the multi-function power button once to start streaming! And that’s it! The green LED blinks while streaming.
Press the multi-function power button again to stop the stream.
TIP: If you connect a display monitor to the HDMI OUT port on Webcaster X2, you can see what is streaming out of the device.
You’ll need your Webcaster X2, your social media account (Facebook, YouTube, Twitch, etc) and a network connection that has access to your social media platform on the Internet.
Optionally, you can connect a keyboard, mouse, and HDMI display to monitor your stream, view comments, engage with viewers and configure stream settings.
Tip: To stream to a Facebook group, your group administrator must add Webcaster X2 as an app to the group before you can live stream to that group using Webcaster X2, see the Facebook online documentation for details.
The following input and output ports are available on Webcaster X2. For more information about the available input and output ports, see the Webcaster X2 overview.
TIP: Check out our forum for interesting discussions about accessories for Webcaster X2, like video switchers and a compatible cameras list.
Webcaster X2 accepts HDMI input from 720p30 (or 60 fps) and 1080p30 (or 60 fps) sources. Interlaced video signals and PAL are not supported.
Webcaster X2 can output up to 1080p (1920×1080) at 30 fps with bit rates of up to 8 Mb/s.
Just about any camera that outputs a live HDMI signal at 720p30 (or 60 fps) and 1080p30 (or 60 fps) will work with Webcaster X2. However, not all cameras send a clean HDMI output without all the overlay icons on the live signal. And not all cameras send audio on the live HDMI output. Check your camera’s specifications or see if your camera is on our list of the cameras we know about on our forum. Interlaced video signals and PAL are not supported.
To use a USB webcam with Webcaster X2, you can enable the beta USB camera feature. This feature is beta and is still in testing, so we cannot guarantee success when using a USB camera. Some USB web cameras work better than others with Webcaster X2. You can learn how to enable the beta USB camera feature in the online user guide.
We’d be happy to hear about which USB cameras you’ve found that work or don’t work with Webcaster X2. You can email info@epiphan.com with the camera model(s) and your results, or visit our forum.
The HDMI port on most laptops are HDMI output ports, which can only be used as a video source. Make sure that you’ve connected the HDMI output port from your laptop to the HDMI IN port on Webcaster X2. To monitor the live stream and see the configuration menu, connect an external monitor to Webcaster X2’s HDMI OUT port.
Yes, as long as the wireless device uses RF (radio frequency) and comes with it’s own dongle receiver that you plug in to the USB port. Webcaster X2 does not support Bluetooth devices.
You can connect Webcaster X2 to your network by wired Ethernet of Wi-Fi. For details on how to configure your Wi-Fi settings, see the Webcaster X2 online user guide.
TIP: Ensure your network has enough bandwidth for live streaming and has Internet access to the platform you will be streaming to (i.e. YouTube, Facebook, etc.).
Webcaster X2 supports audio over its HDMI IN port. For example, you can connect any wired or wireless mic to your camera to get professional HDMI audio along with your video.
TIP: If you enable the Use USB audio source (beta) option in the Preferences, you can connect a plug-and-play USB microphone that is a UAC device (i.e. it doesn’t require you to install drivers). If you’ve already enabled the USB camera feature, you can enable the USB audio source option to use the audio from the connected USB camera instead of the audio from the HDMI source.
The USB audio feature is beta and is still in testing, so we cannot guarantee success when using a USB microphone. Some USB microphones work better than others with Webcaster X2. You can learn how to enable the beta USB camera feature in the online user guide and watch this Live @ Epiphan episode about using USB audio with Webcaster X2.
Webcaster X2 can stream to:
No. Webcaster X2 streams to one platform at a time.
You can use Webcaster X2 to stream to Switchboard Cloud, which is a paid restreaming service that enables you to stream to multiple destinations at the same time.
You can start and stop your stream by pressing the multi-function button on the side of the Webcaster X2 device. If using an external display, you can also end your stream by clicking the ‘Start’ or “Stop” button in the Webcaster X2 interface.
TIP: To stream, Webcaster must be paired with a streaming platform (i.e. YouTube, Facebook, Twitter, Switchboard Cloud, etc.) and connected to a network that has access to that platform over the Internet.
Facebook made changes to it’s security policies that no longer allow devices like Webcaster X2 to stream live to Facebook events. As such, Webcaster X2 firmware update 2.16 and later no longer include that function. You can still live stream to your Facebook timelines, groups and pages, see Stream to Facebook Live.
Yes. The group administrator must add Webcaster X2 as an app to the group before you can live stream to that group using Webcaster X2. You’ll find the Facebook instructions documented here.
You can change the title, description and other metadata under Webcaster X2’s Preferences when an external monitor and mouse are connected to your Webcaster X2.
You can configure your Webcaster X2 through the device interface by connecting an external display and mouse. See the online user guide for more information on configuring your device.
Yes – when a live stream is ended, YouTube and Facebook automatically save video to your account. Note: On Facebook, streams set to continuous are not saved when the stream ends.
By default, Webcaster X2 posts to your Timeline, but can be configured to post to a Page or Group.
Yes! You can easily unpair Webcaster X2 from your account, then your friend only needs to enter the device code shown on the LCD into their Facebook and YouTube account and the device will now be paired to their account.
Yes. You can configure your stream for a YouTube Live Event using the Webcaster X2 interface on an external display. See How to live stream to a YouTube Live Event for more information.
For Facebook and YouTube, you can use Webcaster X2’s user interface to configure the privacy of the video you stream to your social media account. The stream’s privacy setting affects who is notified of your live stream, as well as who can see it. You can also change the stream’s privacy setting directly from your Facebook or YouTube account once your stream is live. For more information, see Set Stream Privacy for YouTube and Facebook.
For streaming platforms like Switchboard Cloud, Blue Frame, BabyFlix and other third party applications that integrate with Webcaster X2, check out the documentation accompanying those platforms for details.
Webcaster X2 imposes no limits on the length of your live video stream. However Facebook Live only supports streams up to 4 hours in length, unless they are configured as a continuous live stream. See the Webcaster X2 user guide for more information on continuous live streams.
Webcaster X2 stays paired to your account on YouTube, Facebook, Twitch, or any other supported third party platform only as long as you want. You can unpair Webcaster X2 from one account and pair to another account at anytime. You can even configure Webcaster X2 to unpair automatically when you turn off the device.
TIP: To quickly start your stream, pair your Webcaster X2 in advance of your live stream. You can even turn it off! Webcaster X2 stays paired. When you’re ready, turn WebcasterX2 on and start streaming with a single press of the multi-function power button. You can even take Webcaster X2 to a different location and start streaming from there!
Webcaster X2 is a fully secure social media streaming solution. To pair the device with your account you need a unique randomly-generated code which gives the device limited access to your account.
Webcaster X2 will have occasional firmware updates. Customers who have registered their device will be notified via e-mail of new firmware upgrades that include major feature updates. The product registration page can be found here.

Connect to the Internet [Webcaster]
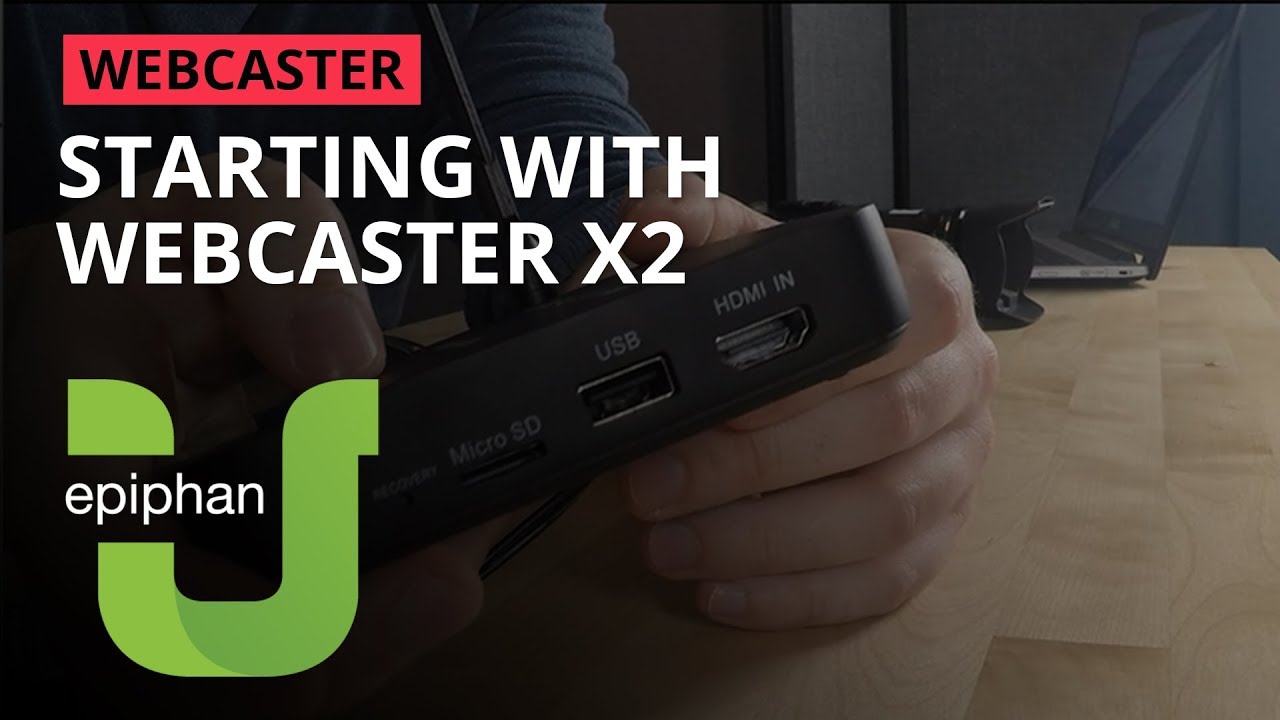
Starting with Webcaster X2 [Webcaster]
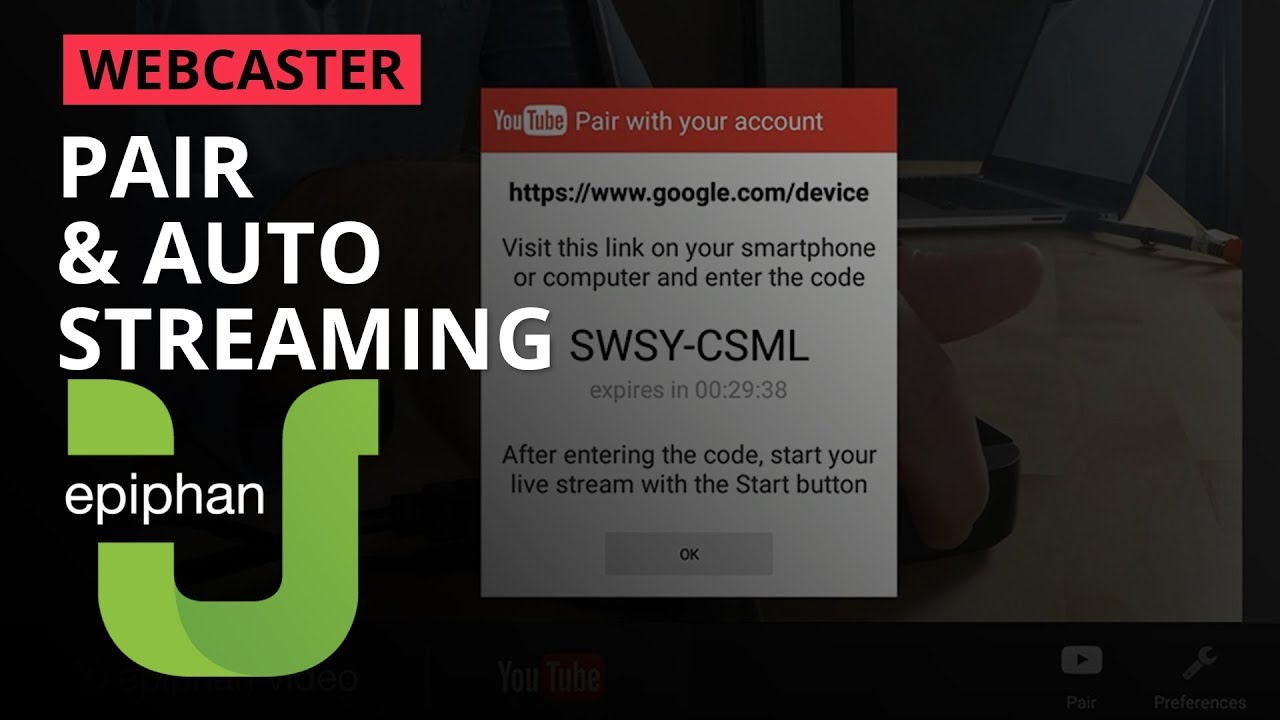
Pair Webcaster X2 & auto streaming [Webcaster]
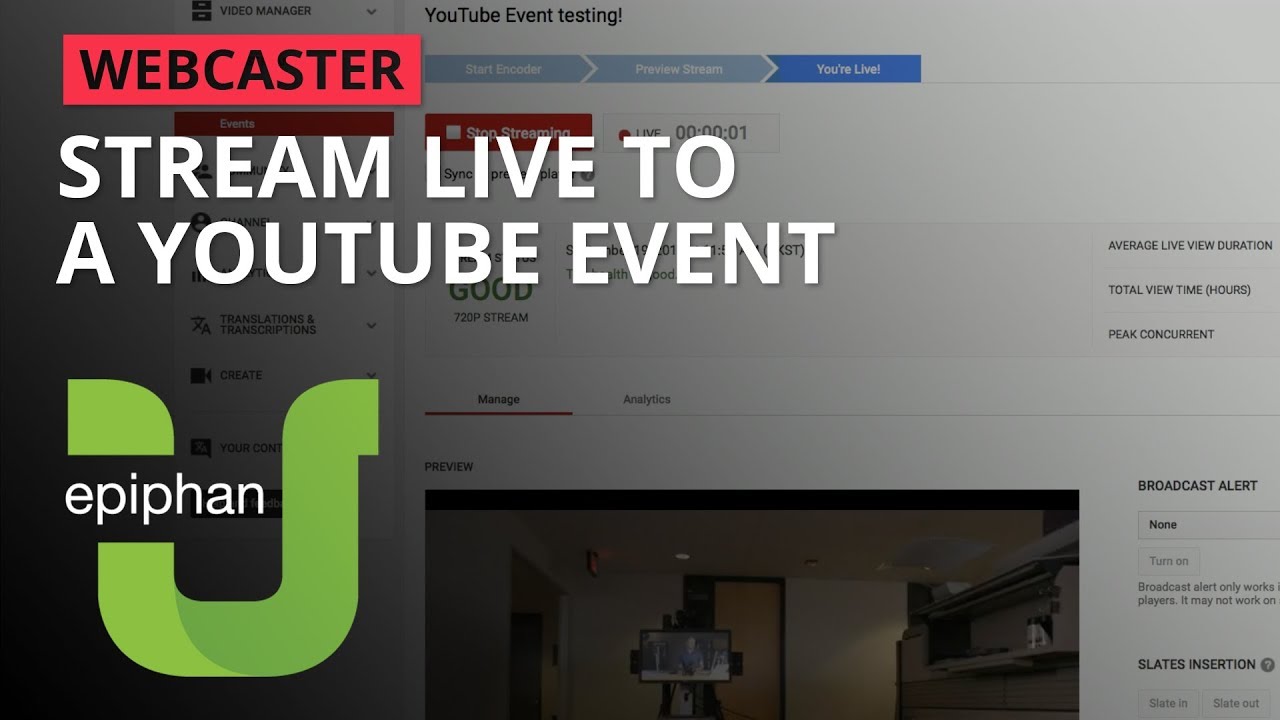
Stream Live to a YouTube event [Webcaster]
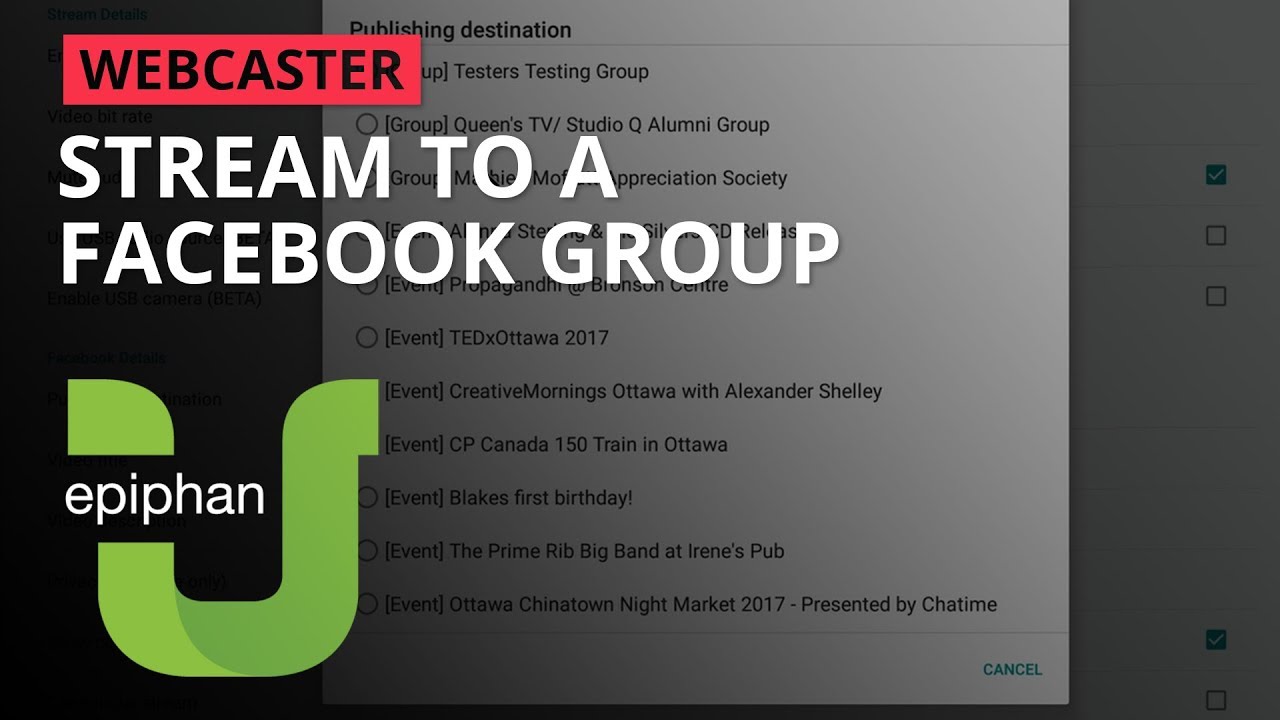
Stream to a Facebook group [Webcaster]
Stream to Twitch [Webcaster X2]
Monitor viewer comments [Webcaster]
Keyboard shortcuts and USB webcams [Webcaster X2]

Protect your investment. Access service and support from the team that designs and builds the products.

Register your product to activate your warranty and access free, personalized customer support.

Submit an RMA for purchases from Epiphan. For others, contact your authorized dealer.