If you need to capture and broadcast a stream from a VGA, DVI or HDMI™ (non HDCP) video source using a Mac OS X machine, QuickTime Broadcaster is an easy to use and free software utility that allows you to do just that. All Epiphan Systems’ video grabbers support this software as well as all other software packages that accept high-resolution external cameras as a capture source.
In this tutorial, we will be setting up a LAN Unicast – a broadcast to one person on the same local area network as the machine running QuickTime Broadcaster.
Step 1: Connect your DVI2USB 3.0 device (or other Epiphan video grabber) to your Mac via the included USB 3.0 cable and start QuickTime Broadcaster.
Step 2: Configure QuickTime Broadcaster
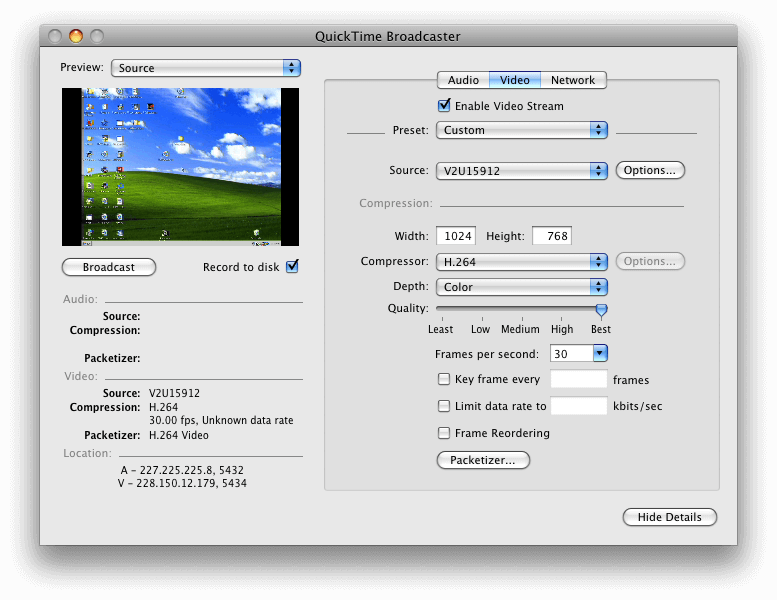
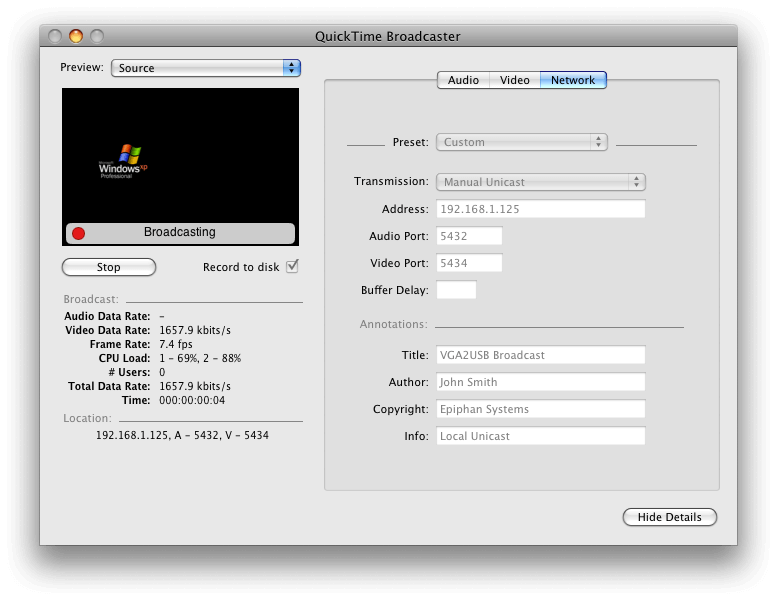
- In the “Video” tab, make sure that the “Enable Video Stream” checkmark is chosen. If you would like to record your broadcast to the local hard drive, select “Record to disk” under the preview window. You may also specify the quality, compression codec, and frames per second for your stream.
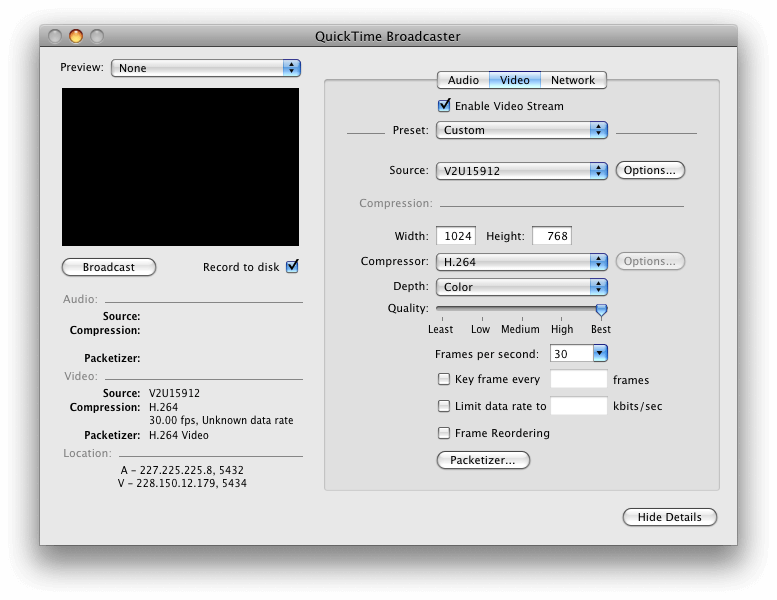
- Under the “Source” drop-down list, select the DVI2USB 3.0 (or other video grabber). If a device with this name or a similar one does not appear in the drop-down list, you may need to reinstall drivers and reboot your computer.

- Choose “Source” from the Preview drop-down list in the top left corner of the window. The preview of the DVI2USB 3.0 output appears.
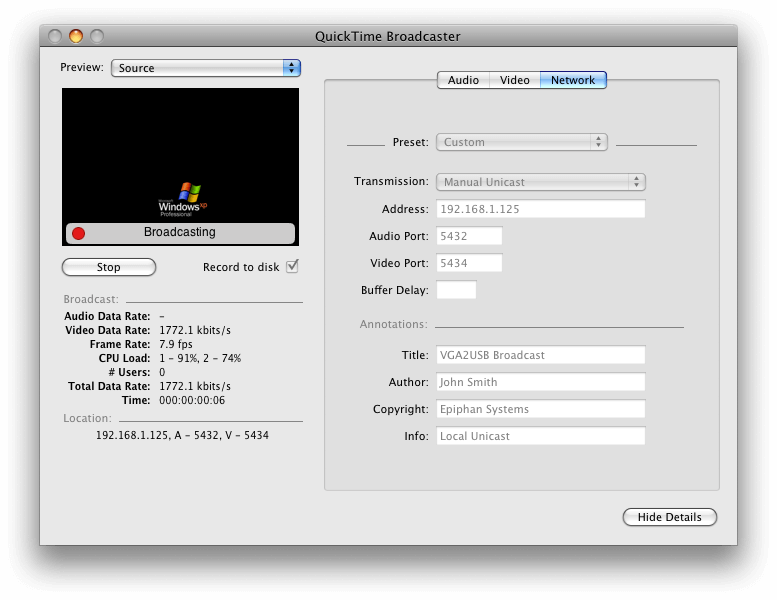
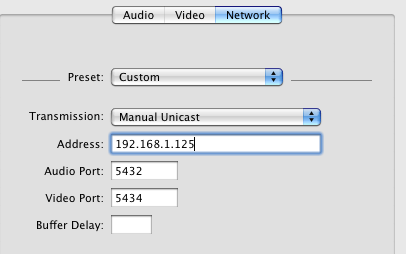
- Now navigate to the “Network” tab. For the purpose of this tutorial, we will be doing a manual unicast to one person on the network. Select “Manual Unicast” from the “Transmission” list. In the “Address” field, the default IP address is automatically set to that of your computer. You must replace it with the IP address of the computer that will be viewing your unicast. Unless you have specific requirements for the audio and video ports, you may leave these values at their default settings.
- Under the “Annotations” section, enter the description of the broadcast that you would like your viewer to see.

Step 3: Broadcast
You are now ready to broadcast the content captured by your DVI2USB 3.0 device.
- Click on “Broadcast” in the left side of the window. The text “Broadcasting” appears in the preview window.
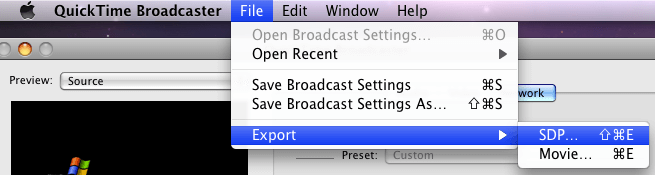
- The viewing computer will need the SDP file for your broadcast. Select “File > Export > SDP…” to generate the SDP file.
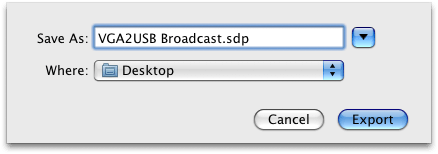
- Select a name and location for the SDP file. Remember that the SDP file must be given to your viewer in order for them to be able to view your unicast. With this in mind, you may want to save it directly to a flash drive or other external media. Alternatively, you may e-mail it to them or share it with them over your network.
- Provide the SDP file to your viewer (who needs to be on a computer with the IP address in earlier steps, if you followed that part of the tutorial). The viewer opens the SDP file with QuickTime Player (Windows or Mac) and instantly is able to view your unicast.You have now completed a broadcast from your DVI2USB 3.0 device using QuickTime Broadcaster! Click on “Stop” on the left side of the Broadcaster window to finish your broadcast.