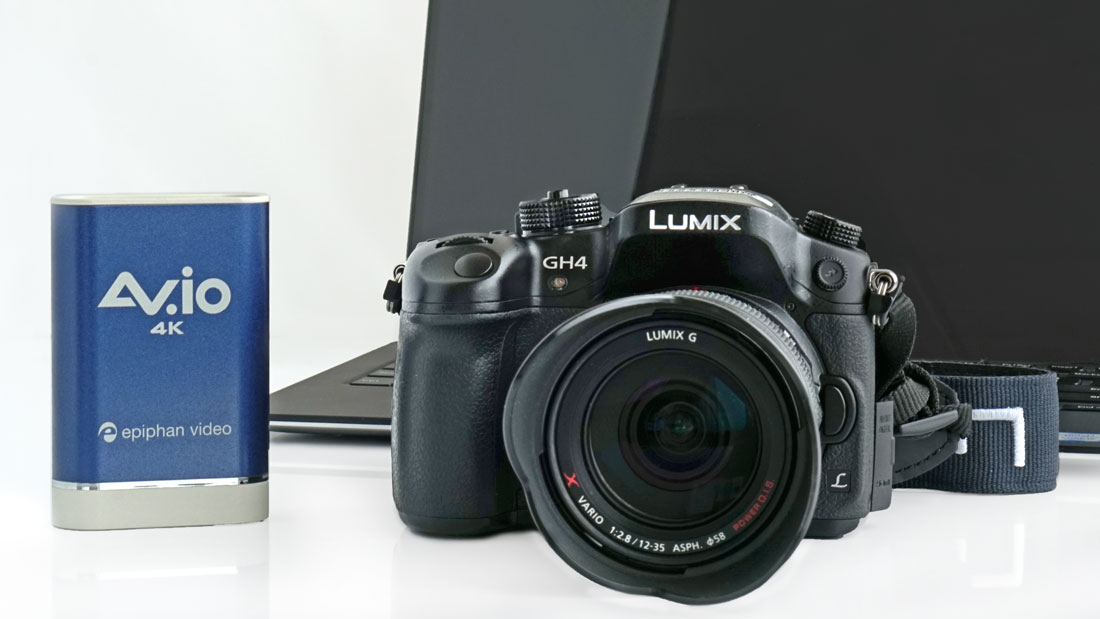
If you’re using Pearl-2 or AV.io 4K with your Panasonic GH4 camera, chances are you’re trying to capture and encode 4K video.
According to Panasonic’s user guide, the Panasonic GH4 Lumix camera only supports 4K video in Creative Video Mode and when one of it’s 4K video quality settings is configured.
Use these quick instructions to configure your GH4 for 4K UHD or 4K DCI (Panasonic calls this C4K or Cinema 4K) and get ready to capture in 4K!
The Panasonic GH4 camera supports two different 4K frame sizes and a number of frame rates. The choices available depend on your camera’s system frequency setting. Check the table below to see which system frequency is needed for your chosen frame size and frame rate.
| Frame size | Frame rate(s) | System frequency |
|---|---|---|
| 4K UHD (3840×2160) | 30 fps, 24 fps | NTSC |
| 4K UHD (3840×2160) | 25 fps | PAL |
| 4K DCI / C4K (4096×2160) | 24 fps | CINEMA |
The first step in configuring your camera for one of these video options is to set the appropriate system frequency.
- Turn the camera on.
- Press the MENU/SET button on the back of the camera.
- Select the Settings menu (wrench icon) from the on-screen display.
- Select System Frequency.
- Choose the system frequency needed for the frame size and frame rate you want (consult the table above).
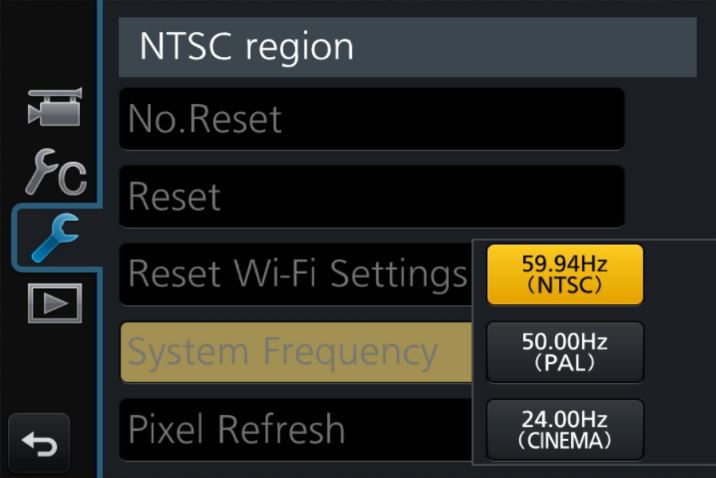
- If requested by the camera, turn the camera off and on again to apply your change.
The Panasonic GH4 only supports 4K resolutions when the mode dial is in the creative video mode position.
- Turn the dial mode to the movie camera icon to enable creative video mode.
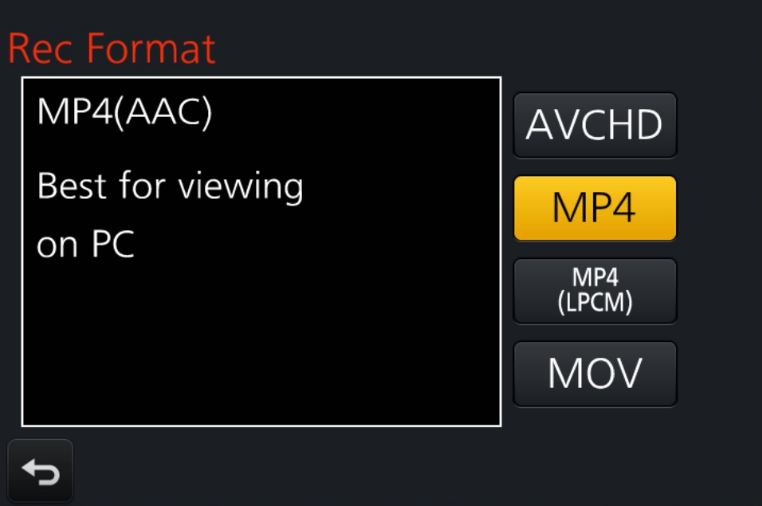
Regardless of whether you want to record your video locally to the camera, the Panasonic GH4 camera must be set to use a 4K-capable recording format before it lets you choose a 4K frame size. Your options are:
- MP4 (Note: not available when camera is in CINEMA 24.00 Hz mode)
- MP4 (LPCM)
- MOV
Configure your chosen recording format.
- Turn the camera on.
- Press the MENU/SET button on the back of the camera.
- Select the Movie tab from the on-screen display.
- From the first page of settings, select Rec Format.
- Choose your desired recording format.
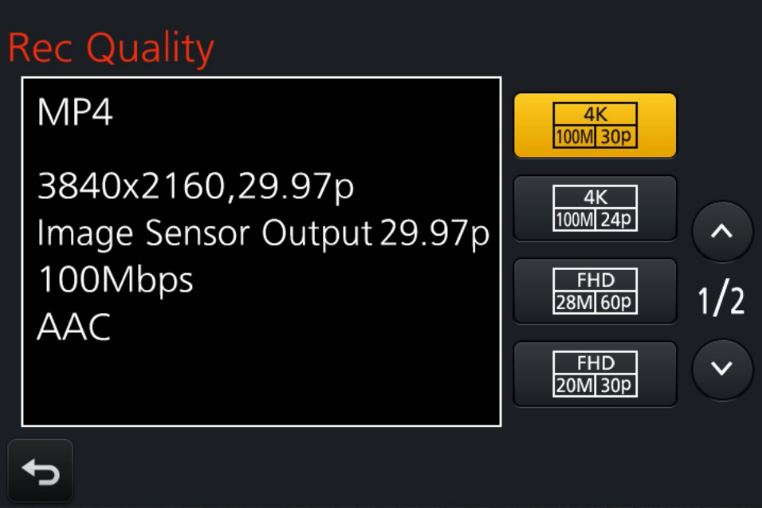
Now that the camera is configured correctly for allowing 4K modes, you can configure the mode you’d like for video capture.
- Turn the camera on.
- Press the MENU/SET button on the back of the camera.
- Select the Movie tab from the on-screen display.
- From the first page of settings, select Rec Quality.
- Choose your desired 4K frame size and frame rate pair. The 4K options are at the top of the list.
The Result
Your Panasonic GH4 camera is now configured to output 4K video (either 4K UHD or 4K DCI/C4K). Connect your HDMI cable from the camera to your AV.io 4K or to your Pearl-2 and you’re ready to start 4K video capture!
For help configuring OBS to capture from AV.io 4K, read this How To article.