
This article provides a complete walk-through of the process, showing how to integrate and stream multiple sources easily! It shows how to capture SDI, DVI, USB, VGA, AV.io capture card, or HDMI™ video sources, and use Pearl-2 to stream multiple sources to a single display simultaneously.
What you need
To live stream and record a multi-source video you need the following:
- Pearl-2
- Two or more video sources to capture (SDI, USB, AV.io capture card or HDMI)
- LAN or Network for administration
- A computer or laptop on the same network as Pearl-2
Step 1: Switch on and connect hardware
You’ll first need to connect your sources to your Pearl or Pearl-2.
-
- Turn on your source and your Pearl system.
- Use your cables to connect your SDI, DVI, USB, VGA, AV.io capture card, or HDMI output from your source to the appropriate input on your system.
- Connect to the Pearl-2 Admin panel using your preferred connection mechanism and log on as admin.
Step 2: Create a channel and add your sources
To use Pearl-2 to the best of its potential, you need to set up a channel and a layout for your sources.
-
- In the Admin Panel, click Add channel to create a new channel. In the Sources section, select Add new layout.
- Click Add new item to add a source to your layout. Use the drop-down menu to insert Text, an Image or a Video source. Select Video Source from the drop down, and the Source settings box appears on the right side of the page.
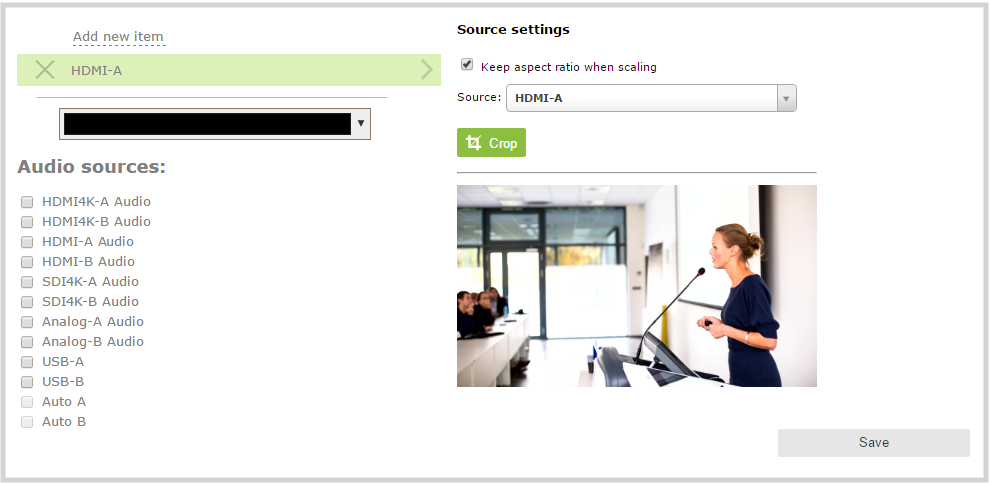
- Click the Source drop down and select a video source from a list of all sources connected to Pearl-2. The video source appears in the visual layout editor. Repeat steps above to add as many video sources as needed.

- Make any additional changes to the layout using the visual editing features found in the user guide.
- Use the Add new layout button to create as many different layouts as you wish. Use the Admin Panel or Pearl-2 touchscreen to live switch between them during the show.
Step 3: Edit the layout
When all sources have been added to the layout, you can use the layout editing tools to ensure they look the way you want.
-
-
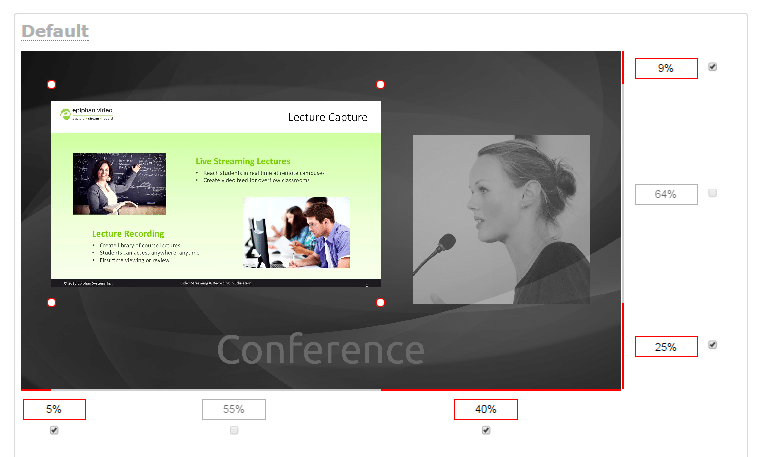
In the layout area, use the mouse, the keyboard shortcuts, or the manual position value fields to position and resize your sources. You can click and drag, stretch using the handles in the layout area, or type values into the fields. For more details on how to use these features, see the user guide.
- If needed, re-order the items in your layout by clicking and dragging items in the item list (under the Add new item link). For example, if you added your video source over a text overlay, the video source could conceal the overlay. To fix it, drag the video source item below the text item in the list, or vice-versa.
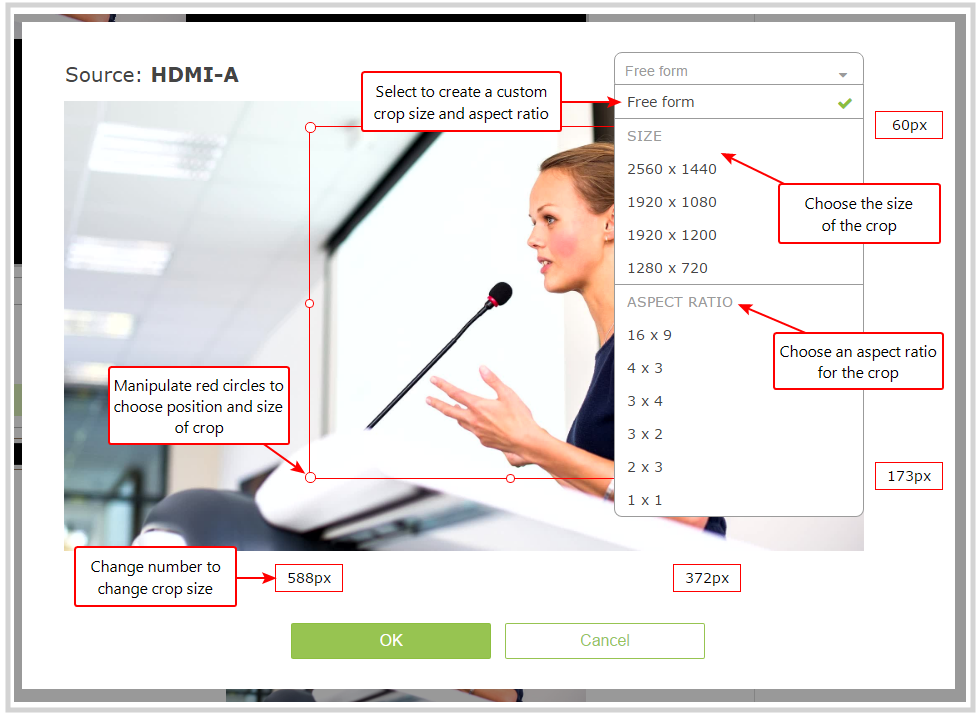
- Crop sources as needed by selecting Crop from the Source settings box and using the pop-up box tools described in the user guide.
- Use all of these tools to design your layout to show all your sources in a dynamic and interesting presentation!
-
When your layout is complete, scroll to the bottom of the page and click Save to save your work.
-
Step 4: Start recording
In addition to live streaming your video, you are able to simultaneously record your video. To start and stop channel recording:
-
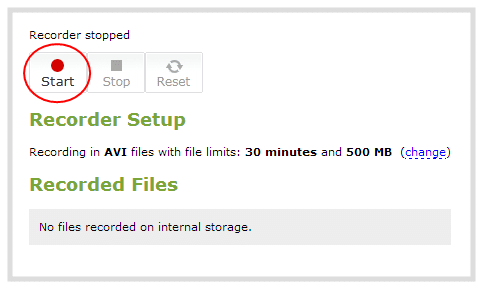
- Go to your channel’s Recording page.
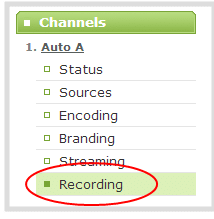
- To start recording, click the Start button; the recording starts and a timer indicates how long it has been recording.
-
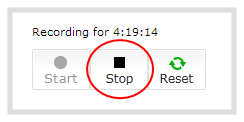
Pearl-2 continues to record this channel (and any concurrent recordings) until it is stopped, even if you browse away from the recording page.
- To stop recording, go back to the recording page and click the Stop button, or use the Pearl-2 touch screen.
- View your recording in the Recording section at any time.
- Go to your channel’s Recording page.
Step 5: Start broadcasting!
Configure Pearl-2 to publish to whichever Content Delivery Networks (CDNs) you choose.
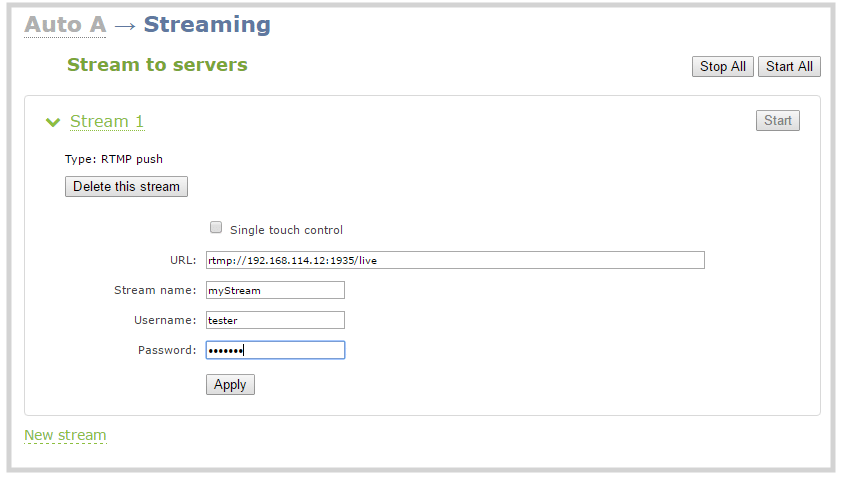
- Click your channel’s Streaming link to open the Stream to servers page.
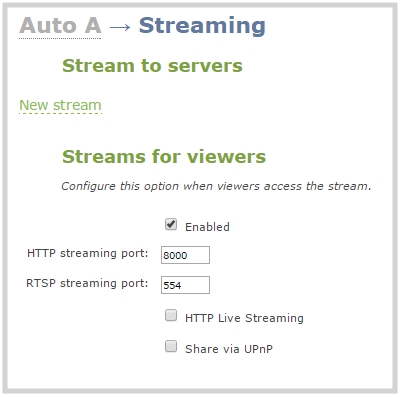
- Click on New Stream to open a drop-down list and select the streaming method required by your CDN.
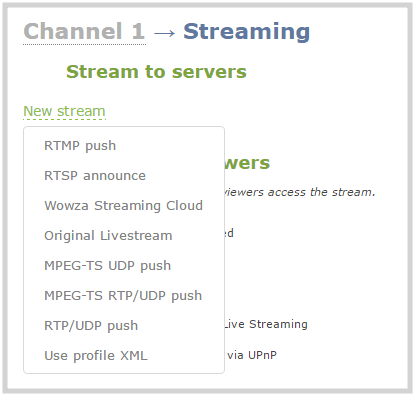
-
After selecting a streaming method, prepare it to publish live online by entering all required information. For example, the RTMP push option requires you to write in a Server URL and Stream Key acquired from the CDN. Click Apply when finished.
- When all the information is entered, you may repeat steps B and C for any number of streams that your network is able to handle.
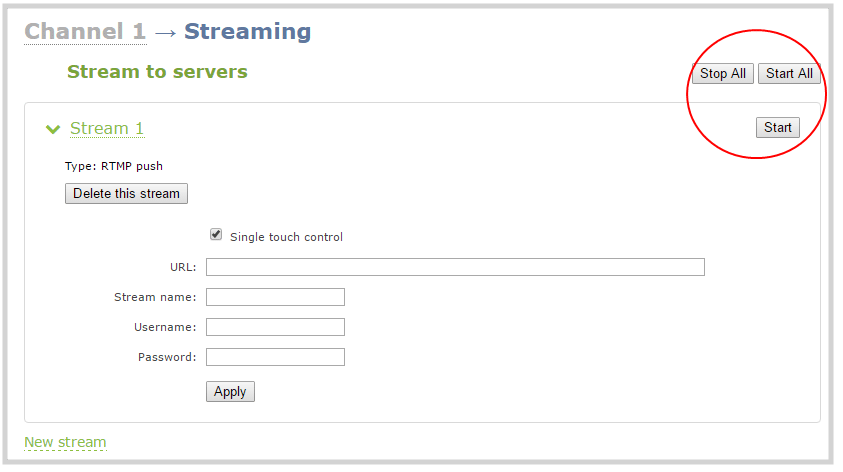
- To begin broadcasting to your CDNs, you may either click Start on a particular Stream to start only that stream, or Start all to begin all streams simultaneously. Pearl-2 starts broadcasting the selected streams to their respective CDNs.
- Go to each CDN Pearl-2 is broadcasting to, and Go live by activating the stream on that site.
- To stop the stream, end the event on the CDN and then go to the Admin Panel and use the individual Stop buttons or Stop all button to stop the streams.
The result
With this process, you can stream multiple sources quickly and easily! The multiple input ports on the back of Pearl-2 lets you insert lots of different video sources into your stream, and its ability to use RTSP streams as well means that you can use as many sources as your network can handle. Inserting all these sources into your stream makes your video more dynamic and engaging, as well as giving you the opportunity to have multiple different layouts. With Pearl-2 giving you the ability to integrate all of your sources together, and then simultaneously record your ISOs and the final video while streaming live to a wide variety of CDNs, it has never been easier to stream multiple sources and make it look great!