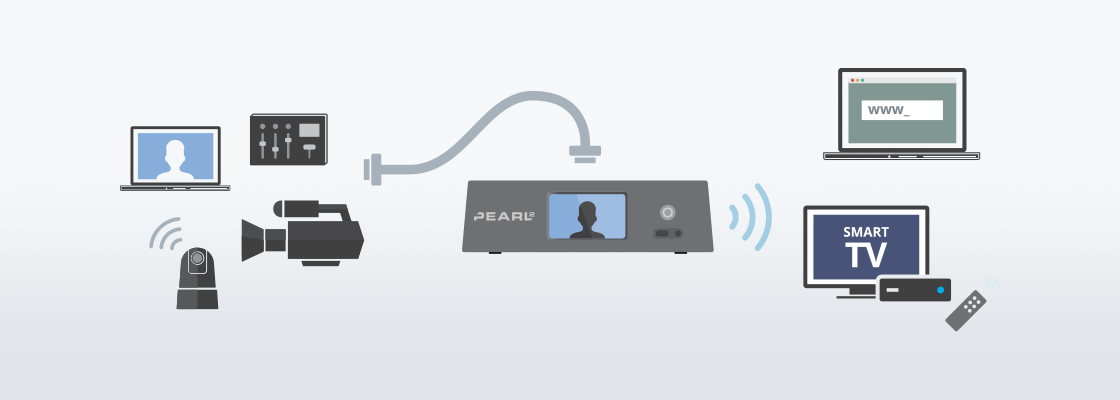
Do you have an HDMI, DVI, or VGA device you wish you could share with others over your internal network (Ethernet) or over the Internet? This tutorial helps you do just that. As long as your viewer has access to the URL for the video stream, they can view it from anywhere using a browser, media player, smart TV, or set-top box.
Epiphan Video has solutions for sharing nearly any type of video. We have everything from portable capture cards you can use with a workstation or laptop to dedicated video encoders (including HDMI encoders and DVI encoders) that do the capture and streaming for you.
For this tutorial, we use Epiphan’s latest integrated all-in-one video production system, Pearl-2. You can also follow the same instructions with Pearl. Many of our other products, including VGADVI Broadcaster, Lecture Recorder X2, or VGADVI Recorder, share very similar steps. If you want to stream a single video source directly to Facebook or YouTube, take a look at Webcaster X2. Regardless of which Epiphan product you use, live video streaming over your network is easy!

What you need
To stream your video source over the network, you need:
- Your HDMI, DVI, SDI, or VGA source(s)
- Your video encoder – Epiphan Pearl or Pearl-2 (for VGA, use Pearl, or connect an AV.io HD to Pearl-2)
- Access to a hard-wired Ethernet connection
- A computer on the same network (for admin and setup of Pearl-2)
- A computer, set-top box, or smart TV to watch your live stream (must also be on the same network or have access to Pearl-2 through your network)
This tutorial uses a Pearl-2 system and with two HDMI sources and shows options for streaming live to media players, browsers, smart TVs and set-top boxes. Let’s get things started by connecting cables and turning on Pearl-2.
- Connect the power supply cable to Pearl-2.
- Connect the Ethernet cable to Pearl-2.
- Connect an HDMI video source to the HDMI port labeled A.
- If you have another video source, connect it to HDMI B.
- Turn on Pearl-2 by pressing the power button on the front of the system.
Pearl-2 is configured using the Admin panel, a web interface hosted by the device. To connect, you need a web browser on a computer connected to the same network as Pearl-2.
(missing internal accordion feature)
When you have the system’s IP address :
- Using a web browser on your admin computer, go the the url http://<Pearl-2 ip address>/admin (replace <Pearl-2 ip address> with your system’s IP address).
E.g. http://192.168.1.113/admin
- Login using the username admin and your admin password (by default there is no admin password set and you can leave this blank if you haven’t set one).
Pearl-2 automatically makes a channel for each video source. If you’re following this tutorial and have an HDMI camera or other device connected to each of HDMI A and HDMI B, you already have two channels ready to live stream. If you want, you can edit either of these channels or create a new channel to add picture in picture options.
We’ll show you how to make a third channel with three quick layouts that make use of both of your HDMI inputs.
- In Pearl-2’s Admin panel, click Add channel; the Sources page opens with a default layout created.

- Create your first layout for HDMI-A only:
- Under the preview of your Default layout, select Add new item, then Video source from the drop down box.
- Select HDMI-A; your HDMI A video source is added to your layout.
- In the layout preview area, resize HDMI-A to fill the full screen size.
- Click Save to save your new layout.
- Create your second layout for HDMI-B only:
- Click Add new layout at the top of the page; a new layout is added.
- Under the preview of this layout, select Add new item, then Video source from the drop down box.
- Select HDMI-B; your HDMI A video source is added to your layout.
- In the layout preview area, resize HDMI-B to fill the full screen size.
- Click Save to save your new layout.
- Create your third layout for picture in picture:
- Click Add new layout at the top of the page; a new layout is added.
- Under the preview of your Default layout, select Add new item, then Video source from the drop down box.
- Select HDMI-A; your HDMI A video source is added to your layout.
- Add a second source by selecting Add new item again and follow the same steps to add HDMI-B to your layout.
- In the layout preview area, click, drag, and resize your sources so they make a pleasing picture in picture layout.
- Click Save to save your new layout.
You’re now ready with your three layouts. One for each source (full screen) and one picture in picture that contains both your sources.
For local network-based streaming to browsers and most media players, there’s nothing more to do except share the live stream link.
- In Pearl-2’s Admin panel, click the Status link for the channel you want to share (following our example, choose Channel 3).
- Your channel’s status appears, including a number of shareable web links.
- For watching in a web browser, copy and share the Live broadcast link with your viewers.
- For watching in a media player, copy and share the RTSP link with your viewers.
- You’re streaming live! Use Pearl-2’s touch screen, Admin panel, or Epiphan Live to switch layouts as needed during the stream.
To stream to a Smart TV using UPnP, follow these easy steps to enable UPnP and configure it for your channel. You can then browse your local network with your Smart TV or set-top box and find the live stream!
