Maximizing layout space with HD sources
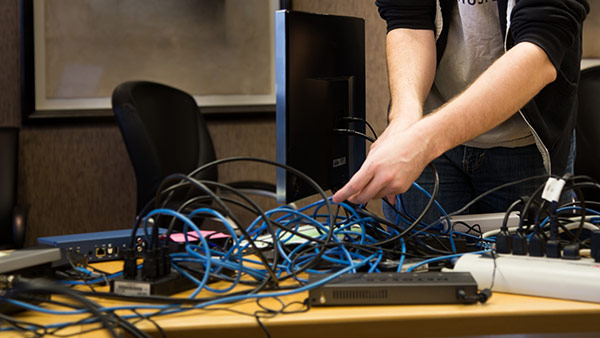
Anyone who has tried to record or stream a live event knows the struggle. You have to set up the audio, the video, the mixer, the encoder, the streaming connection, the camera angles, the display layouts and the source settings, all before you can even start the event. It’s usually a bit of a mess.
The difficulties are common, which is why we’ve put together a list of five tips to ensure that setting up for streaming and recording a live video event goes as smoothly and as quickly as possible. Whether you’re at a busy music festival or a quiet and professional business conference, there are some preparations you can make that will improve your setup time and limit those all-too-common delays caused by “technical difficulties”.
Making the most of your space
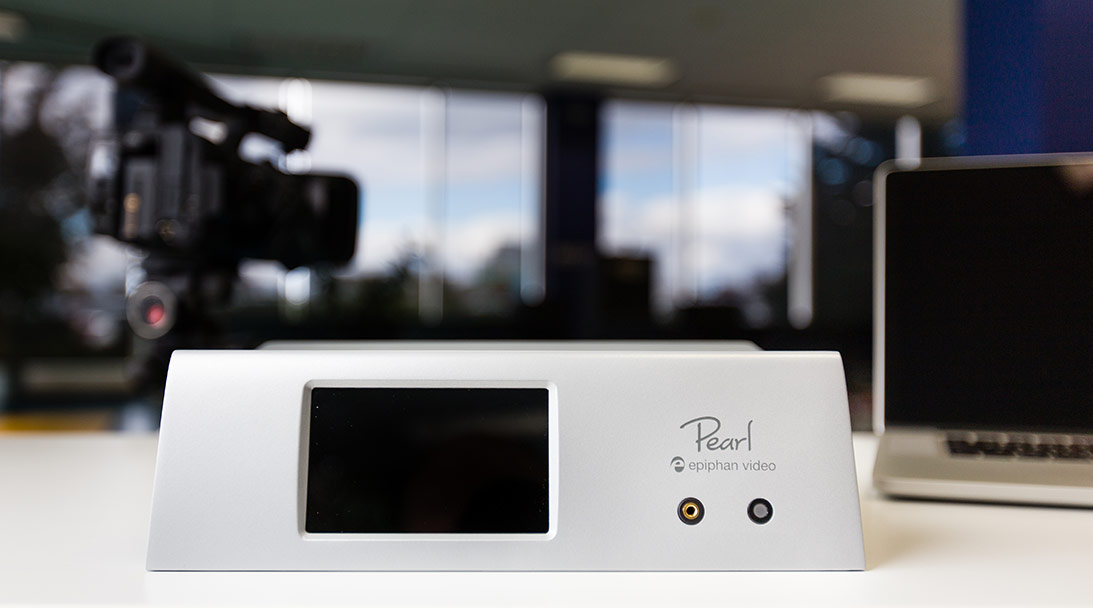
If you can, scout the event location before the event and figure out what equipment you need. Will your power lines reach the outlets? Do you have the right camera tripod for the angle you want? Is the area dark enough that you need a lamp or flashlight? Customizing your equipment kit sometimes means filling up your bag with unusual items, and sometimes it means bringing less to fit into a small setup area. In either case, having a compact multi-purpose system like Pearl helps you fit into the space quickly and ensure that you can make the location work for you. Preparing the right kit for the location means that nothing slows you down on the day of the event.
In addition to my Pearl, video cameras, tripods, cables, etc., here is a list of a few things you’ll always find in my live streaming kit:
- Small, hands-free flashlight
- Spring clips or clamps
- Residue-free tape (like gaffer tape or blue exterior painter’s tape)
- A note book and pens
- 5 mm to ¼” audio converters
- Cable ties
- Duct tape (of course!)
- An AV.io HD video grabber
- At least two more extension cables than I think I’ll need
- And an equipment checklist to make sure it all comes back with me afterwards.
2. Create stunning live production layouts ahead of time
With a little bit of effort before the show, you can create a set of visually appealing layouts that you can switch between for a dynamic program during the live event. Getting these arrangements done before the event means you don’t have to spend valuable set-up time at the location creating layouts. Check out some tips for doing it right in our recent blog post about improving layout appearance.
I highly recommend you print a sample screen shot or drawing of each layout on a quick reference sheet that includes the layout’s name and description so anyone producing the live event knows which layouts are available to use and has an idea about what to expect in each.
3. Verify your video sources quickly and easily!
Making sure your cameras and sources are properly captured by your encoder is one of the most important parts of setting up a live event. It’s probably the first thing you’ll want to do when you arrive and start setting things up.
There are two important types of encoder layouts you can create to make this easy. The first helps you make certain that all your sources are in the right place as they’re being connected and examined, and the second helps confirm they’re correct just before you go into production.
These layouts should show all of your sources simultaneously and avoid production elements like logos, picture-in-picture or any other creative designs.
For the first one, keep it simple and keep it blank. You don’t want any obstructions at all, you just want all the sources laid out in a matrix. To begin with, before any of your sources are connected, you’ll see a bit of an ugly mess of “no-signal” images.
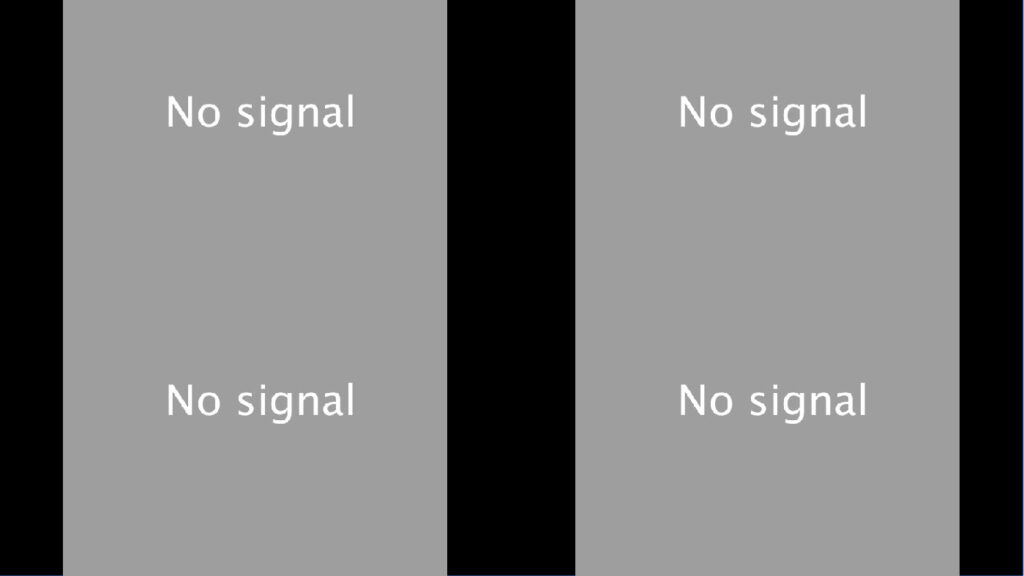
As you start plugging in sources, the no-signal images will disappear and be replaced by the video signal, letting you verify that each is correct.
When all sources are plugged in, this layout allows you to see all of your video sources free of obstruction, and lets you determine at a glance which sources are working well and which ones are giving you problems. Use a large external monitor, attached to your encoder, to verify that each source has the right color, focus and lighting settings. If you want to take this setup a step further, you can create a series of layouts that shows each one of these sources full-screen, so you can examine them one by one.
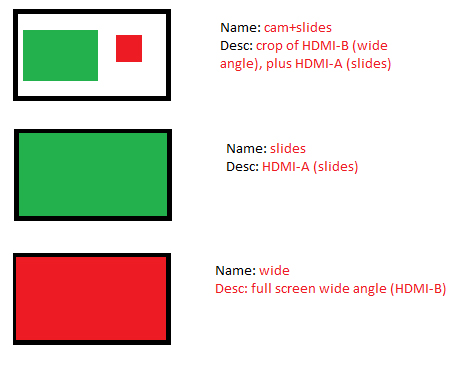
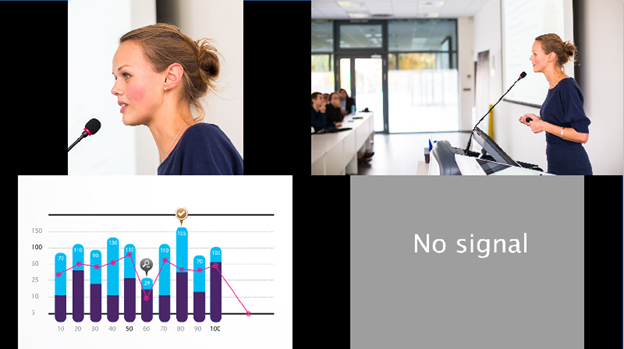
Next, repeat your 4-up matrix layout style, but this time use Pearl’s built-in text overlay feature to add information that describes the expected input type or camera angle for each source.
This way, after everything is plugged in, you can do a quick check to see that the video feeds match what you expect them to be, meaning that you won’t accidentally end up showing the sources in the wrong spot. For example, if you want to have a cropped shot of a presenter with a large display of a slideshow, mixing up those two sources will give you a wide shot and a cropped slideshow.
Both setup layouts help you isolate signal or image quality problems and solve them individually, independent of your production settings.
Find the right layout for your recording
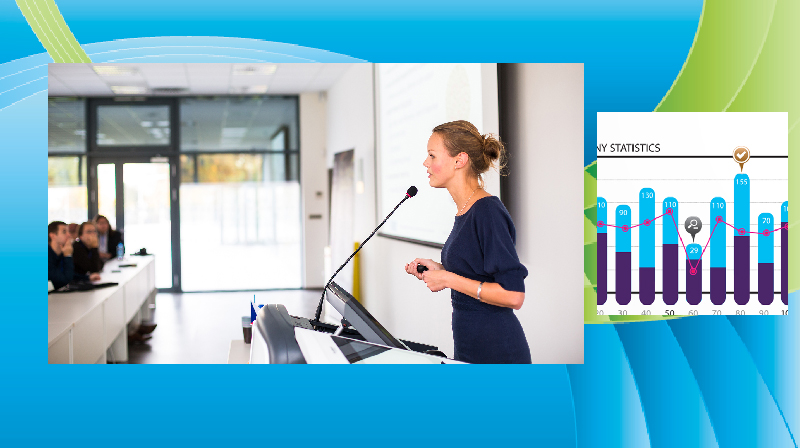
Sometimes, a straight translation of the video source isn’t what you want. By using Pearl and the multisource layout options it gives you, you can not only resize and crop each video until it looks like what you want, but maximize your custom layout space to create a rich and engaging visual display for viewers without any drawbacks.
What sort of layout would you make with these tools?This setting preserves the original proportions of the video source. All you need to do is draw a box around the area you want to show, and then only that part of the video is shown in the layout. After cropping the video of your presenter to a more suitable size, your layout looks like this:
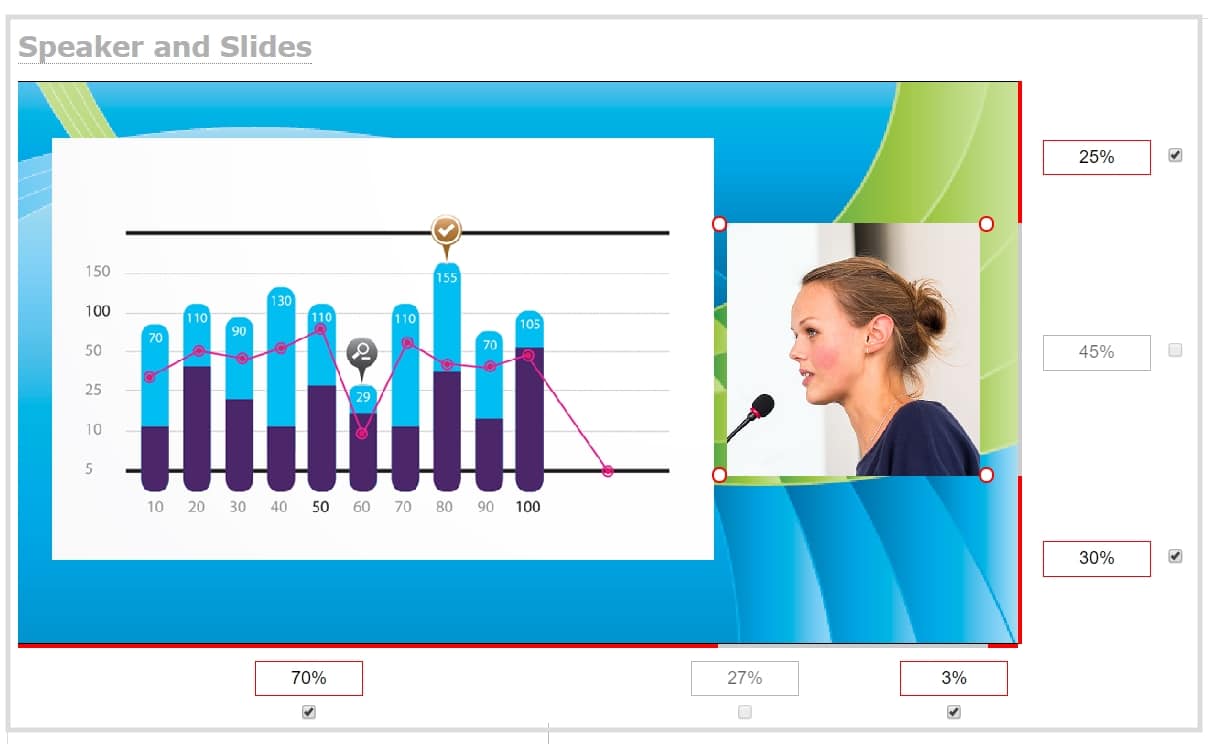
Now both displays are much clearer, and with much less wasted space. You can see the speaker clearly and without distortion.
4. Use custom “no signal” images to make testing even easier!
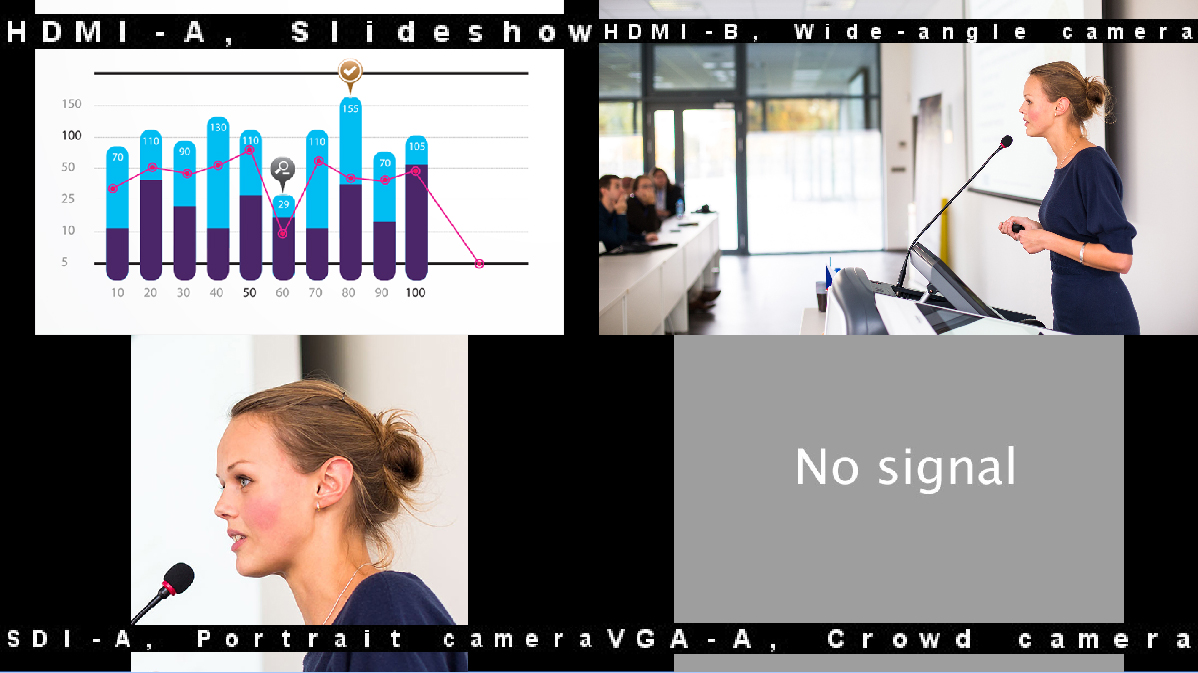
If your encoder supports it, custom no signal images can help make source setup even easier. As you see in the tip above, when you’re using Pearl, the default “video” for each source with no signal is a plain “no-signal” message on a grey background. It can be difficult in this case to determine which no signal image is coming from which source.
Luckily, with Pearl this is easy to fix. Create a unique “no-signal” image for each source, and label it with a note about what type of data you expect to see in a way that uniquely defines the source. Adding information such as “SDI-B Close view camera” or “HDMI-B wide angle camera”, means that you know what each camera or input should show and where it should be connected. This even allows someone else to handle the setup without any confusion, and ensures all those production layouts you created earlier will be perfect (very much like the previous tip that used text overlays to describe each video source.)
Your 4-up matrix from before will now have a whole lot more useful information in it, like this:
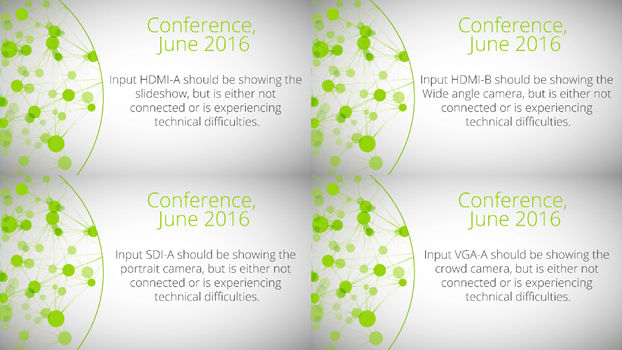 These setup “no-signal” images help you identify the sources as you’re plugging them in – when you plug an input into HDMI-A, does the slideshow appear in your layout where the HDMI-A no signal image was located? If not, you might have the wrong wire or the wrong input slot.
With these two sets of images working as your no-signal feeds, you’ll always be able to identify potential problems quickly.
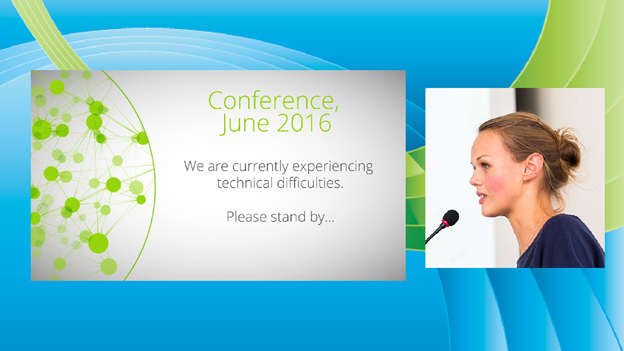
Just between you and me, these no-signal images with technical details are intended to be internal-facing, so it’s a good idea to use a different one for production use. When creating production no-signal images, the key is to make it look good to the viewer, but you won’t need any details about which source is the problem. This way, if a signal gives out during a presentation, you’ll still look good.
5. Use configuration presets
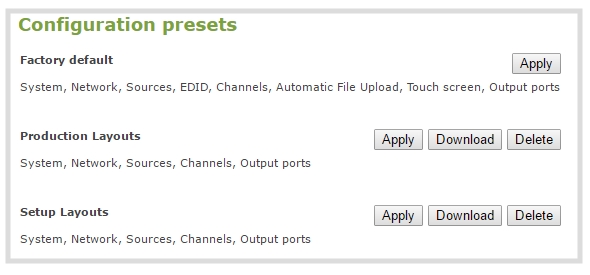
To make all these tips save you time at the show, and to keep pre-show content separate from production content, I suggest you use Pearl’s configuration presets feature.
Configuration presets hold different sets of “tools”: layouts, images, network settings, etc. for your encoder. Configuration presets have many uses, but in this case, they will make sure your Setup environment (including those internal-only no-signal images) never pollute your Production environment.
When you make this distinction, you can create a toolset that will help your setup without worrying about how they might interfere with your final presentation to the audience.
Your setup configuration preset includes the setup layouts and special informational no-signal images, while your production preset has the production layouts and user-facing no-signal images. At the show, start with the setup layout, and when everything is perfect, switch to the production configuration preset with the touch of a finger on Pearl’s touch screen.
6. Bonus tip! Isolate problems quickly with a video grabber
In every live show setup, there is inevitably at least one video source whose signal won’t come through when you plug it in. Determine if the problem lies with the cable or the source itself by testing the connectivity. Use a video grabber like AV.io HD or DVI2USB 3.0 in conjunction with a laptop to check each video source’s signal, and you can isolate difficulties before the setup is even done!
Results
Streaming and recording your live event boosts your message out to a wide audience, but the pre-show preparation is complicated. With these tips, including source testing layouts, well-designed no-signal images and video grabbers acting as a troubleshooting safety net, you’re ready to fix problems in no time at all! You will speed up your setup and avoid some common video production difficulties while ensuring that your live program looks fantastic!
For more on making the most of your setup time, check out our blog post on the best ways to ace live streaming, or sign up for our free guide to streaming tips. You can also keep following our blog posts, and stay tuned for an upcoming article on some ways to improve your pre-show end-to-end testing!
How do you set up for events?

thanks for this wonderful information. This is really helpful for everyone.