The active use of the flipped classroom model is pushing more and more educators toward finding new and more creative ways to deliver study material to students. This includes creating more engaging and high-quality video lectures.
However, teachers don’t always have the knowledge and/or the resources to set up that ideal recording space. They make do with what they have available, using laptop webcams and smartphone mics to record lectures in underlit faculty facilities or even at home. This could mean that even the most outstanding lecture may be overshadowed by poor picture and sound quality of the recorded video.
This may not seem like a big deal, but high-quality video content can help keep students more engaged and interested in the subject. Video lecture material is much easier to grasp if the picture and sound are crisp and clear. Additionally, students build a better connection with a teacher whom they can see and hear clearly. In a study by Ball State University, 78% of students agreed that seeing the professor’s face helped them to better engage with the lectures.
A good video starts with good equipment and setup. A common myth is that setting up a lecture recording studio is very difficult and very expensive. In reality, if you understand the 5 basic steps of studio setup, are willing to experiment, and possess some resourcefulness — creating an excellent lecture recording studio (and lectures!) is actually quite possible.
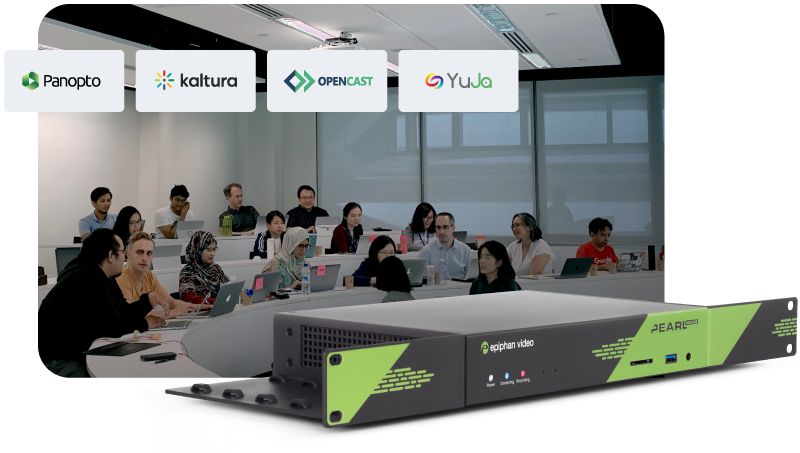
Simplify lecture capture with seamless video solutions
Discover easy-to-use, flexible, and reliable classroom capture. Pearl systems feature seamless integration with video management platforms like Kaltura, Panopto, YuJa, and Opencast.
1) Find the right space
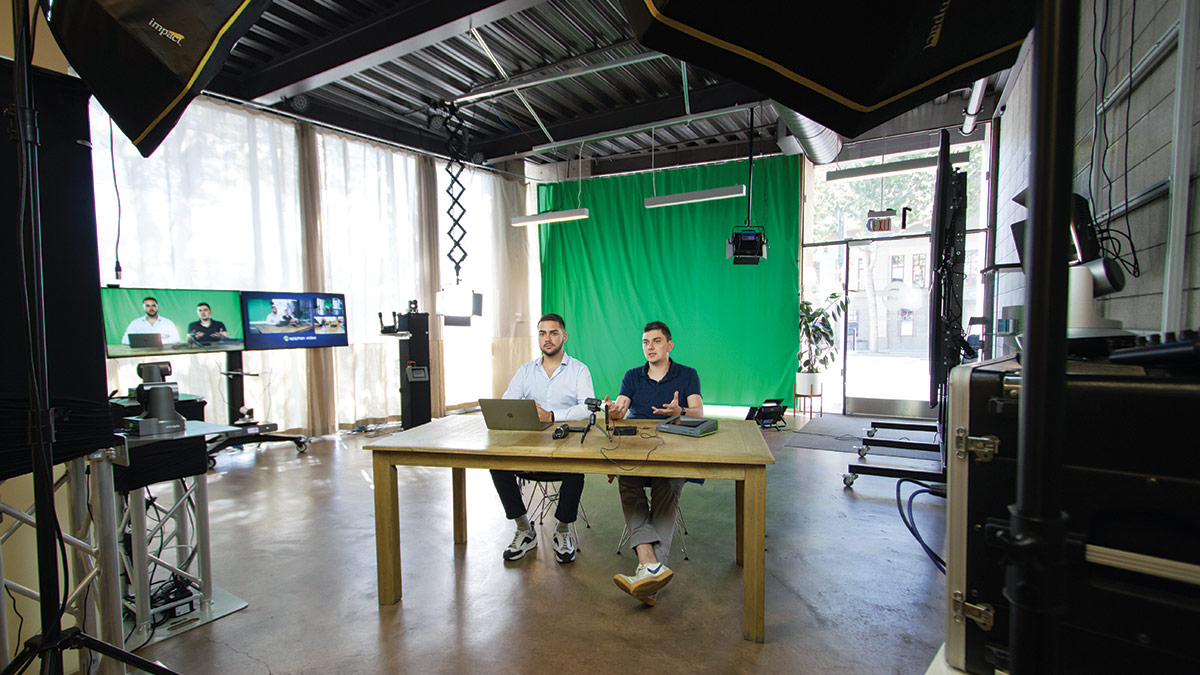
Having a dedicated recording space to record lectures is ideal. This means creating a permanent setup that is always there when you need it. Having a recording studio always ready to go saves a lot of prep time and will help keep you motivated to record. An ad-hoc or mobile-type scenario would work as well, and the general design principles will remain the same.
Look for a quiet room. No extra background noise of people chattering, no coffee maker puffing, no sirens wailing in the background — you do not want these sounds to end up in your video. If you have a faculty office — this could be a good place to start. Try to pick a room enclosed by all four walls, this will give you the best audio and least distractions.
Consider the size of the room. It has to be large enough to allow for at least 3 ft of space between both the camera and you, and you and the background. Shooting very close to a wall isn’t ideal because this can create hard shadows cast by the lector. That beautiful depth-of-field effect always looks great on camera, but you need some space to create it.
Get a sturdy desk to sit behind. Presumably, simultaneously with your narration, you will be going through a presentation on your computer or demonstrating something, so having some horizontal real estate is important. Standing is ok too, if you are comfortable with that. Just remember that your mobility will be limited because of the fixed camera position.
2) Set the stage
After you’ve picked the space, you will need to soundproof it. Turn off all fans, air conditioning, and other electric appliances; all of these can create unpleasant background noise.
Sound bounces off walls, creating echoes. To battle this, fill the room with soft objects, such as blankets and pillows. Hanging up blankets and having carpets on the floor will also help absorb sound waves, creating a better lecture recording environment. If you have a larger budget, consider purchasing acoustic foam (it’s those ribbed wall panels that you might see in audio recording studios).
Think about where your camera is going to be and the framing of the shot. Pick a neat background: something calm, maybe with a pop of color, but not too busy. Clean up the space: remove any distracting items from the background and pay attention to details. Those with a larger budget may consider getting backdrop paper, which makes for a very smooth-looking background (darker tones look better on video).
3) Position the camera
If you are using a computer with a webcam to record your video – the webcam is, of course, fixed atop the computer. If you are using a better camera (like a camcorder or a DSLR camera), then a good place to put it would be on a tripod across from you other other side of the desk. If you will be using a computer to go through and narrate presentation slides – be sure the computer isn’t blocking the camera view.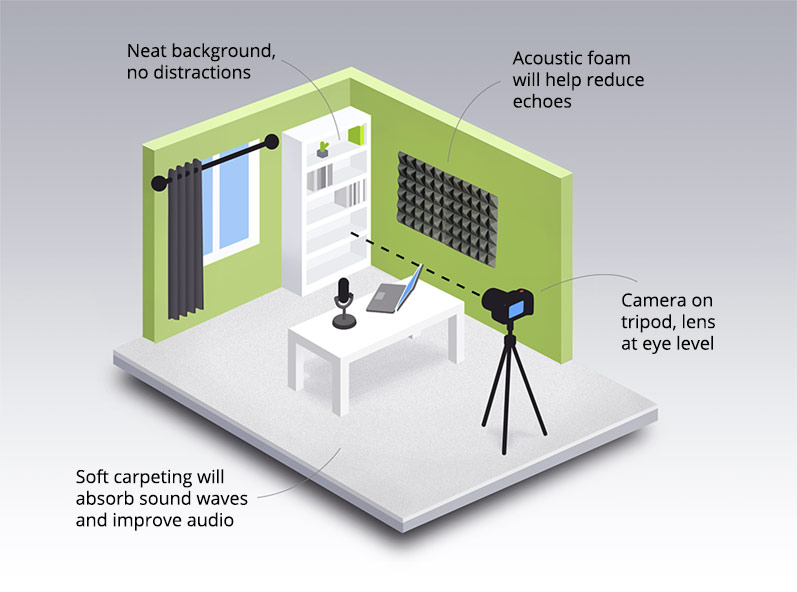 A tripod is always a good idea, it gives a much more stabilized image and provides more control over the camera. You can pick up a decent tripod for as low as $25. Adjust the camera on the tripod so that the lens is at your eye level. The subject should be positioned at the middle of the shot, with their head in the center and the eyes on the top one-third line. It is best practice to keep your cameras and other equipment running on AC power rather than battery (so they they don’t suddenly die halfway through the lecture recording). Always shoot in horizontal orientation, you can always crop the frame later.
Choosing a camera
Webcams, such as the ever-popular Logitech C920, are very convenient to use in a tighter space (like a faculty office), although the image they provide is rather basic. Again, as with other cameras, make sure that it is positioned at your eye level (use a laptop stand/books to elevate, or even fix the webcam on to a tripod), it looks much better than shooting from that awkward lower angle.
If you want better image quality and color than a webcam for your lecture, you could use a digital camcorder or a DSLR camera. Fixed on a tripod, camcorders like the Sony Handycam or Canon Vixia series and DSLR cameras like Panasonic Lumix or Sony Alpha yield a very crisp image. They are a bit more expensive than webcams, but the video quality is much better.
4) Set up your audio
Many believe that sound is actually the most important part of any video, but especially a lecture. In addition to you being able to deliver the lines, your equipment needs to be able to capture that audio well. This is why it’s best to invest in a good microphone to record lectures and avoiding using the built-in mic on your camera, laptop, or smartphone.
To get the best sound, keep the microphone as close to your mouth as possible. A mic mounted on your camera 4 ft away might be a bit too far, even for a very good mic.
Choosing a microphone
- Desktop USB microphones like the Blue Yeti are very popular and reliable. They are great for recording audio straight to your computer and very user-friendly.
- Lavalier (also called “lapel” mics) are good too. They clip on to your collar, very close to your mouth and capture voice well. However, most of them run on batteries and need a receiver, which is a bit more complex design than, say, a shotgun mic.
- A shotgun mic on a boom pole or a microphone suspension clip is probably ideal for capturing audio: it is easy to hide out of frame, but still have it be close to your face, and it is great at capturing direct sound.
Lavalier and shotgun mics generally use XLR out, which means you can’t directly plug them into a computer, an adapter is required. You may be able to run your audio through your camera (if the camera has XLR in) and recording sound and picture as one signal. Always check the microphone connection type beforehand and make sure it’s compatible with your other devices.
It is worth mentioning that microphones have different types of pickup patterns, which means they are better adjusted to either pick up one sound coming from one direction, or capture sound coming from multiple directions. For lecture recording we are mostly interested in capturing sound from a single direction (your voice), and this is called a cardioid pickup pattern.
If you want to learn more, this comprehensive guide goes into great detail about popular microphones and will help you pick the best one.
2025 State of Video in Higher-Ed Report
Get a firsthand look at the mindsets, strategies, and tech shaping tomorrow’s classrooms. Download it now:
5) Light it right
Using natural light from a window and/or regular room lights only will not provide the best results. We actually recommend blocking off all natural light with thick curtains because natural light can be very hard to control. Outside lighting is bound to change throughout the day and can give inconsistent lighting as well as harsh shadows due to its intensity. We strongly encourage using artificial light fixtures and light stands, they will give much more control over the lighting situation.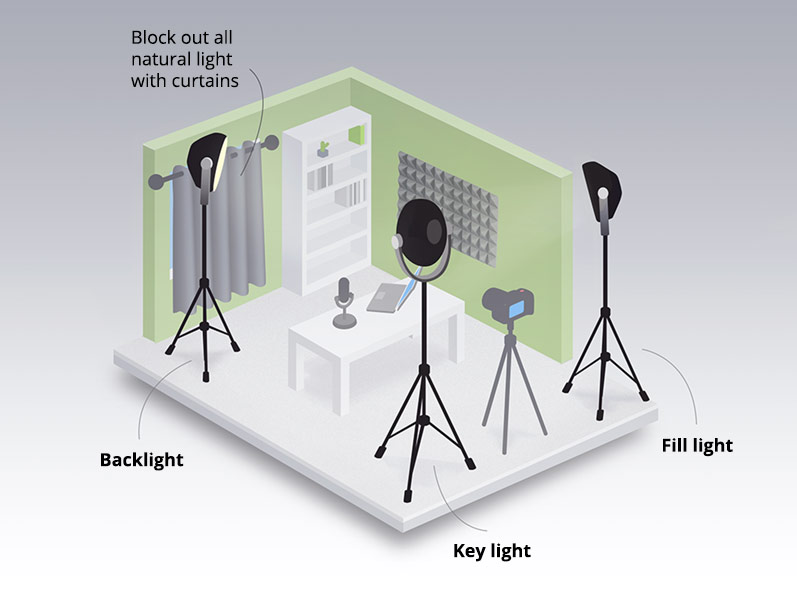
How to choose the lights
LED lights are quite convenient to use because they don’t warm up the room, however they tend to be more costly. Regular bulb lights are fine too, just make sure to choose the “natural daylight” tone to avoid a bluish skin tone.
If you have a more sizeable budget – you can simply get a lighting kit from Amazon for under $150. If you are on a tighter budget or if your space doesn’t allow for large light stands, you can get some clamp lights from your local hardware store (about $10 each, excluding the bulbs). You may need to diffuse these lights with a paper or plastic screen to avoid harsh direct light. To learn more about DIY lighting, check out this excellent video.
How to arrange the lights
There is a classic three-point lighting setup that works well. The first, key light is placed in front and a bit to the side of the model. The key light is the main light. The second light is the fill light. The fill lights counteracts the heavy shadow created by the key light. It should also be in front, but on the other side from the key lights, and a bit farther away from the model. These two lights should shine from just above the lecturer’s eye level and face a bit down. The third and final light is the backlight. This light is to be positioned behind the model and creates dimension, “unsticks” the model from the background, creating a rim of light around the silhouette.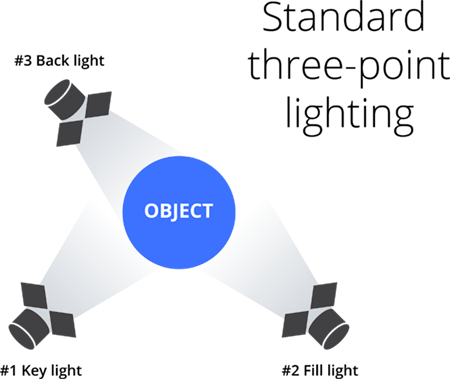 We’ve actually talked about three-point lighting (and other practical lighting tips!) on our weekly Live @ Epiphan show, check it out:If three-point lighting sounds a bit too complex for you at this time – we advise that you still try to use at least one artificial light source and try to achieve a shot without any harsh shadows. If you are limited to only using natural light – do not shoot against the light. This creates a silhouette effect where the subject will be much darker than the background.
Another tip is to watch out for glare and reflections. Move the lights around or raise them a bit to avoid glare on eyeglasses if you happen to wear them.
Start with these 5 steps to create your ultimate lecture recording studio. Your next step would be testing and adjusting your setup. This includes things like adjusting the lights, framing the shot, making sure that the background is neat, checking the audio, etc. Be sure to run tests of all components and make test recordings. We encourage you to experiment; this way over time you will find your perfect studio configuration.
A few words about recording your lecture
We won’t go into too much detail on how to record your lecture, that’s a whole different topic. You will need to decide on how you will be recording your lecture: using lecture capture software on your computer, recording all sources individually and then editing them together (the hard way), or using lecture recording hardware (the easy way).
- The first method implies using a computer with a lecture capture software like Camtasia, a USB microphone, and probably a webcam to capture your video. You could upgrade to a better video camera, but you will need a capture card like Epiphan’s AV.io HD to bring in the video signal into your computer.
- You could potentially record all your sources (audio, video, presentation) separately using the video camera’s internal storage or a digital audio recorder for sound, and then bring them together in editing, adding titles and lecture slides (provided you know your way around editing software). This takes some time and getting used to editing software.
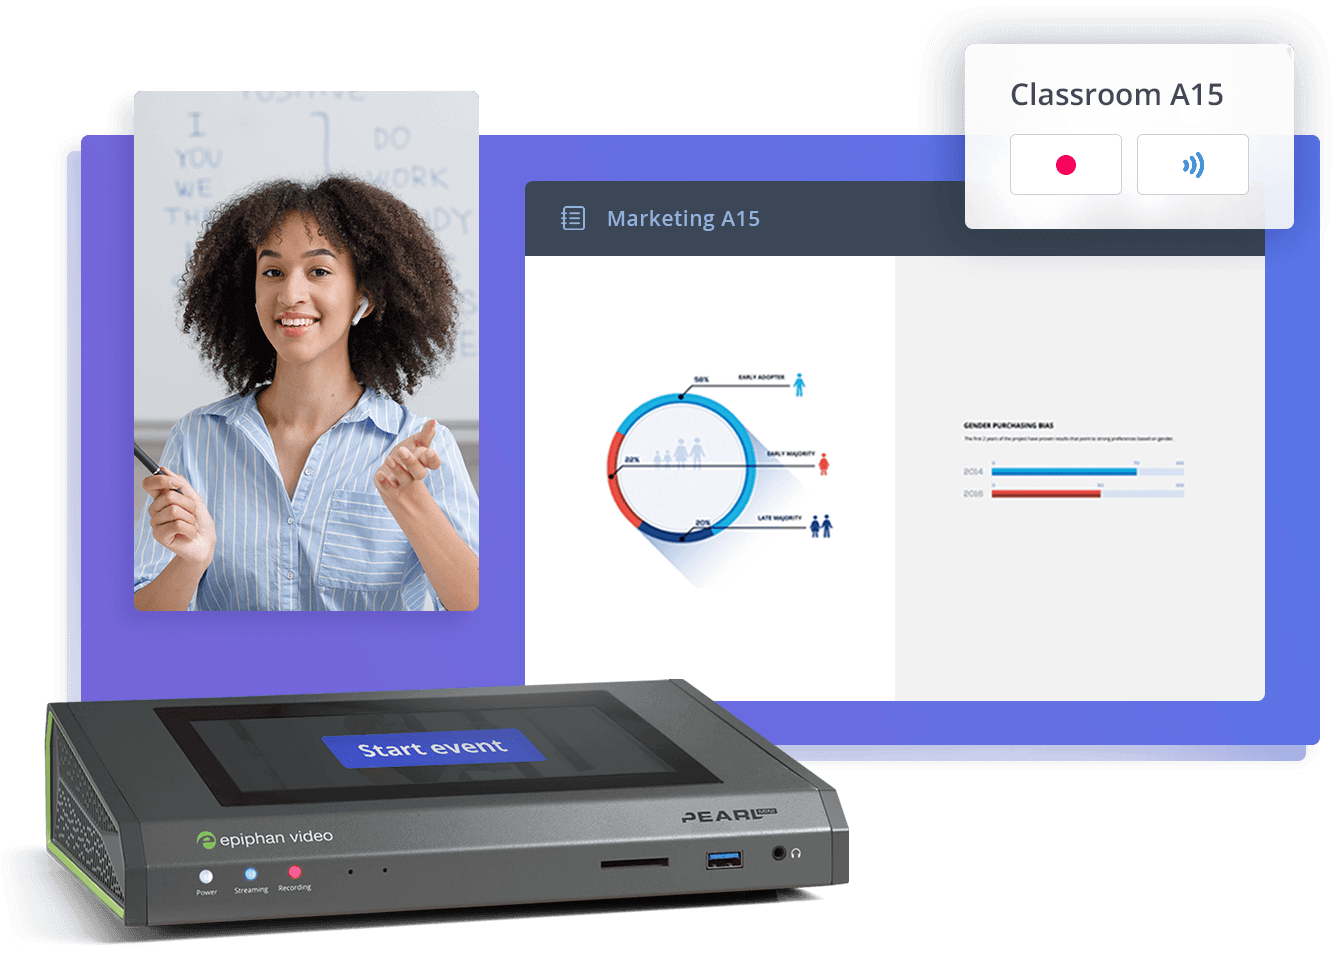
- You could also choose the simplest and most reliable method and use a hardware lecture recorder like Pearl Mini to record lectures. Pearl Mini is a device that lets you capture the signal from your camera, your audio, and your computer by simply plugging them into the box. Moreover, you can create a custom layout, which means after you are done recording you will have a final file (no editing required). The touchscreen display will let you start and stop the recording with a push of a button.
In conclusion
We hope this article helped you gain a better understanding of what makes a good studio, as well as how to get started creating one. We also hope you are now inspired to build your own lecture recording studio. Perhaps now you will come together with your teacher faculty and pitch in to create that one studio that everyone will share (and has been dreaming about for so long)!
Equip your campus with best-in-class video solutions
Meet your school’s video production needs with a lineup of flexible and scalable hardware for video capture, streaming, and recording – all centrally managed. Perfect for lecture capture, online learning programs, and more.

Nice exposition, Marta.