We’ve talked about how to record lectures in our past blog posts, however due to growing interest in flipped classrooms and blended learning (i.e learning using online video lectures), we’ve decided to revisit the topic.
The demand for high quality video lectures is higher than ever. Teachers who use the flipped classroom method are always looking for ways to make better and more engaging videos for their students. Lecture capture is not solely limited to university and school environment. Independent educational content creators use platforms like Skillshare, Udemy, and Teachable to upload their video lessons.
So what are the ways to record a quality lecture from a technical point of view? Well, as the title suggests, lecture capture options could be broken down into two categories: software- or hardware-based lecture capture. Essentially, software-based lecture capture uses a computer with some additional capture software, while the hardware-based model implies using a separate lecture capture appliance.
Simplify lecture capture with seamless video solutions
Learn moreHow to record lectures using software
By lecture capture software we mean using your computer with specific type of software only to record a lecture (also called screencast software). Standard lecture capture software allows you to capture everything that is happening on your computer screen, plus the audio from a microphone, as well as the video feed from a webcam. This means you could have a finished video file, complete with on-screen instruction, a talking head, and a voice-over commentary.A typical software-based lecture capture session might go something like this:
- Lecturer sets up a filming studio: a computer with capture software, a connected webcam and microphone (perhaps a graphic tablet for drawing on your screen), good light, and a neutral background. We will be doing a post on recording studio setups in the future, meanwhile, check out this amazing article on how to set up a studio.
- Lecturer pulls up all learning materials on the computer screen. This may include a powerpoint presentation, a video, web links in a browser, images, etc. This also includes a window with the webcam feed.
- When they are ready to go, they press “record” inside the lecture capture software and go through the material, switching between slides and narrating the lecture. Every frame, mouse movement, and sound is captured. Some lecturers use a clicker for smoother transitions between slides.
- When finished, the lecturer presses “stop” in the software and the file is saved. They can then edit the video: crop out bad moments, weld sections together or cut them into smaller segments, trim heads and tails, and add titles and captions.
- After editing, the software exports the final video file and it is now ready for distribution.
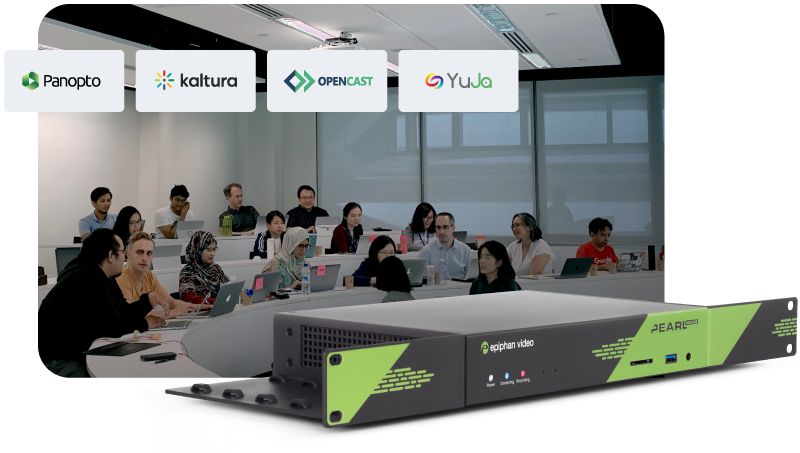
Equip your campus with best-in-class video solutions
Meet your school’s video production needs with a lineup of flexible and scalable hardware for video capture, streaming, and recording – all centrally managed. Perfect for lecture capture, online learning programs, and more.
Examples of lecture capture software
There is a large variety of downloadable software designed for lecture capture. Among the most popular are products by Techsmith: their Camtasia and Snagit capture software is used by many, but they also have a product specifically designed for educators called Relay. What sets Relay apart from basic screen capture software is that it is a true lecture capture solution. It provides advanced features like LMS management, in-video quizzes and learning analytics.
Other examples include OpenCast, Brightspace Capture, Screen Grabber Pro, and others.
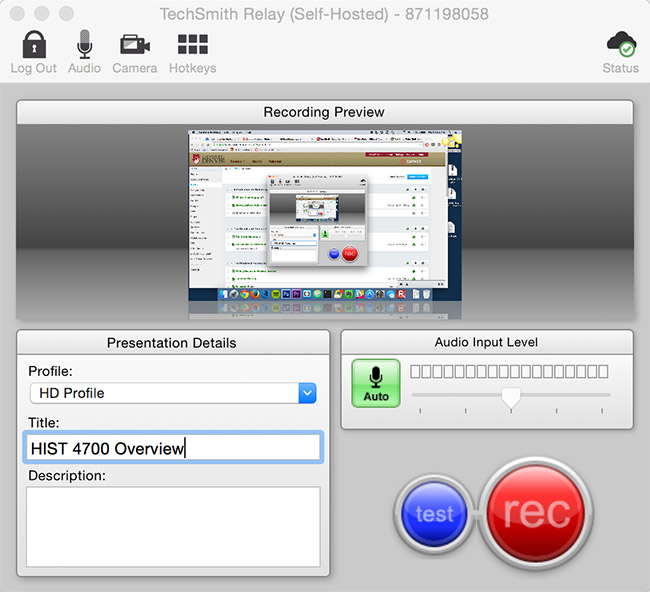
Screenshot of TechSmith Relay
Generally, lecture capture software is not free (pricing differs for each software), however, there are free screencast software options out there. One example is OBS (Open Broadcast Software). While being able to do capture a screen, OBS does not provide post video editing capabilities. Editing must be done is a separate app.
Who should use lecture capture software?
Software-based lecture capture is a solid choice for individual lecture creators, recording videos only from time to time and in a solo studio setting. Lecture capture software is also worth considering if your lecture consists mostly of presentation slides and your voice narrating the material, or perhaps recording podcasts.
Using solely a computer with lecture capture software may not be ideal in an auditorium or class setting because of equipment limitations: a webcam will not be able to capture video in great detail, and the microphone’s USB cable would make it difficult for the lector to talk and move around. In addition, setting up and worrying about the computer/software every time might get cumbersome.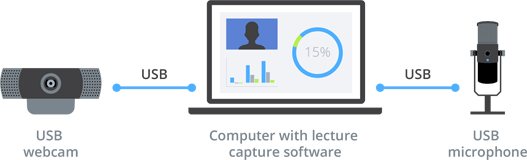
Pros
- More economical initial setup
- Lots of post editing power
- Good choice for recording audio+computer screen only
Cons
- Not always reliable (software crashes)
- Only basic lecture setup with limited in number of inputs
- Software licensing and support costs
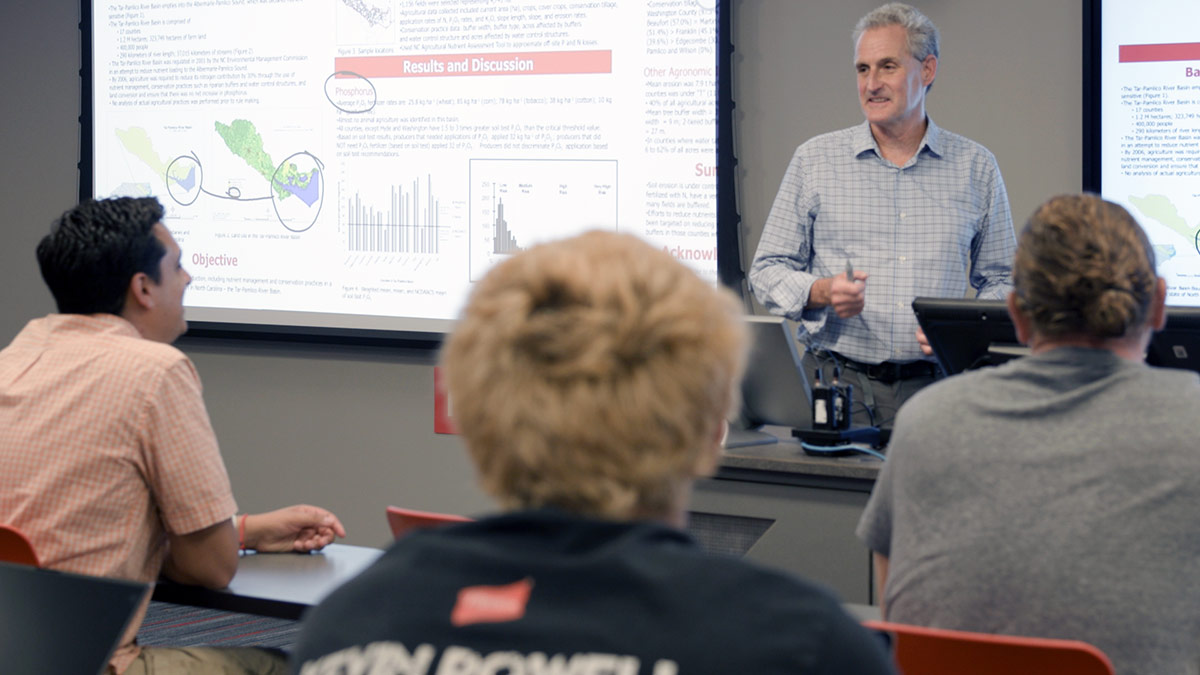
Get Inspired: How NC State supercharged 200+ classrooms
Supported by Epiphan’s all-in-one Pearl production systems, NC State created a seamless lecture capture solution that covers the entire campus.
Watch the videoHow to record lectures using hardware
Using hardware to record lectures means having a dedicated appliance for connecting all your video and audio sources and having it do all the capture and recording. Here is how it works:
- Similarly to software-based lecture capture, the lecturer would set up the filming studio, but instead of connecting all the inputs to the computer, they would connect them to a lecture capture box like Pearl Mini. This may include PTZ cameras, laptops with presentation slides, audio, document cameras and even microscopes. Lecture capture appliances are capable of capturing different types of inputs such as HDMI, USB, XLR and analog audio.
- With all the sources connected, the lecturer would then press the “Start Recording” button on the unit or the unit’s web/mobile UI and the lecture will begin recording.
- The lecturer would then proceed to explain the material (this would work great in both an auditorium with students as well as personal studio setting).
- When finished the lecturer would press “Stop Recording” on the device or the UI. The file is saved internally, on a thumb drive, or is automatically pushed to a CDN, LMS, or other destination of choice, depending on settings.
A lecture capture device like Pearl Mini also allows the lecturer to create custom layouts, combining and switching between between them during recording. This means that upon completion, the lecturer could have a finished lecture file. They also choose to record each input individually (in sync) and then combine them in editing software as they see fit. The best part is that the lecturer will be able to focus solely on presenting the lecture while the box does all the capture work. Which brings me to…
Who should be using hardware-based lecture capture?
Lecture capture hardware is great for auditorium and classroom setting, where lecture recording happens regularly and frequently. Hardware-based lecture recording is an efficient and reliable way to capture source-rich, multi-input presentations. Many schools and universities already have lecture capture hardware permanently installed in auditoriums. All the lecturer has to do it press “record” on a special panel or web UI.
For a completely hands-off experience, many rooms are even equipped with lecture capture scheduling systems (integrated with the hardware). This allows for lecture recording to start and stop automatically. This way, the lecturer is not distracted by having to juggle recording and presenting at the same time. For instance, Epiphan’s Pearl lecture capture hardware family is integrated with Kaltura, an open source video platform used by many universities. This hardware integration means effortless scheduling through the school’s learning management system.While the words “permanently installed hardware” may lead some of you to believe that lecture capture hardware is something very rigid and stationary, built into the walls forever, that’s actually not always the case. For example, a device like Pearl Mini is ultra lightweight and portable, making it a good choice for setting and capturing ad hoc lectures. This makes Pearl Mini a suitable solution for how to record lectures on the go and in impromptu studios.
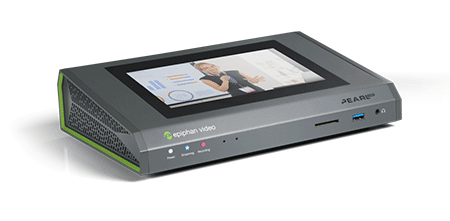
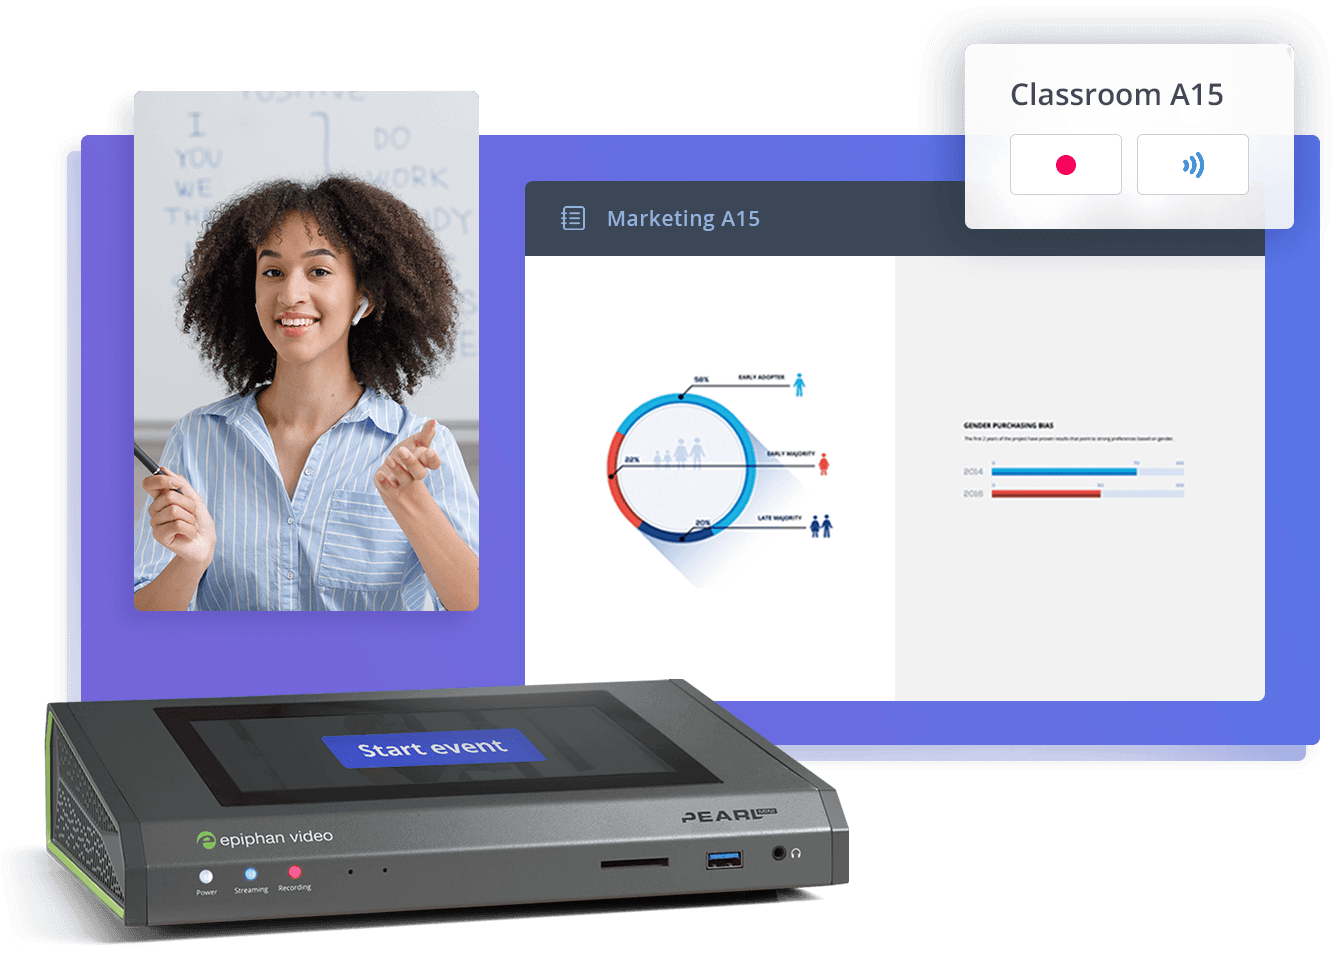
An example of a lecture capture hardware appliance (Pearl Mini)
Pros
- Records full HD and SD video and audio
- Captures multiple sources such as document cameras, lecture cameras, or tablets, in sync
- Reliable
- Less editing after recording
- Easy to use, set-and-forget: could be started and stopped with 1 button. A more hands-off experience
Cons
- A significant upfront investment (but lower recurring fees)
The hybrid option: how to capture lectures using software with a little bit of hardware help
Let’s say that the software-based lecture capture scenario practically satisfies your case, but you wish you could to bring in one HDMI source into the lecture. This could be the feed from a DSLR camera, or a document camera, or perhaps even a microscope. You could do that using a capture card like AV.io HD.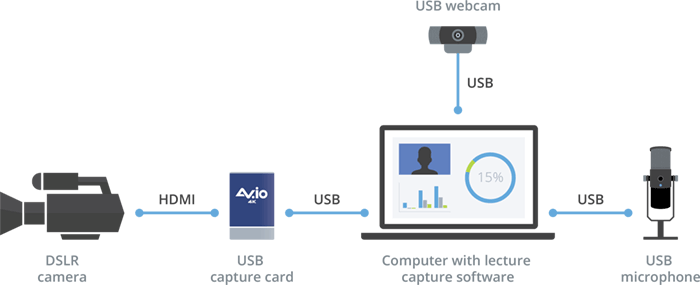 Connect your source via the capture card, and from there use the software-based lecture capture model. The only caveat here may be the processing capabilities of your computer. If the computer processing power is on the lower side (or the computer itself is old) – it may have a more difficult time capturing in HD and maybe even dropping frames.
A few words about video lecture management and distribution
We also wanted to briefly mention a special kind of lecture capture software, which in addition to lecture capture has a much wider range of functionality. This includes keeping track of all media assets, distributing lectures to students, tracking student progress using built-in quizzing and analytics, and much more. This special type of software is known as Learning Management Systems (or LMS). LMSs are often directly integrated with the school’s existing hardware and AV equipment to make it easier for staff to track, store, and distribute all media materials.
Today, most top universities have multiple rooms and auditoriums fitted with easy to use lecture capture systems, integrated with the school’s LMS. This makes it easy for professors to schedule and record lectures. The LMS automatically uploads and distributes learning materials among students. We will be sure to do a more detailed post about Learning Management Systems in the future, it’s a very interesting and deep topic.
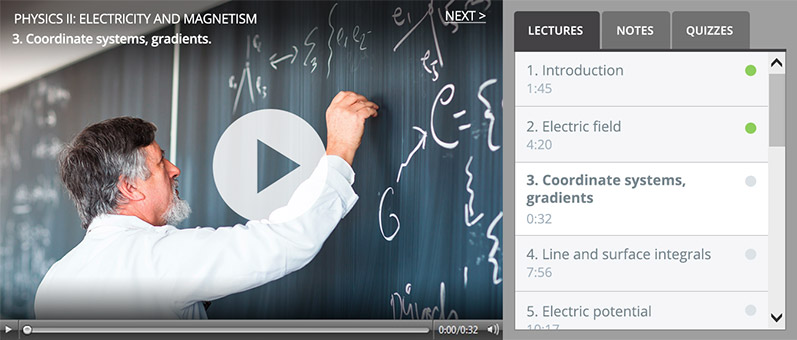
Online video course. Example LMS UI.
In conclusion
We hope this article helped you to better understand the two different ways of how to record lectures. To sum it up, using software to record lectures is great for individual creators while hardware is great for capturing lectures with multiple inputs. Creating interesting and rich lectures is very important in today’s dynamic learning environment. Schools and universities rely on flipped classroom and blended learning techniques, and we believe that efficient and high quality lecture capture is a huge part of that.
2025 State of Video in Higher-Ed Report
Get a firsthand look at the mindsets, strategies, and tech shaping tomorrow’s classrooms. Download it now:

What equipment is best to be used to video record 5 lessons for the new edPTA lesson plans performed at an elementary school for a small group of students?