
Live video is everywhere these days – from large-scale entertainment platforms, such as Netflix, Hulu, and Amazon Video, to social media tools like Facebook Live, YouTube, and Periscope. Live video technology is enabling content creators, businesses, broadcasters, and entertainment companies to reach their target audience and grow their brands like never before.
In many cases, these live streams are temporary – only existing to watch for a predetermined time period. A Twitch stream is only available to watch while the streamer is live, for example. Other platforms, such as YouTube, automatically convert a streamed video into video on demand (VOD) format. However, these kinds of publishers still ultimately own the legal rights to the video content and hold the power to add or remove VOD content as they wish. Luckily, live video hardware and software technology today makes it easy to save a stream as a video file for later use.
While this post focuses on how to record a live stream that you’ve produced yourself, it is also possible to record live video published from another source.
A note on recording someone else’s live stream
A quick disclaimer – recording live video content that you didn’t produce yourself is not encouraged. In many jurisdictions, reproducing someone else’s video as your own (i.e. stealing) can place you in direct violation of various copyright and piracy laws. Always consult the laws regarding video reproduction in your area.
Benefits to recording your own live stream
Even if some platforms automatically convert your finished stream to VOD format (such as YouTube), it’s still a smart idea to record a personal copy of your live stream. With a recorded video file, you can edit your live stream to create marketing and promotional collateral for your brand. Or you can save individual clips from the stream to use in future creative video content.
You can edit your live video using post-production video editing software, such as Adobe Premiere Pro (for pro-level video editing capabilities), or you can use our very own AV Studio cloud-based live production software for simple edits (shameless plug: AV Studio has a free 90-day trial!). Some high-end recording tools let you record each individual video source as a full-resolution ISO file. This is a good idea if you’re using multiple video sources to create picture-in-picture (PiP) layouts in your live stream. Many live streamers use these files in their post-production video editing to create video assets in maximum quality.
Screen recorder software
Screen recorder tools are often the first place people look when learning how to record a live stream. If your screen is showing a full-resolution livestream, then the tool will can capture the video content as a recorded file. Some of these tools are freely available, while others require payment.
Compared to free tools, paid screen recorders offer more options for editing, such as graphic overlays and basic clip modifications. Examples of paid screen recorder software include TechSmith Camtasia and Fraps. Free live stream recorder tools don’t cost you anything, but they have limited functionality beyond simply recording your screen. CamStudio is an example of a live stream recorder tool that is open source, and therefore free to use. (Open source software is a collaborative effort between many people, so there is no single company that owns the rights to the tool.)
Many people don’t know that Windows 10 comes with a pre-installed Xbox app that lets users record their screens. This is intended for gameplay capture, but the tool can be used for any recording project – including live stream recording. To use this feature as a Windows 10 user, simply press the Windows key + G to display a pop-up bar where you can control recording and configure capture settings. See Record game clips with Game DVR on Windows 10 for detailed instructions.
The downside to using screen capture tools for recording a live stream is that the video quality will suffer. By recording a live stream, you’d be recording—which involves encoding—video content that has been encoded once already by the original publisher. Recording your screen can also put a significant strain on your computer’s CPU/GPU, especially if you’re recording in high resolution while also using your computer for other tasks. This can potentially result in a poorly-encoded media file with jittery video and dropped frames. So if you’re using a lower-end computer, you may want to consider investing in video hardware for recording instead.
Software tools for recording and live streaming
There are plenty of software tools which let users live stream their own video content while also simultaneously recording their streams. These streaming software tools can also be used exclusively to record video content on your screen.
There are free, open source streaming software, such as OBS Studio, and more advanced tools at progressively higher price points, such as XSplit Broadcaster and vMix. See our post Best streaming software in 2018: A breakdown of the main contenders for all the details. Live streaming and recording software are built with live streamers, live event producers, and content creators in mind. Therefore, these tools usually offer a greater extent of creative features, such as lower thirds, chroma key, and more.
As with screen capture software, you’ll need a decently powerful CPU/GPU if you plan to stream and/or record live video content. Moreso if you plan to stream and record at the same time. This is especially true if you plan to record in high resolutions and frame rates, such as for fast-paced computer gameplay. If your computer isn’t up to par, you’ll either need to upgrade your computer—or alternatively—consider a dedicated encoding hardware appliance for your live streaming and recording.
The hardware alternative
Using hardware for live streaming and recording is a good idea because these devices are purpose-built for capturing, encoding, streaming, and recording video. This means no more excessive processing stress on your computer.
Typically, professional-quality hardware encoders are priced significantly higher than software options. This might seem pricey, but remember – you get what you pay for.
For example, hardware encoders, such as our Pearl-2 and Pearl Mini, are built to be reliable (never fail), easy to use, and incredibly versatile with their “all-in-one” design. With a Pearl-2 or Pearl Mini, you have everything you need to capture, stream, and/or record – all in the box. Pearl-2 is the ideal solution if you require 3 or more video sources or you need to encode in resolutions up to 4K. Pearl Mini on the other hand is better suited for encoding 1-2 sources (i.e. a laptop and a video camera) in resolutions up to 1080p.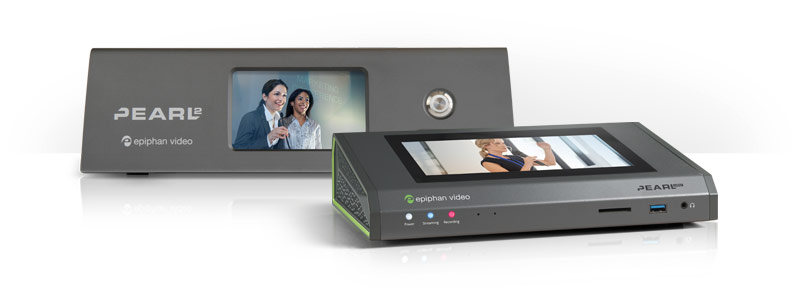 For more information on the differences between software and hardware encoding, check out our post Video streaming hardware and software: which one is right for me?.
If you’re exploring how to record a live stream with a smaller budget, consider using an Epiphan AV.io capture card. These HDMI to USB devices help capture video from one source (such as a live stream on a separate computer), and transfer the video source into your live streaming and recording software on your main laptop.
AV.io capture cards are special because they take the strain off your computer (the one doing the actual streaming and/or recording). These devices send raw pixel data to your computer over USB 3.0 (max transfer of 640 MB/s), meaning there is no resource-intensive encoding and decoding of data.
Other capture cards compress your video into a container (such as H.264 or Motion JPG) so the data is small enough to fit across a USB 2.0 bus. When the video data arrives on your computer, the CPU and/or GPU need to work to decompress and then re-encode this image with your encoding settings. And with this type of pre-compressed video, it’s never possible to get back the full detail that was lost in compression.
Now you know how to record a live stream
As you can tell, there are many different options if you’re looking for information on how to record a live stream. You can use screen recording software as your live stream recorder, or you can take advantage of live streaming software tools if your computer has a strong enough processor. You can also invest in a dedicated professional live streaming and recording system that contains everything you need to capture, stream, and record.
Hey Jordan,
have you ever heard / tried the Mac software mimoLive from Boinx Software? Would be interesting to see how you like it.
If you have interest in testing – get back to me.
All the best,
Steffen