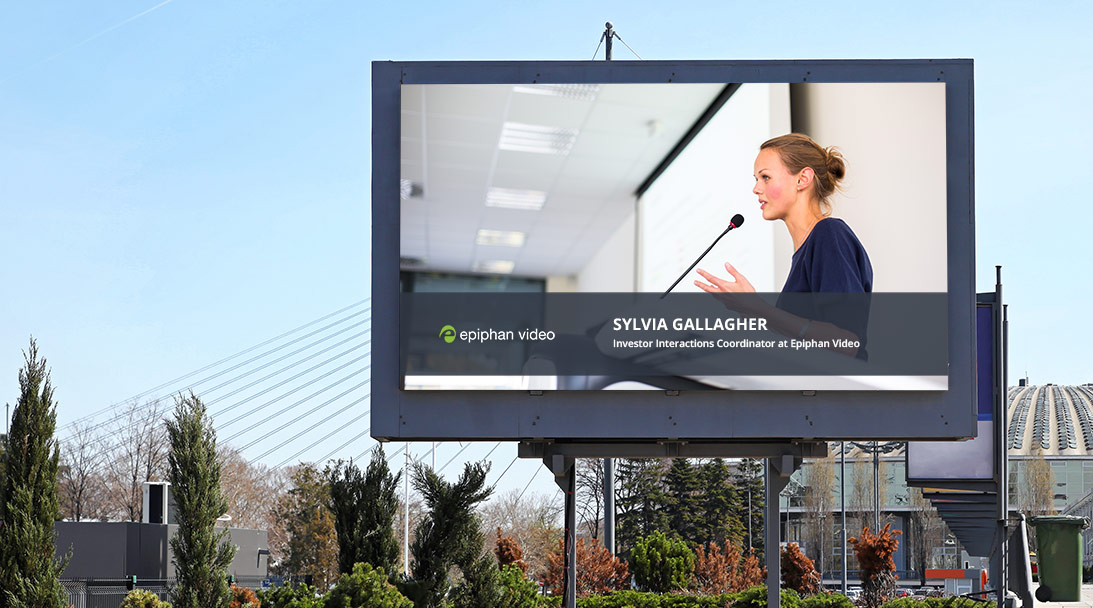
Every day, around the world, digital signage show us flight and transportation data, menus, production statistics, important safety messages, presentations, overflow classroom lectures and more. I’d like to show you how easy it is to create digital signage using smart TVs and Pearl.
Most smart TVs of today have a built-in feature called universal plug and play (UPnP) AV. This audio / video variety of UPnP is designed to make it easy to share multimedia across your network. The television acts as the media player and it serves up content from any UPnP media server visible on the network. So all that’s needed is to have your content played through a UPnP media server.
This is where Pearl comes in (although you could also use VGA Grid or VGADVI Recorder Pro, all have the same functionality). Pearl acts as a UPnP media server and can serve any or all of its channels on your network. You can use it for live video (collected from video cameras, a laptop or any other video source) and for recorded files.
Creating your digital signage
Whether your channel is something static, like a menu or slide presentation created in PowerPoint, or a stream composed of live video and other components, the process for getting your digital signage ready is the same! To get started, all you need is to have both your smart TV (with UPnP player support) and your Pearl on the same network.
Step 1: Set up your content
Decide what content you want to show on your digital sign(s) and determine which items need to be sources connected to Pearl (for example you could be using a laptop, a camera, a tablet or any combination of these inputs). Once these sources are connected, log into the Pearl web admin interface and create a channel that includes these assets.
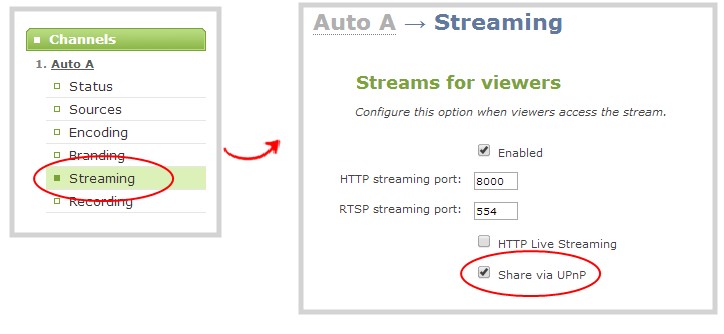
Step 2: Turn on UPnP
To help keep your content private, Pearl comes with UPnP disabled. Once you’ve decided to stream over your network via UPnP, it’s very simple to turn it back on. There are two easy steps. First, enable UPnP for your Pearl and set a hostname (optional). Next, go to your channel’s Streaming configuration page, select the check box for sharing via UPnP and click Apply. (If you wanted to share recordings instead, go to the channel’s Recording configuration page and enable UPnP sharing there.)
Step 3: Configure your Smart TV
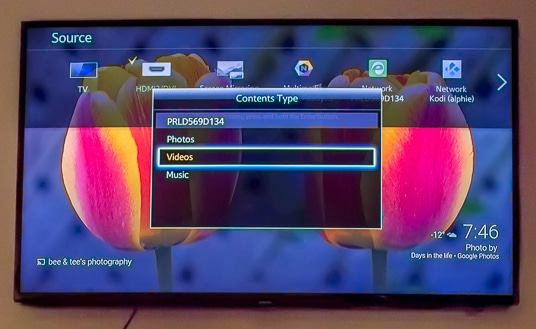
On my Samsung 48″ Smart TV, I press the Source button on the remote to bring up a list of all the sources I can see on my network. I use the arrow keys to find the hostname I set for my Pearl. (If you didn’t set a hostname, the default name uses Pearl’s serial number, as shown below.)

Once I’ve selected my Pearl, I choose Videos, then Live Stream to a channel list.

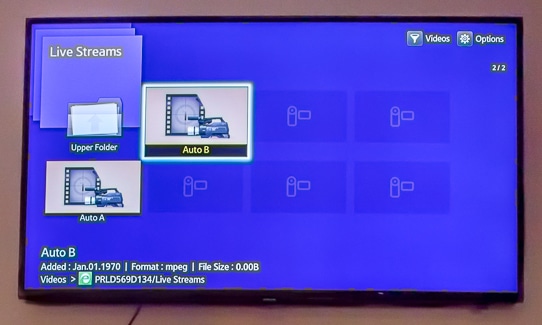
After that, I just need to select the channel I want to show and I’m streaming live to my digital sign.
The possibilities for what you’ll share are endless. We’ve seen customers create digital signage to:
- Share live events to TVs in retail spaces
- Share lectures and presentations to overflow classrooms
- Display employee information across a plant or campus
- Build customer viewing areas for a manufacturing plant
- Share all-hands meetings in several meeting rooms at once
- Show daily customized welcome messages in a retail or hotel space
- Display performance footage to actors behind stage
What will you share on your digital sign?
