Knowing your audio input levels makes it easier to get the sound quality results you want for your live streaming video event.
Everybody wants clean, crisp audio that’s free of distortion when streaming or recording a live video event. Not everybody realizes that it’s crucial for the audio input level of your equipment to match the level of your audio source.
There are two audio input levels to consider: mic level and line level. Relative to each other, mic level is a weaker signal (i.e. quieter) and line level is a much stronger signal (i.e. louder). A quick look at the technical specifications of your equipment will help you identify the audio input level you need.
Mismatched audio input levels can cause audio problems that you definitely want to avoid:
- You have a weak input signal that’s so low you have to really crank up the volume just to hear it. But you’re also boosting the background noise, which creates a noisy signal because the signal-to-noise ratio is so bad.
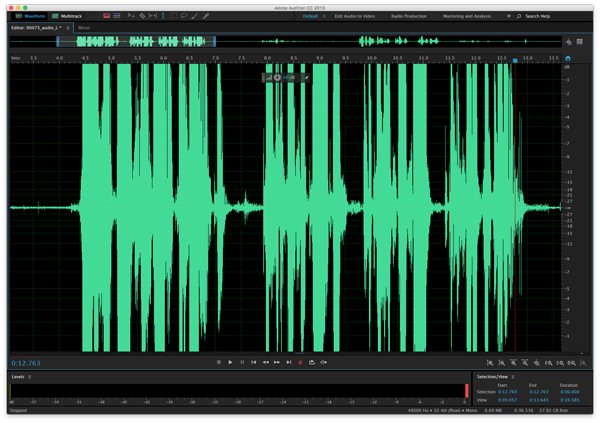
- Your audio input is so hot (loud) that it’s overloading the inputs on your equipment and you risk damaging them. Not to mention adding a whole lot of distortion to the audio because the tips of those lovely, loping sound waves are being aggressively clipped off (limited) by your equipment. Another symptom you could hear is the pumping effect of a compressor pulling down the volume of all the high peaks.
 Poor audio quality is annoying for your audience and a headache for audiovisual technicians. If the connectors on your equipment aren’t clearly marked, you’re better off checking the specs and avoiding these common issues related to audio input levels.
Analog line-level audio inputs and Pearl
Let’s take a look at the analog audio inputs on Epiphan Pearl and Pearl-2, then offer up a quick tip for matching audio input levels in the field.
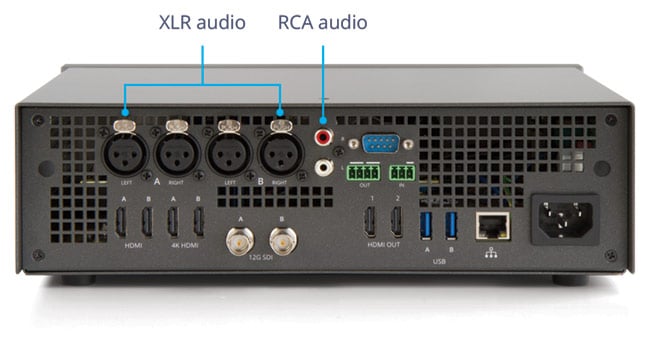
The audio signal you send to Pearl usually comes from either a mixing console or pre-amp, which are line level. But not all line levels are the same. This table lists the different line-level signals. For a good description of dBu, dBV, and the related voltage ratings, I recommend reading Audio recording for live events. Pearl-2 has left and right XLR jacks that are professional, line-level inputs rated at +4.0 dBu without phantom power. Pearl-2 also has consumer-level, left and right RCA jacks with a maximum input rating of +24 dBu, 12.3 V (RMS).
 The left and right ¼ inch TRS (Tip Ring Sleeve) jacks on the rackmount Pearl models are professional, line-level inputs that are also rated at +4 dBu. Software-controlled, on-board 25 dB attenuators provide additional padding. With attenuation applied, the maximum input signal is rated at +24 dBu, 12.3 V (RMS). Without attenuation, the maximum input signal is rated at -1 dBu, 0.707 V (RMS).
What does this mean? The optimum level of audio signal to send Pearl-2 and the rackmount Pearl models is Pro Studio Level 1. If your source audio signal is Pro Studio Level 2 or Consumer Level, you’ll likely need to apply some gain to get the volume you want or remove the attenuation in situations where you have a weak signal, like a speaker standing slightly off mic.
Desktop Pearl has left and right ¼ inch TRS (Tip Ring Sleeve) jacks that are professional, line-level inputs rated at -10 dBV. It comes with an external, 25 dB attenuator that you can use with audio signals that have a high dynamic range or that are coming in at either 0 dBu or +4 dBu (i.e. Pro Studio Level 1).
All analog audio inputs on Pearl and Pearl-2 can handle both balanced and unbalanced signals.
Mic audio input level
Compared to line level, mic level is really low at about -60 dBu (or -62.2 dBv), so it’s a much weaker signal. Mic level audio signals aren’t powerful enough to plug directly in to a line level input. You need to connect your microphone to a mixing console or pre-amp and take your audio from the line level out on those devices. While mixers and pre-amps send line-level signals, not all microphones send mic level. Dynamic microphones send mic level. Dynamic means they generate an audio signal when a sound wave hits a movable diaphragm. A low impedance dynamic microphone uses XLR connectors and a high impedance dynamic microphone uses mono ¼ inch connectors.
Condenser microphones can be either line or mic level and use either batteries or phantom power. If your condenser microphone is rated for line level out, then go ahead and plug it directly in to a line level input using the appropriate cable. But if you’re condenser mic needs phantom power or is sending mic level output, you should connect it to a mixing console and send your audio feed from the mixer to Pearl.
So what happens if you’re setting up Pearl and realize that your audio sources are only mic level and you don’t have a mixer or pre-amp handy? Here’s a tip. Connect your mic to your camera and let your camera provide the audio signal to Pearl over the HDMI connection. That way, you get the right audio input level and perhaps even save yourself from having to lug around some extra equipment. Are you cheating by using the digital HDMI audio inputs? Not at all. The quality audio result is well worth doing it.
For a great explanation about audio cables types and connectors, you can read Audio cables – balanced vs balanced

The info on this page is way over my head. All I’m trying to find out is what audioinput#0 means. That’s the result of a test on the “built-in microphone” (webcam). However, it doesn’t explain whether that’s good or bad. Oh well, I’ll keep looking!