If you’ve heard the acronym NDI and wondered how it can help your live video productions, you’ve come to the right place.
We’re here to answer the most frequently asked questions about NDI, NDI|HX, bandwidth speeds, and how the protocol gives you more options to create video.
What is NDI video?
Network Device Interface, or NDI®, lets you transmit and receive broadcast-quality, low latency over existing LANs using cost-effective CAT5/6 cables and the quality is virtually lossless.
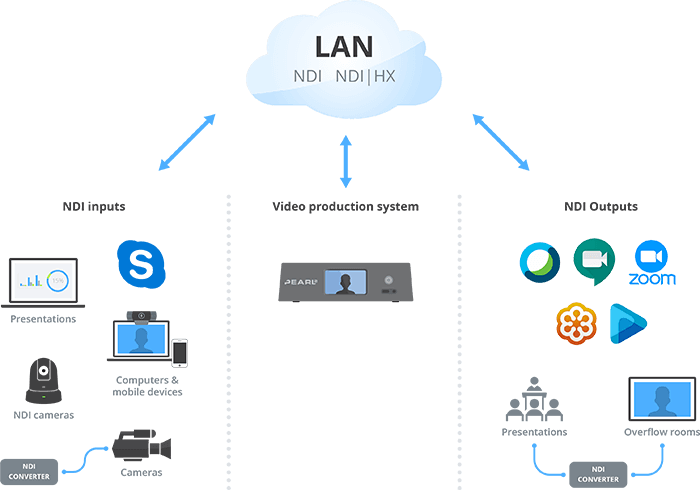
NDI allows the flexibility to choose from a wider variety of video input sources. Across the same network, you can access multiple cameras, software on computers, mobile devices, and more on the network using a single LAN port. No expensive multiple-port HDMI switches or SDI routers are needed.
The number of NDI sources you can add to your network is practically limitless. To access NDI devices across subnets, you can manually enter the IP address of devices on those other subnets using NDI Access Manager.
With NDI, taking your video production to a different location is a lot simpler without a whole mess of HDMI and SDI cables to manage. All your video sources are readily accessible from anywhere over the network. CAT5/6 cables are also a lot cheaper than traditional SDI or HDMI cables.
NDI and network bandwidth
High Bandwidth NDI, as the name suggests, uses a lot of local bandwidth to share audio and video. This is because the protocol transmits high-quality, low latency, uncompressed video streams that are virtually lossless. Every pixel captured by the camera’s sensors is sent without any reduction – resulting in a lot of data.
Transmitting uncompressed video, especially at higher resolutions, requires at the very least a Gigabit network, though the ideal transfer speeds ultimately depend on the number of concurrent High Bandwidth NDI streams.
A single 1920×1080@30 fps NDI stream needs approximately 100 Mbps of dedicated bandwidth.
The bandwidth required will change, however, depending on the resolution, framerate, and how much motion is being captured by the camera. For example, a 1920×1080@60 fps NDI stream requires 150 Mbps. Meanwhile, a 4K@30 fps NDI stream is roughly 250 Mbps.
It’s recommended to leave approximately 25 percent of headroom so that the signal remains smooth just in case any unexpected network traffic pops up during production.
So, if you have three PTZ cameras sending their video to an Epiphan Pearl-2 at 1920×1080@30 fps, that’ll cost you approximately 300 Mbps of bandwidth. If the Pearl-2 is also outputting the NDI stream in 4K, that puts your bandwidth at 550 Mbps. Reserving 250 Mbps for the suggested headroom, three sources and one output already totals 800 Mbps, just enough for the Gigabit network to handle the transfer
| Resolution / Framerate | High Bandwidth NDI Mbps | NDI|HX Mbps |
|---|---|---|
| 1920×1080p@30 | 100 | 8 |
| 1920×1080p@60 | 150 | 10.5 |
| 3840×2160@30 | 200 | 18 |
| 3840×2160@60 | 250 | 30 |
High Bandwidth NDI vs. NDI|HX
There are two variations of NDI to work with: High Bandwidth NDI and NDI|HX.
Both are great options for transmitting video and embedded audio signals across a local network, the main difference between them being compression and latency.
High Bandwidth NDI is uncompressed and requires a lot of bandwidth to transmit. NDI|HX is the high-efficiency alternative, functioning almost exactly the same way but requiring significantly less bandwidth thanks to the advanced compression – making it an ideal choice for any environment where bandwidth is limited. The high efficiency of NDI|HX will add some latency compared to the High Bandwidth version, but at most, it’s only a frame or two. Audio is uncompressed in both High Bandwidth NDI and NDI|HX.
Here’s how much dedicated bandwidth is recommended for NDI and NDI|HX:
- A single 1920×1080@30 fps High Bandwidth NDI stream needs at least 100 Mbps of dedicated bandwidth
- A single 1920×1080@30 fps NDI|HX stream needs 8 Mbps of dedicated bandwidth
It’s worth noting that these figures are estimates and the actual bandwidth required will vary based on resolution, framerate, and motion.
NDI|HX allows creators to take advantage of almost identical, exceptional quality without worrying so much about bandwidth availability. Of course, the bandwidth available should always be something to consider, but NDI|HX was designed to work over low-bandwidth networks.
Available NDI tools
More and more software applications like Zoom, Microsoft Teams, Skype, NewBlueFX, EasyWorship and others offer native NDI support.
To help spur adoption, there are free NDI plugins for popular applications like VLC and Adobe Creative Cloud. For all the rest, NDI offers simple-to-install free tools. For example, NDI Screen Capture lets you turn a computer into multiple NDI inputs that any other NDI device on the network can access. You can define live video sources like the computer’s webcam, the full-screen display, different windows or combination of windows. Even different software applications running on that computer can be converted into an NDI input.
A couple more options include the NewTek NDI Connect and the NDI|HX Camera app (available for a nominal fee). NewTek Connect makes any camera or device connected to a computer’s capture card (or the local webcam) available to other NDI systems on the LAN. And NDI|HX Camera converts the output from iOS devices and Android phones into NDI video inputs. If you want to take your content further and out onto the WAN, consider using SIENNA Cloud for NDI.
The many free tools and flexible options that are available are definitely helping to drive adoption.
NDI adoption
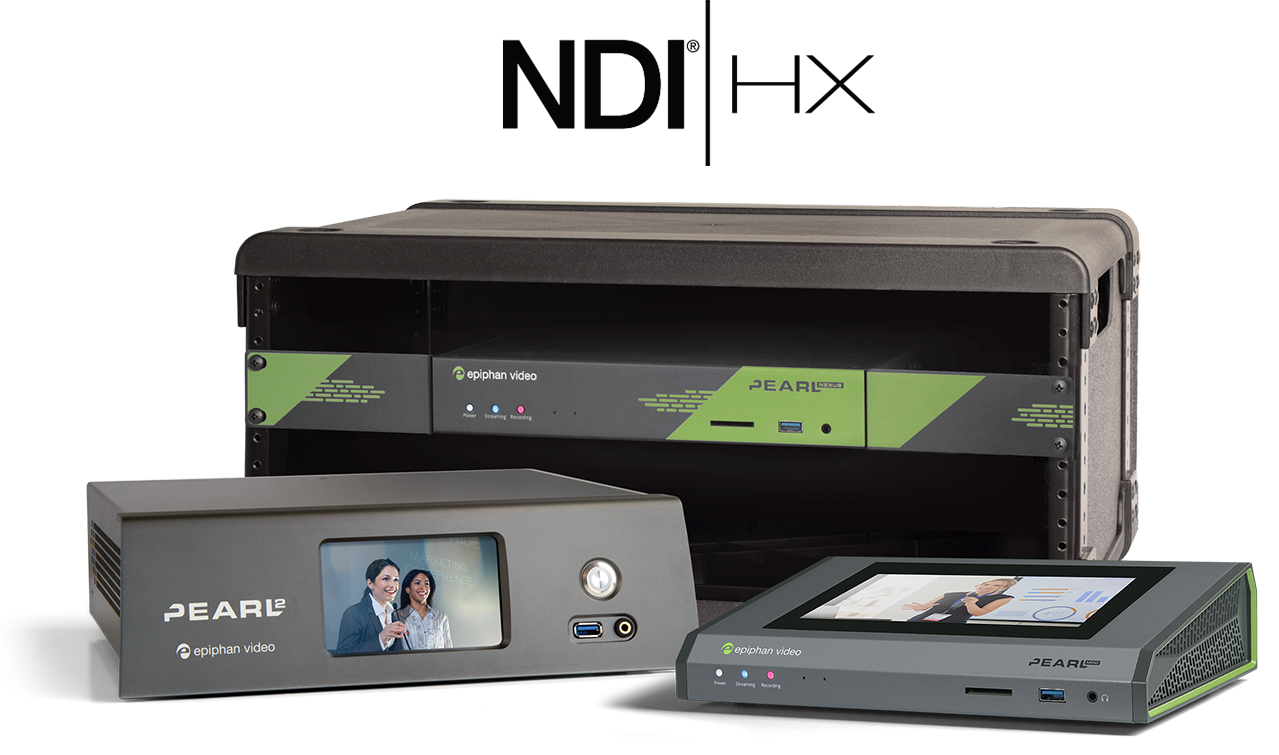
Adoption of NDI is spreading since its introduction to the public early in 2016. Designing NDI into your AV system is getting easier as more hardware and software options become available. There are also more NDI enabled cameras to choose from companies like PTZOptics, or Panasonic, as well as full-featured video production systems like the Epiphan Pearl-2 that support NDI and NDI|HX. Additionally, Pearl Mini can support up to two NDI|HX inputs, making it a perfect choice to build a small studio.
If you already have existing cameras and AV equipment, NDI is still within your reach. You don’t have to make a huge commitment to switch over all your gear. NDI converters are readily available. These converters connect existing NDI unaware HDMI or SDI video sources to the network – and convert NDI into HDMI signals for your average monitor or video projector. NDI converters range in price and features. For example, the BirdDog Mini offers 1080p60 NDI encoding, 1080p60 NDI decoding, tally, and power over the Ethernet.
Practical NDI applications
Here are some practical ways you can start using NDI.
NDI for live events
Using NDI can offer several advantages when capturing live events such as lectures, conferences, or performances.
NDI eliminates the need for cabling, which can be challenging to set up and manage. By connecting cameras and other devices to an all-in-one production system like the Pearl-2 or Pearl Mini, everything you need to stream or record the live event is acquired in less time and in a much more organized fashion.
If the live event uses presentation software like Microsoft PowerPoint, this can easily be added to the LAN using the free NDI Screen Capture or NDI Screen Capture HX. With this app, the presentation computer becomes another NDI input for your video production system to ingest. It can be added to Pearl-2 or Pearl Mini like any other NDI or NDI|HX source, recorded, streamed, and switched between as needed for the production.
Certain venues won’t have the network bandwidth required for an effective NDI production. It is possible to work around this, however. With NDI Bridge, you can securely connect two entirely different NDI networks from anywhere in the world. This is particularly useful for remote production workflows or transmitting signals to other locations.
Adding remote guests to broadcasts with NDI
Adding a remote guest to a live production was once a tricky proposition. However, with the addition of NDI-out to all major video conferencing apps such as Microsoft Teams, Zoom, and Skype, it’s possible to bring the remote guest’s audio and video to your production tool or system of choice.
When enabling NDI-out on Microsoft Teams, Zoom, and Skype, the feeds can be ingested by Pearl-2, allowing you to switch, record, and stream video with these remote sources as well as any physical input available. Create interesting layouts with NDI inputs using the built-in custom layout editor and add text, custom backgrounds, and transparent images.
Using NDI for meetings and conferences
The top video conferencing platforms all feature an NDI-out function, but they also accept NDI Webcam Input. Any NDI-enabled camera, including mobile devices with the NDI|HX Camera app, can be used in place of a laptop’s built-in webcam, which allows meeting participants in far greater quality.
Taking this a step further, adding NDI-enabled PTZ cameras to any conference room can elevate the quality of town halls, conferences, webinars or trainings being broadcast internally or to the public. Connect the cameras to the network, acquire the signals in a video production system, and create a dynamic, switchable program that’s either being sent to a content delivery network or directly into the computer hosting the video conferencing app.
If your video production system outputs NDI like Pearl-2, ingesting the NDI becomes an easy and inexpensive process. Install the free NDI Virtual Input software on the computer that’s running your conference software. Then, your switched NDI program appears like any other connected webcam source that you can select using the conference software.
Graphic overlays with alpha channel
With NDI, you don’t need to use the HDMI ports on your production gear to connect an effects computer. All your video sources including your computer generated effects connect through the LAN port. This also lets you offload chroma keying from your production equipment for better performance so you can worry less about chroma effects.
Overflow rooms made easy
Stream NDI output to overflow rooms to accommodate larger audiences without a lot of planning ahead. Quickly and easily connect video from one room to another using the existing LAN connections in the rooms. An inexpensive NDI converter is all you need to convert the NDI video to HDMI that you can feed into a common monitor or room projector.
NDI and NDI|HX FAQ
Is NDI free?
Yes! NDI is free to use. Costs only come from acquiring the hardware or software licenses. But the ability to access NDI is free.
Should I use a hardware or software encoder with NDI?
While software encoders have advantages, the reliability and performance of hardware encoders make a huge difference when working with NDI.
Software encoding needs computers with state-of-the-art GPUs and ample memory to operate efficiently in an NDI workflow. If the computer doesn’t meet these high standards, it may crash or freeze while trying to process the uncompressed video. Software encoding also has been known to add latency to the NDI feeds.
Hardware NDI encoders, like the Pearl-2 or Pearl Mini, were designed explicitly to encode video, obtaining high-quality video and audio with no additional latency or competing programs.
How do I find my NDI sources?
There are a few ways to find your NDI sources. It depends on the devices being used.
If you’re using an NDI camera, start by logging in to the camera’s interface and making sure NDI is enabled. Once enabled, you can check the stream using NDI Studio Monitor.
The NDI discovery server, available in the NDI Software Developer Kit, can help you find your NDI sources as well. The NDI discovery server automatically discovers NDI sources on the network and provides a list of available sources that can be accessed by authorized users without having to manually search for their exact network location. To make sure each user has the appropriate access to NDI devices on the network, the NDI Access Manager app allows network administrators to set permissions and control access.
How do I connect my NDI sources?
If you’re connecting an NDI source to a Pearl, access the device’s admin panel.
In the Inputs menu, click Add input. The Add input page will open with all available NDI resources listed.
If it’s there, you can press Add and your NDI source will be connected to Pearl. If you don’t see it, enter either the “Group name” if it’s been assigned a group or the IP address of the NDI device in the “Extra source IP addresses” field to discover and receive the signal.
How does NDI transport audio?
Although NDI is commonly associated with video sharing, it can transport both video and audio over networks.
NDI can transport up to 16 channels of uncompressed, high-quality, low latency, 48 kHz, 24-bit audio data in the same stream as video in three ways: embedded audio, analog audio, or digital audio.
The most common way of transporting audio via NDI is by using embedded audio. With embedded audio, the audio data is carried within the video signal, making it easier to keep the audio and video in sync and allowing multiple audio channels to be carried within a single NDI stream.
To transport analog audio via NDI, it must be connected to a physical, NDI-enabled device like a mixing console that converts the analog audio to digital.
Transporting digital audio via NDI can be accomplished with the Audio Direct tool. This set of Virtual Studio Tools (VST) audio plugins allows virtually any audio software to select, receive, and generate multichannel audio.
Wrap up
NDI opens up new opportunities to make your live video production workflow easier and more flexible. You can save money on cables and infrastructure by using the existing Ethernet network and gain easy access to a lot more video sources at broadcast quality. There are free plugins and tools to help you start incorporating NDI into your current AV system right away.
If you’re considering a new AV system and want to start taking advantage of the benefits of NDI, an all-in-one video production system like Pearl-2 makes a lot of sense. Pearl-2 accepts multicast and unicast NDI sources, as well as high-efficiency NDI|HX. Pearl Mini also accepts NDI|HX, allowing to work with any NDI|HX source in low-bandwidth settings.
With Pearl-2 or Pearl Mini, you can bring in video and audio from a multitude of different NDI and NDI|HX sources, such as:
- Remote NDI-enabled PTZ cameras
- Any NDI-unaware HDMI/SDI source using a converter or the free NDI Virtual Input software
- Webcams connected to remote computers using the free NDI Connect application
- Output from iOS and Android mobile devices using the NDI Camera app
- Direct input from NDI-compatible software (Zoom, Microsoft Teams, Skype, EasyWorship, etc)
NDI output from Pearl-2 is recognized as a webcam and is compatible with other NDI applications and devices that support webcams as an input, like Skype and many more.
Capture broadcast-quality, low-latency video with more freedom thanks to NDI and Pearl
Pearl-2 and Pearl Mini support NDI, providing users with more options to acquire high-quality video signals from networked cameras.
Unlock your NDI workflows