
Facebook Live is a great way to connect with friends, family, customers, and clients alike. In this post, we’ll walk you through how to stream on Facebook in 2022 through your browser, mobile device, live streaming software, or hardware encoder.
Sheer reach makes Facebook impossible to ignore as a platform for promoting your business or side project. But while there’s been an effort to make out-of-network live video more discoverable, to many users it’s still a social media platform first. If your goal is to reach new audiences, live streaming on YouTube may be more suitable (or, better yet, streaming to multiple platforms). But Facebook can’t be beat when it comes to reaching people you’re already connected with: existing customers or clients, your local community, hobby groups, and so on.
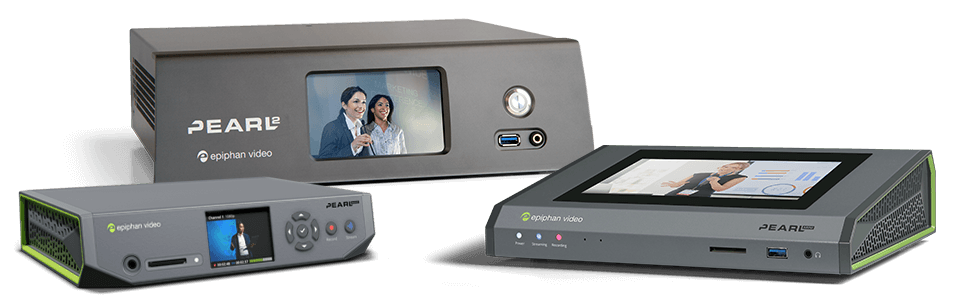
The ultimate solution for Facebook Live streaming
Award-winning Epiphan Pearl Nano, Pearl Mini, and Pearl-2 hardware encoders make it easy to create professional-quality Facebook streams that will engage your viewers and followers.
Discover the power of PearlFour ways to stream on Facebook
You can live stream on Facebook through a:
Which avenue makes the most sense depends on your goals. Web, mobile, or streaming software will probably do the trick for the average social streamer, while gamers will want to opt for streaming software or a hardware encoder. Consider a hardware encoder especially if you’re live streaming for your business. (Businesses should also look into subscription-based business live streaming platforms to access advanced features related to monetization, analytics, and lead generation.)
Note that Facebook imposes a live stream time limit of eight hours whether you’re streaming through a web browser, mobile device, streaming app, or hardware encoder.
A note about 1080p streaming on Facebook Live
Facebook limits most live streams to 720p. Only members of Facebook’s Level Up Program (which targets gaming creators specifically) and managed partners can stream in 1080p. If you’re not using an account or a device with 1080p streaming enabled, Facebook Live will downscale any 1080p signal you send to 720p.
Ultimately, if your goal is to put out the highest quality live stream, YouTube is your platform. YouTube allows not only 1080p live streaming for most users but also 4K.
Still, don’t let Facebook’s lack of universal 1080p live streaming stop you from considering it as a viable live streaming platform. For Facebook specifically, 1080p live streaming is a nice-to-have rather than a need-to-have. Reason being, most Facebook users access the platform on their mobile phones. Those who do use a computer will probably watch videos in a tiny window off to the side while scrolling through their news feeds anyway. Under these circumstances, most Facebook users won’t care whether your live stream is in 720p, 1080p, or 4K – because the difference is imperceptible.
Streaming encoder caveat: RTMP vs. RTMPS
If you’re keen on live streaming through a software application or hardware encoder, make sure the application or device you have your eye on supports streaming through the secure Real-Time Messaging Protocol (RTMPS). Don’t mistake this for the Real-Time Messaging Protocol (RTMP) without the “S”. Many encoders are capable of streaming with RTMP, but not all support RTMPS.
This distinction is important if you’re looking to stream on Facebook. Facebook Live migrated to RTMPS ingest in mid 2019 to better protect users’ live streams from cyber threats. Unlike YouTube, which still allows streaming over RTMP, Facebook is RTMPS only. (Epiphan Pearl Nano, Pearl Mini, and Pearl-2 all support live streaming over RTMP and RTMPS.)
How to stream on Facebook: Web browser

One of the simplest ways to live stream on Facebook is straight from your web browser using a built-in or external USB webcam.
A webcam may be all you need if your only aim is to share your thoughts and engage with your audience in real time. (If you’re in the market for one, be sure to check out our blog on the best webcams for streaming.)
It’s also possible to live stream through your browser with a higher-end camera, such as a digital camcorder or mirrorless camera. To do so, you’ll need a HDMI-to-USB adapter to bring the video signal into your computer. Then Facebook can recognize the camera as if it were a plug-and-play webcam.
Once you’re all set with a camera, here’s how to stream on Facebook through your web browser:
-
- Log in to your Facebook account and access Facebook Live from:
- Your News Feed – Click on the camera icon that says “Live video” below where you’d enter text for a post.
- A Facebook Page you manage – Click on the “Live” button in the “Create” box near the top of the feed.
- Choose whether you’d like to go live now or make an event of it with the “Create live video event” option. If you’re going live now, be sure to toggle “Create a test broadcast before going live” before you hit “Select.”
- Choose “Webcam” under “Select a video source” at the top.
- If prompted, give Facebook and your browser permission to use your camera and microphone. (If you don’t see this pop-up, you may have to go into your browser settings to enable camera/microphone access.)
- Select your camera and microphone from the “Camera controls” box.
- Where it says “Add post details” on the right, customize the stream to your liking: give it a title and description, upload a thumbnail image, decide if you’d like to cross-post to any other Facebook Groups (that you manage, or that allow live video), etc.
- In the “Create live video” pane on the left, confirm where you’d like to post and when (“Now” to start as soon as you hit the “Go live” button, or “Later” to schedule a stream for another time).
- Within the same pane, enter the “Interactivity” submenu and determine if you’d like to use any of the features there (i.e., Polls, Questions, Graphics, Prompts).
- Hit “Go live” or “Schedule live video” at the bottom of the pane on the left side of the screen. (If the button is greyed out and unclickable, confirm that your camera is connected and that you’ve filled out your post details.)
- Log in to your Facebook account and access Facebook Live from:
That’s it. Remember to press “End live video” at the bottom of the pane on the left side of the screen when you’re done.
Facebook will post a replay to your Timeline soon after. This way, viewers who missed it can play back your live video. You can prevent this by clicking the red “Delete video” text on the session end screen. From the same screen, you can also trim your video or make a clip.
To see and manage all your current, scheduled, and past live videos, click the three-by-three cluster of dots in the top nav and then find “Creator Studio” in the drop-down menu (under “Professional”).
How to stream on Facebook: Mobile device

Mobile live streaming is ideal for spur-of-the-moment audience engagement and dynamic events where freedom of movement is key to a compelling webcast.
Facebook live streaming on a mobile device is pretty simple:
-
- Download the Facebook app from the App Store (iOS) or Google Play (Android).
- Open the app, log in to your Facebook account, and access the “Create Post” menu from your news feed or a Facebook Page you manage.
- Select “Live video” from the list of options below the text field.
- Grant any permissions Facebook needs for live streaming (camera, microphone).
- If you accessed Facebook Live from your timeline rather than a page, set your audience (public, friends, certain friends, friends of friends) by clicking on the downward arrow alongside the “To:” field in the top-left corner of the screen.
- Tap the text field at the bottom of the screen and add a description, tag other users, etc.
- Click the hamburger menu at the bottom to add a location to your post, add up to three other users to your stream, and/or set up polls for engagement.
- You can also create and schedule a live event from here by tapping the calendar icon to the right of the “Go Live” button.
- When you’re ready to start, press the blue “Go Live” button.
Now you’re ready for some untethered live streaming. There are a bunch of fun options to explore (filters, masks, etc.), which you can access from the magic wand icon at the top of the screen before the stream starts, or from the ribbon at the bottom while streaming. These are fun to play around with, particularly for social streamers. If you’re not looking to add some visual flair (or chaos) to your live stream, ensure you don’t have any of these options toggled before going live.
When you’re done, hit “Finish” in the bottom-right corner of the screen. Then decide whether you’d like to post a replay to your Timeline. Press “Next” at the bottom of the screen, or hit the bin icon to the right of it to trash the recording. If want to edit the details of your live video replays after the fact, the easiest way is via Facebook’s Creator Studio through your browser.
How to stream on Facebook: Streaming application

Use live streaming software if you want to access extra production features or use multiple cameras or video sources. Open Broadcaster Software (OBS), XSplit, and Wirecast are just a few of your options.
Any streaming software should automatically detect any USB-based cameras connected to your computer. You can also bring non-USB video signal into your computer through a USB capture card. Your streaming software should then recognize the camera as a USB video class (UVC) device.
The exact process of live streaming on Facebook with a software encoder will depend on the software you’re using, but it should look a little something like this:
-
- Download and install your preferred streaming software.
- Log in to your Facebook account and access Facebook Live from:
- Your News Feed – Click on the camera icon that says “Live video” below where you’d enter text for a post.
- A Facebook Page you manage – Click on the “Live” button in the “Create” box near the top of the feed.
- Choose whether you’d like to go live now or make an event of it with the “Create live video event” option. If you’re going live now, be sure to toggle “Create a test broadcast before going live” before you hit “Select.”
- Ensure “Streaming software” is highlighted under “Select a video source” at the top.
- In the “Streaming software setup” box, copy the stream key to your clipboard. (Keep this string of characters private.)
- Open your streaming software and paste the “Stream key” — and, if required, the “Server URL” — from Facebook into the appropriate field. Refer to the user documentation for the software you’re using if you’re not sure where to look.
- If Server URL is required – On Facebook, open the “Advanced Settings” menu under the stream key to find the Server URL. You can also establish a backup stream here using the toggle and then the separate stream key that appears.
- Start the stream via your streaming software. Back on Facebook, check that the live video preview looks good.
- On Facebook, where it says “Add post details” on the right, customize the stream to your liking. Give it a title and description, upload a thumbnail image, decide if you’d like to cross-post to any other Facebook Groups, etc.
- In the “Create live video” pane on the left, confirm where you’d like to post and when (“Now” to start as soon as you hit the “Go live” button, or “Later” to schedule a stream for another time).
- From the same pane, enter the “Interactivity” submenu and determine if you’d like to use any of the features there (i.e., Polls, Questions, Graphics, Prompts).
- Hit “Go live” or “Schedule live video” at the bottom of the pane on the left side of the screen. (If the button is greyed out and unclickable, confirm that your streaming software is connected and post details are filled out.)
- If you scheduled your Facebook live stream for later, open your streaming software before the set time and turn on streaming.
End your stream through your streaming app once the show’s over. A replay will appear on your Timeline soon after for anyone who missed your live stream. You can review and manage all your live video replays through Facebook’s Creator Studio.
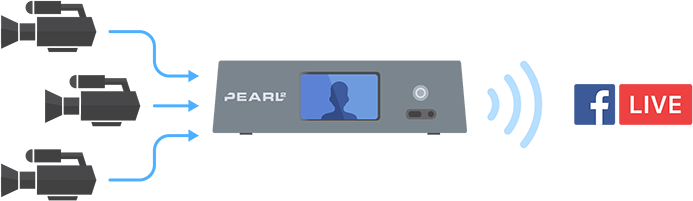
How to stream on Facebook: Hardware encoder
What’s a hardware encoder?
A hardware encoder is an appliance purpose-built for video streaming, capturing, recording – or all three.
Running your Facebook live stream through a hardware encoder offers a number of advantages over using a web browser or mobile device. These benefits make hardware encoders the best option for businesses shooting high-stakes events (e.g., concerts, sports matchups) and anyone who wants to elevate the look of their live streams.
Essentially, hardware encoders make it easier to produce polished, multi-camera live streams that are sure to impress and engage your audience. How? Flexibility is one of the major benefits. A lot of hardware encoders include multiple inputs for video and professional audio, letting you connect and stream HDMI and SDI cameras, laptops, tablets, XLR or TRS microphones, and more. And as dedicated devices, hardware encoders often perform better than software encoders. That’s because software encoders have to share resources with your computer’s operating system and any active processes. (Check out our post on the advantages of hardware vs. software encoding if you’d like to learn more.
There’s a wide range of live streaming hardware on the market, which makes it impossible to write a definitive guide to making hardware encoders work with Facebook. For that reason, we’ll walk through how to stream on Facebook using our Pearl encoder hardware. If you’re not using a Pearl system, we encourage you to review the user documentation for your appliance or reach out to the manufacturer.
Pearl Nano, Pearl Mini, or Pearl-2
For an in-depth look at how to configure Pearl Nano, Pearl Mini, or Pearl-2 for optimal live streaming, check out our live stream beginner’s survival guide. Also see Facebook’s video format guidelines for live streaming.
Here’s how to live stream on Facebook using an Epiphan Pearl system:
- Log in to your Facebook account and access Facebook Live from:
- Your News Feed – Click on the camera icon that says “Live video” below where you’d enter text for a post.
- A Facebook Page you manage – Click on the “Live” button in the “Create” box near the top of the feed.
- Choose whether you’d like to go live now or make an event of it with the “Create live video event” option. If you’re going live now, be sure to toggle “Create a test broadcast before going live” before you hit “Select.”
- Ensure “Streaming software” is highlighted under “Select a video source” at the top.
- In the “Streaming software setup” box, copy the stream key to your clipboard. (Keep this string of characters private.)
- Log in to the Pearl web UI. In the side nav, select “Streaming” under the channel you want to live stream.
- Paste your “Stream Key” from Facebook into the “Stream name” field.
- Click “Apply.”
- Back on Facebook, click open the “Advanced Settings” menu under the stream key to find the Server URL. Copy it. You can also establish a backup stream here using the toggle and then the separate stream key that appears.
- Flip back to the Pearl web UI and paste the Server URL in the “URL” field under the channel you want to live stream.

- Press “Start” in the top-right corner of the Pearl web UI streaming menu. Return to Facebook and ensure the stream preview looks good.
- In the “Create live video” pane on the left, confirm where you’d like to post and when (“Now” to start as soon as you hit the “Go live” button, or “Later” to schedule a stream for another time).
- From the same pane, enter the “Interactivity” submenu and determine if you’d like to use any of the features there (i.e., Polls, Questions, Graphics, Prompts).
- Hit “Go live” or “Schedule live video” at the bottom of the pane on the left side of the screen. (If the button is greyed out and unclickable, be sure that your encoder is connected and that the post details are filled out.)
- If you scheduled your Facebook live stream for later, start streaming on your appliance before the set time.
You’re live on Facebook! Select “Stop” on the Pearl web UI when your stream is over.
Live stream on Facebook like a pro
Learn more about how Epiphan Pearl Nano, Pearl Mini, and Pearl-2 hardware encoders can help you take your live streaming to the next level.
First published on November 26, 2019, this post was updated on July 26, 2022, to reflect new information and changes in the Facebook desktop and mobile UIs for live video.
Great article! Thanks for sharing!
Here you’ll find the best microphones for streaming: https://micspeech.com/microphones-pc-gaming-streaming/