Overflow rooms are simple in concept: they give people somewhere to watch your event when your main venue is at max capacity. What’s not so simple is figuring out how to stream video from one room to another. Questions abound:
- What equipment do I need?
- What kind of cable should I use?
- Should I even use a cable, or would it be better to stream over a network?
We have answers – read on.
Overflow rooms: A contingency plan for your live event
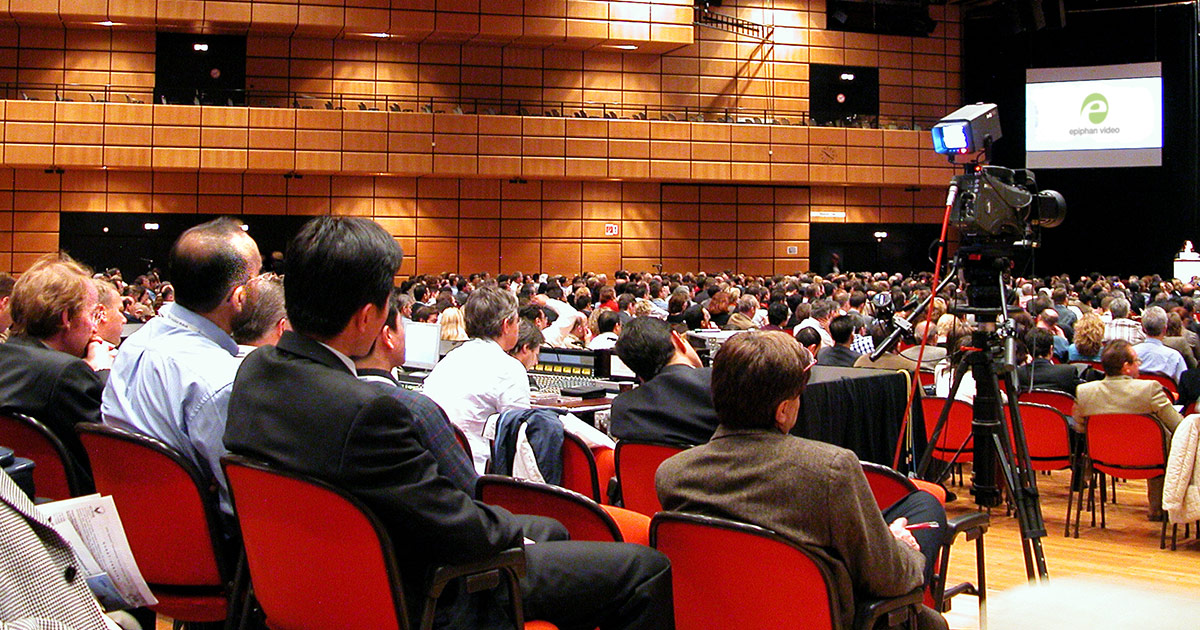
The more the merrier, right? Well, not always. Anyone who treks out to your event only to be turned away at the door because your venue is full certainly won’t be merry. Disgruntle enough people this way and it could hurt your brand – and if you’re charging admission, there goes potential profit. But usher surplus attendees into a side room equipped with comfortable seating and a TV displaying a video feed of the main stage and all will be well.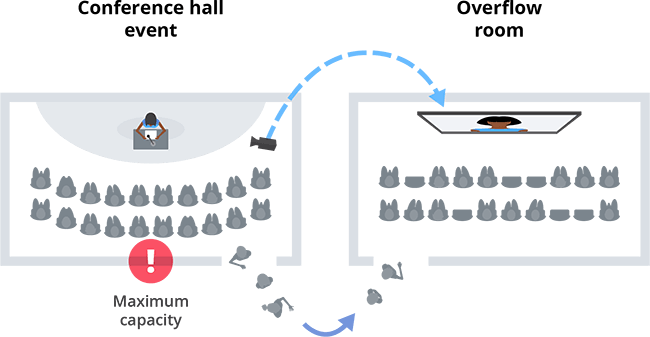 A jam-packed event is just one scenario where an overflow room video setup can save the day. Here’s another: a mother is at a sermon when her baby starts to cry. She doesn’t want to miss any of the preacher’s words, but she also doesn’t want her wailing child to diminish anyone else’s experience. Luckily, she can duck into the church “cry room”, which the church organizers set up for just this kind of predicament. Same idea, different purpose. Thanks to this church “overflow room” video setup, the mother can still watch the sermon while her distressed baby cools down.
Many courthouses set up overflow rooms for trials that attract a lot of public attention, and press rooms to give media a place to watch cases where journalists are barred from the courtroom.
Whatever your event looks like, having one or more overflow room video setups is a great contingency plan.
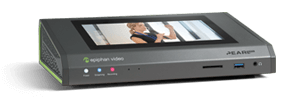
Looking for the perfect overflow room hardware encoder?
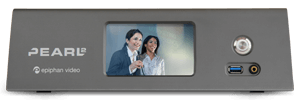
Epiphan Pearl-2 all-in-one video production systems support all overflow room video setups: HDMI, RTSP, UPnP/DLNA, CDN, and NDI.
Get the detailsHow to live stream video from one room to another
There are a handful of ways to stream video to an overflow room. We’ll walk through five:
- High-Definition Multimedia Interface (HDMI) cables
- Real Time Streaming Protocol (RTSP)
- Universal Plug and Play (UPnP) / Digital Living Network Alliance (DLNA) protocol
- Network Device Interface (NDI)
- A content delivery network (CDN) like YouTube or Facebook
Which is the right overflow room video setup for your event depends on a few things:
- Proximity – How close is your overflow room to your main venue? Are there obstructions between the two locations (e.g., a floor or wall)?
- Latency – What degree of latency is acceptable? (This will depend on the nature of your live event.)
- Networking – Do you have access to the venue’s local area network? If so, how much control do you have over that network?
Keep in mind these three factors as you weigh your options.
Watch the Live @ Epiphan hosts go over four overflow room video setups – HDMI, RTSP, UPnP, and NDI – and the method of last resort: via a CDN.
1. HDMI cables
One way to configure an overflow room is to run a High-Definition Multimedia Interface (HDMI) cable from your video source in the main event space to a display monitor in the overflow room.
Pros
HDMI is the most straightforward overflow room video setup. Throw in an HDMI splitter and additional cables and you can even send one signal to multiple displays. (Note that HDMI cables transmit a digital signal, so the brand you use won’t affect picture quality.)
Using an HDMI cable is your best bet if you don’t have access to a local network. Because the video feed isn’t coming in over a network, event attendees in your overflow room will enjoy zero latency.
Cons
HDMI is an excellent option – when it’s feasible. Maybe your overflow room is on the other side of the building or on another floor altogether. If this is your situation, the next best thing is to stream to your overflow room through the venue’s local area network.
HDMI cables can only send signals over so many feet – up to 50 if it’s a standard copper-based cable. Fiber HDMI cables can transfer signals up to 150 feet, but they’re pricier than standard HDMI cables (which are already more expensive than Ethernet cables) and also incredibly fragile. Twist or snag one and you’ve just ruined your expensive cable.
Your HDMI cable can pose a tripping hazard. Someone could get hurt or pull down a camera, disconnecting the overflow room video feed and grinding your event to a halt. Avoid these outcomes by piping the cable through a conduit or binding it to the floor with gaffer tape.
A word of advice: if you do opt for fiber HDMI cables, note that these are directional. One end is for the video source, the other is for the display. Reverse these and the cable won’t work – a real pain if you’ve already routed or taped down the cable.
Concerned about cost? Extend HDMI over Ethernet.
HDMI cables are pricey; Ethernet cables aren’t. If you’re keen to use HDMI for your overflow room to minimize latency, consider purchasing an HDMI extender that works over Ethernet. The one from Monoprice claims to work up to 98 feet, but we were able to use it to extend an HDMI signal up to 150!
Ethernet cables are also far more durable than fiber HDMI cables. Combined with lower cost, this is an excellent option for an HDMI overflow room video setup.
Note that our Monoprice pick is suitable for video signals up to 1080p. Transmitting a 4K signal this way would require a better Ethernet cable (CAT 6 or CAT7) and likely an externally powered extender rather than a passive one.
Bottom line
If proximity isn’t a problem and you can eliminate tripping hazards, an HDMI overflow room video setup is ideal because it means zero latency. But it’s a no-go if your overflow room is far from your main venue.
2. RTSP
If your overflow room location precludes HDMI and you have access and control over the venue’s network, one option is the Real Time Streaming Protocol (RTSP).
Pros
RTSP is a standard protocol, so many encoders – both software and hardware – support it. This gives you the flexibility to stream to your overflow room using a computer, laptop, or dedicated hardware device.
This protocol is also a good choice if latency is a concern since many decoders include manual buffer controls.
Cons
Of course, any time you stream video over a network there’s going to be some latency. Try setting buffering to zero and your stream will suffer from dropped packets and other effects, making for unpleasant viewing.
Setup is also more complex since streaming from one room to another via RTSP requires local area network access. It’s certainly not as simple as plugging in a wire.
If your live event is in a rented venue, the need for network access and control may prove problematic. The resident IT technician won’t hand that over readily. A network administrator may be willing to make these changes by request, but this is never guaranteed (and seldom free).
Playback is another challenge since RTSP is designed for unicast streaming. Essentially, this means a viewer must manually connect to the host encoder to start the video feed. You can get around this by starting the video feed early or designating someone to hit “play” once the show starts.
Bottom line
RTSP is a widely-supported protocol and performs with minimal latency thanks to manual buffer controls. Access and control of the venue’s local area network is a must, though.
3. UPnP / DLNA
Universal Plug and Play (UPnP), also recognized as Digital Living Network Alliance (DLNA) by some devices, is another way to live stream to your overflow room over a local area network.
Pros
What sets UPnP/DLNA apart from RTSP are its automatic stream discovery and playback capabilities. These two features make this protocol more seamless and user friendly. If your overflow room video setup includes a smart TV that supports UPnP/DLNA, the process might not be any different from changing inputs with the remote.
A wide range of hardware media players support UPnP/DLNA, including many smart TV models and mobile apps. UPnP/DLNA is also great if video feed quality is important, since it’s geared for quality versus low-latency.
Cons
Where UPnP/DLNA falls short versus RTSP is latency: it’s significantly higher. A lot of this is because many devices don’t let you control buffering. Buffer times can range anywhere from 500 milliseconds to a full second, making this protocol unsuitable if minimum latency is a must.
Like RTSP, this protocol requires full control to cross networks; it won’t jump across subnets natively. While auto-discovery simplifies things, it may complicate the underlying network configuration. Whereas with RTSP you really only need to forward one part, with UPnP/DLNA you’ll need to forward ports for auto discovery and the stream itself.
Bottom line
UPnP/DLNA offers better quality with higher latency than some other streaming protocols. Automatic stream discovery and playback make this route a good choice if ease of use is more important to you than latency.
Versatile and reliable encoder hardware for overflow rooms
The ultra-portal Epiphan Pearl Mini supports HDMI, RTSP, UPnP/DLNA, and CDN overflow room video setups.
Get the details4. NDI
Network Device Interface (NDI) is a newer protocol that offers significant advantages over RTSP and UPnP/DLNA. It’s worth a look if you have access to the venue’s network and encoder hardware that supports NDI.
Pros
On the surface, NDI offers the whole package: ease of use, high-quality, and minimal latency. And NDI’s newness is no cause for concern: with a growing ecosystem of compatible equipment – from hardware encoders to PTZ cameras – the protocol’s future looks bright.
NDI works over Ethernet cabling, which is affordable even beyond 100 feet. Like UPnP/DLNA, some devices that support NDI feature user-friendly automatic stream discovery.
Cons
The considerable benefits of NDI aren’t without cost. An NDI-powered overflow room video setup can get expensive depending on the equipment you use. You’ll need an NDI decoder box and NDI-compatible equipment at least.
NDI can also be a bandwidth hog. It’s best used on its own dedicated network or, at least, with other network activity kept to a minimum. And as with RTSP and UPnP/DLNA, you’ll need full network control to properly route everything.
Go easy on the bandwidth: NDI vs. NDI HX
Technically, NDI comes in two flavors: NDI and NDI HX. The “HX” stands for “high-efficiency.”
NDI uses light compression that offers high quality and low latency at the cost of considerable bandwidth. If you’re streaming from one room to another over shared infrastructure, look into NDI HX. This form uses standard H.264 compression, making it the better option if bandwidth usage is a concern. There is a trade-off: you may notice higher latency using NDI HX due to this compression. You’ll need to compare performance between the two to determine if this difference matters.
Bottom line
NDI is a top-tier protocol that offers high quality and low latency and is easy to use, but it can be expensive. Consider this route if you have the resources and ample bandwidth.
5. A CDN like YouTube or Facebook
HDMI cabling isn’t feasible and you don’t have access to the venue’s local network? Don’t abandon your overflow room hopes just yet; you can stream out to a content delivery network (CDN) and display the video feed in your overflow room.
Pros
If you’re in a bind, this overflow room video setup could very well save the day. Setup is simple: just live stream out to a platform like YouTube or Facebook and display the video feed on the monitor in your overflow room. There’s less network complexity overall since you don’t need access or control of the local area network.
Using a CDN for your overflow room can also help you to reach a wider audience since you can make your content available outside your venue as well.
Cons
While streaming video to an overflow room via a CDN is an option, it’s far from ideal. There are a number of cons that effectively make this a method of last resort. Say your event is imminent, there’s a line out the door and you haven’t set up an overflow room beforehand. This option may be a lifesaver – but if time is on your side, we strongly recommend you investigate our other overflow room video setups first.
For one thing, streaming to an overflow room via a CDN can introduce considerable latency. How much is unpredictable: it could be 15 seconds, 30 seconds – even a full minute. This could be a deal breaker depending on the nature of your event. Much of the allure of live events is the fact that they’re live. If the people in your overflow room are a full minute behind, hearing cheers from the main venue that’s out of sync with what they’re seeing on screen, this could significantly diminish their enjoyment.
Internet connectivity will also lower the quality of the video feed in your overflow room and use up lots of bandwidth. If you’re using LTE in a shared venue, there may be multiple people doing the same, which can introduce buffering and other performance issues.
Using a CDN does make it easy to share your content outside your venue, but this also introduces security concerns. If your event includes sensitive information you don’t want made public (e.g., a court case), avoid this route.
Bottom line
A lifesaver in a pinch, but high and variable latency make this a method of last resort.
Simplify your overflow room video setup
Epiphan Pearl-2 and Pearl Mini hardware encoders are reliable, versatile, easy to use – and perfect for any overflow room setup. Pearl Mini supports HDMI, RTSP, and UPnP/DLNA; Pearl-2 supports all three and NDI as well. Plus, Pearl systems are ideal for live event production, featuring multiple inputs for video and professional audio, a built-in touch screen, and more.
Learn more about how Pearl-2 and Pearl Mini encoder hardware can help you produce successful and engaging live events. Reach out to our product specialists if you have any questions.