
Webcaster X1 for Facebook Live user guide
Quick start
Your Webcaster X1 for Facebook Live is pre-configured with default settings to live stream to your Facebook Timeline. Connect an HDMI camera or any other HDMI source to your Webcaster X1 to share it live!

To configure and stream to your Facebook Timeline you need:
- A Facebook account
- Your HDMI camera to stream
- Your Webcaster X1 for Facebook Live
-
An Internet connection with 4 Mb/s uplink
This example shows you how to stream an HDMI camera, but you can use any other HDMI source you like (camera, computer, video mixer, etc.), as long as your source (or media) does not have High-bandwidth Digital Content Protection (HDCP).
By default, you only need to pair Webcaster X1 for Facebook Live once with your Facebook account. After that pairing, Webcaster X1 for Facebook Live automatically starts streaming to your Facebook Page every time you turn it on. You can change this behavior by turning off auto-login or turning off auto-streaming.
- Connect the supplied power cable to Webcaster X1.
- Connect your HDMI camera to the HDMI IN port on the back of Webcaster X1.

- Connect your Ethernet cable to the Ethernet port on the back of Webcaster X1.

- Turn on Webcaster X1 using the toggle button at the back; Webcaster X1 executes its boot-up sequence.

- Authorize Webcaster X1 for Facebook Live to your Facebook account (live stream starts as soon as this is done):
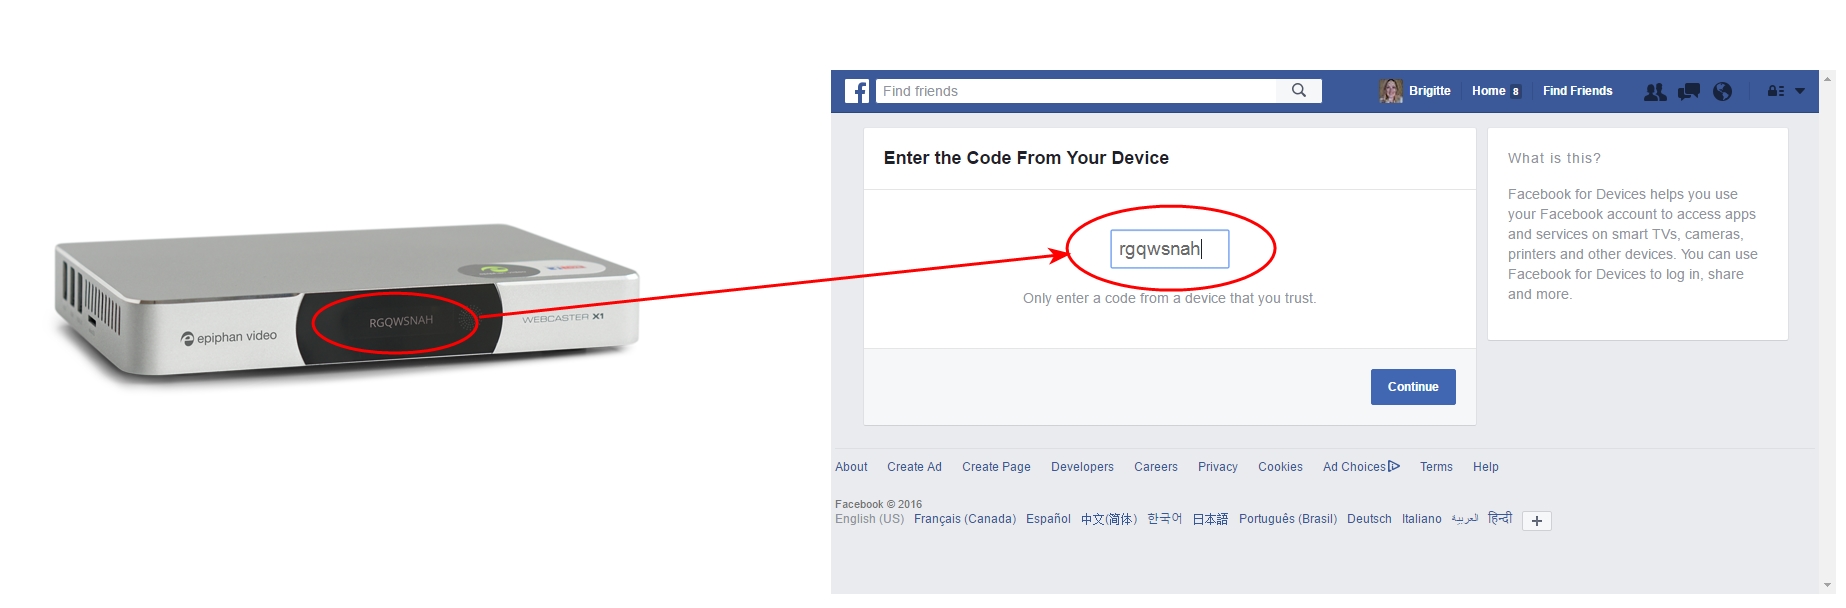
- Ensure your Webcaster X1 is connected to the Internet; a device code appears on Webcaster X1's front screen.
- Open a web browser on your computer, tablet or mobile device.
- Go to facebook.com/device
- If needed, login to your Facebook account.
- Look at the device code on the Webcaster X1 screen, type that code into the device code box on your Facebook device pairing page.
- Click Continue, then OK and OK again in Facebook to authorize Webcaster X1 to post to your Facebook account and associated pages.
- Note: If you have previously authorized this Webcaster X1 for Facebook Live with your Facebook account, there are fewer Facebook messages to click through, simply click OK to confirm that you have already authorized your Webcaster X1.
- You're streaming live! The screen updates to show how long you have been streaming.

- (OPTIONAL) From your computer, tablet or mobile device, log on to your Facebook account and personalize the description and set privacy settings for your stream.
- When your live broadcast is complete, turn off Webcaster X1. (It may take a couple moments for Facebook to realize the stream has ended.)

If your last Webcaster X1 for Facebook Live broadcast was to something other than your Timeline (e.g. to a Page, an Event or a Group) you must re-configure Webcaster X1 to stream to your Timeline. See How to live stream to your Facebook Timeline.
You can also use Webcaster X1 with an HDMI display and USB mouse for additional configuration and viewer engagement options. See How to live stream to your Facebook Timeline for more details.