User Guide
Setting video output resolution and frame rate
You can change your LUMiO 12x's output signal resolution and frame rate using the blue buttons located at the very bottom of your remote control.
Using the remote control, you can set your output resolution and frame rate to the following settings:
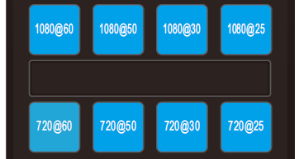
| 1080p, 60 fps | 1080p, 30 fps | 720p, 60 fps | 720p, 30 fps |
| 1080p, 50 fps | 1080p, 25 fps | 720p, 50 fps | 720p, 25 fps |
Additional output resolution and frame rate configurations are available and are set using the OSD menu. See Understanding OSD menu settings for details.
To set the video output resolution and frame rate:
- Ensure that your LUMiO 12x is powered on (the front indicator light should be solid blue – see Front, back and bottom views for exact location of indicator lights).
- Press the CAM button you mapped to your LUMiO 12x in Setting up your remote control (CAM1–CAM4) to sync your remote with your LUMiO 12x.
- Press and hold the desired video output button until the power indicator light flashes purple (~4 seconds); the new frame rate and resolution is set.