Capture menu
The following is a breakdown of the Capture menu in the Epiphan Capture Tool.
The Capture menu lets you start, stop and pause capturing/recording. It also lets you select the DVI2USB 3.0 device that this instance of the application works with, when you have more than one Epiphan video grabber
The Capture menu has these options:
| Menu item | Shortcut | Description |
|---|---|---|
|
Start Recording |
Ctrl+R | Start or stop recording your captured stream as a video or a series of captured images. See Record a video and Record as a series of images. |
|
Pause Capture |
Ctrl+U | Pause or unpause capture and recording (the last frame will stay visible on the screen). See Pause video capture. |
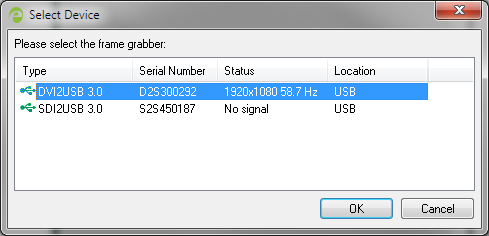
| Select Device... | Ctrl+N |
Use when you have more than one Epiphan Pro Series Video Grabber Choose the device you want to use in this instance of the Epiphan Capture Tool and click OK. |
| Connect Network Device... |
Used with Epiphan's legacy VGA2Ethernet device, outside the scope of this product documentation. | |
| Disconnect Network Device | ||
| Recent Network Devices | ||
| Enable Audio Capture (Disable Audio Capture) |
Ctrl+A | When enabled, audio captured by the device, or by the configured external audio source is included in the recording. See Configure audio. |
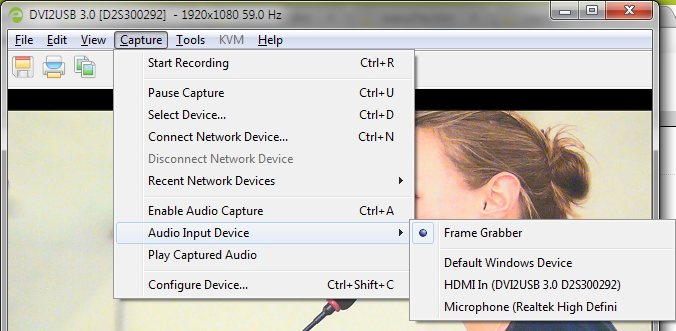
| Audio Input Device | Opens a sub-menu to let you choose the input device used for audio capture. See Configure audio for more details. | |
| Play Captured Audio |
When enabled, captured audio is played on the video capture workstation (e.g. through the workstation's speakers or attached headphones). Use as a confidence monitor to check the audio you're recording, or to share the audio you're capturing with local viewers. Enable Audio Capture must be enabled for the Play Captured Audio settings to work. |
|
| Configure Device... | Ctrl+Shift+C | Opens a dialog to let you configure specific capture adjustments for the video grabber. See Configure your device. |