
Set publish destination
By default, when streaming to Facebook, Webcaster X2 sends your stream to your Timeline. However you can also broadcast to a Facebook Page or Group.
- Webcaster X2 can publish to your Facebook Timeline (default) or to a Facebook Page or Group.
- You choose the publish destination before you start your stream.
- Note: Your Group, Event or Page must be created before you pair Webcaster X2 with your Facebook account, else it is not listed as a possible publish destination.
- Webcaster X2 remembers your selection and uses it again the next time you stream (unless Webcaster X2 is no longer paired with your Facebook account).
To set the publish destination for your live stream you need:
- Your Webcaster X2
- An HDMI display (that supports 1080p video) connected to your Webcaster X2
- A USB mouse connected to your Webcaster X2)
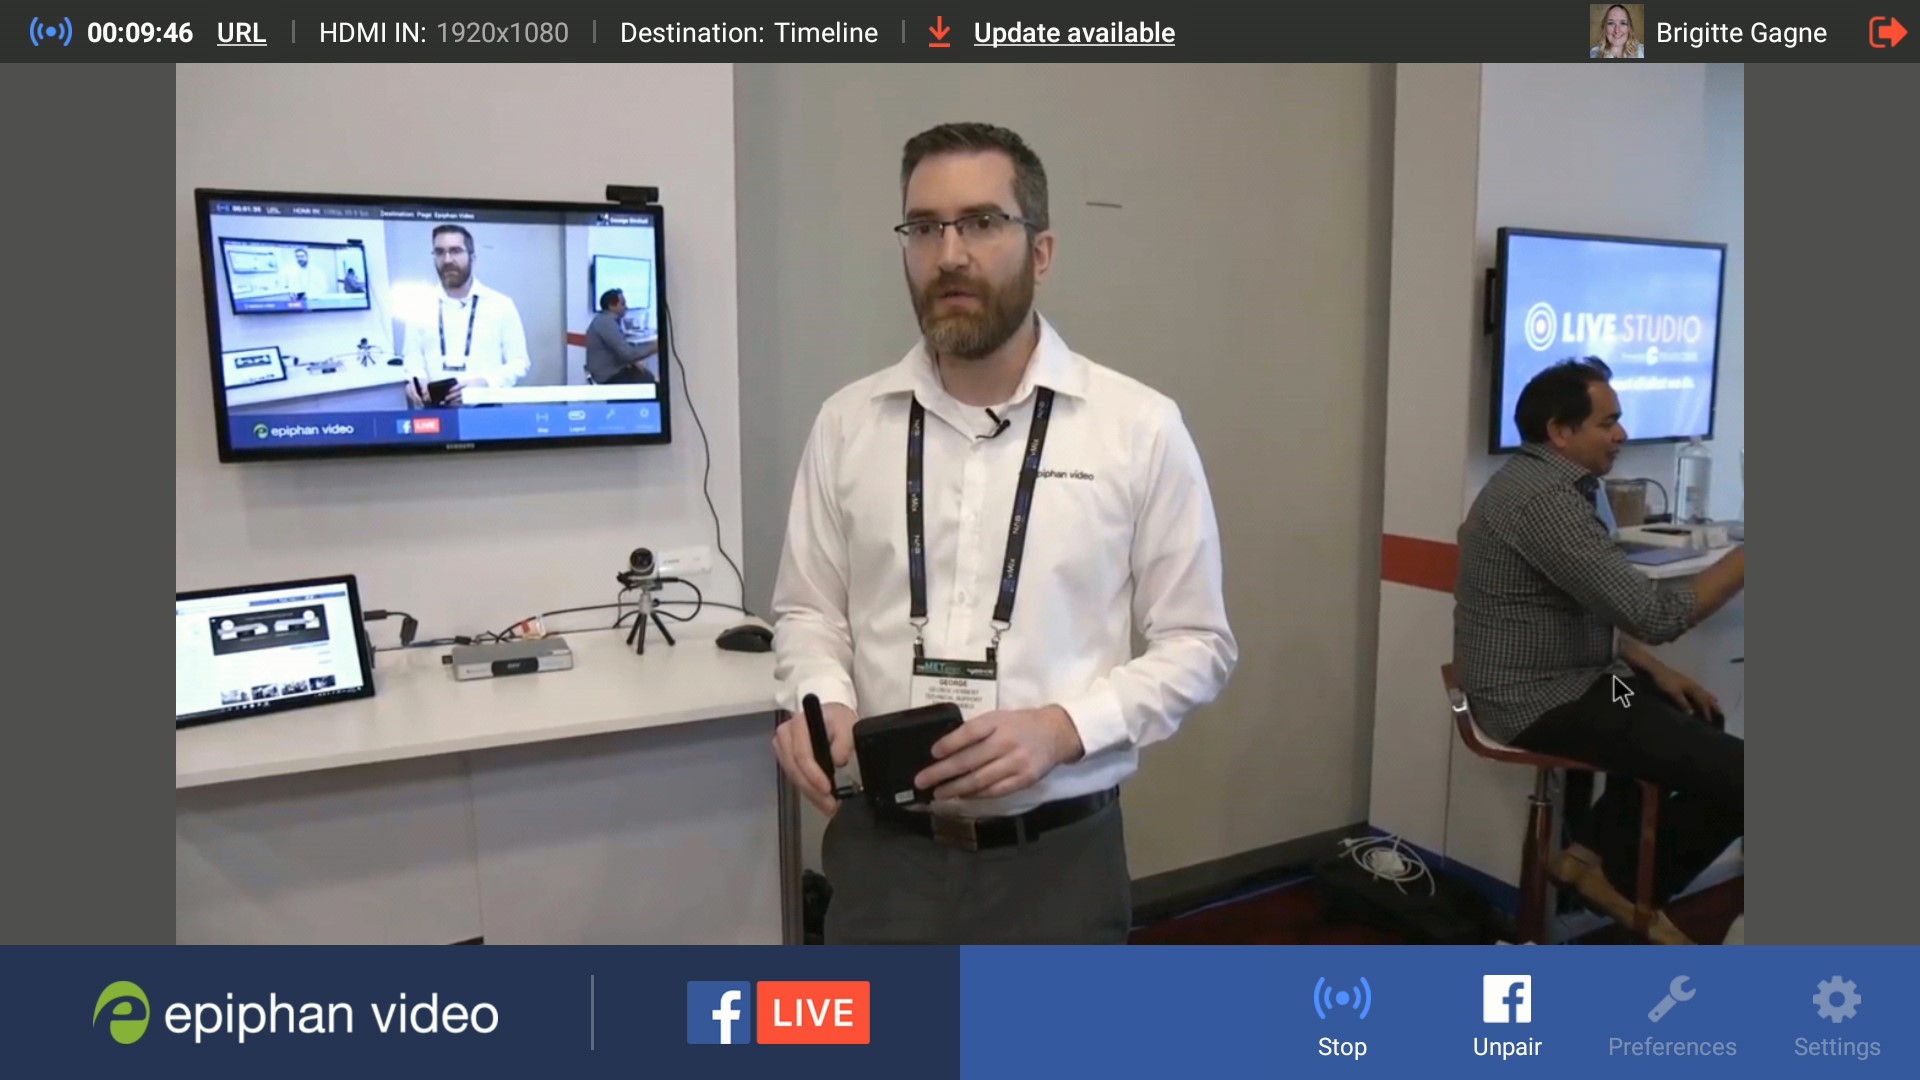
Your current publish destination is shown in the info bar at the top of your HDMI display. For example, this shows streaming to a Timeline.
| Stream to Timeline |
|---|
|
Show me!
- If Webcaster X2 says is paired with your Facebook account, make sure you are not streaming.
- If not already on the Preferences page, click the Preferences icon
 at the lower right corner of the screen; the preferences screen opens..
 - Scroll to the bottom of the list and ensure Start stream automatically after pairing is not checked..
- If Webcaster X2 is not yet paired with your Facebook account, perform these additional three steps:
- Click the Right mouse button to return to the main screen.
- Pair Webcaster X2 with your Facebook account (Pair and unpair Facebook).
- Click the Preferences icon at the lower right corner of the screen; the preferences screen opens.
- Click Publish destination in the Facebook details section; Webcaster X2 asks Facebook for a list of places to which you can publish and displays these in the Publishing destinations settings box.
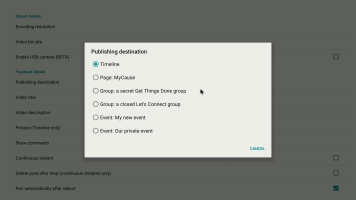
- Select the destination you want to stream to.
- Right click to exit the Preferences.
Note: If automatic streaming after pairing is enabled, you are unable to select a new publish destination.

Note: If your Facebook Page or Group was created or joined after you paired Webcaster X2 with your Facebook account, it may take a few moments to appear in the list. Click Cancel and return to the Publish Destination option in a minute or two.