Quick start
Use this quick start to get up and running quickly with your DVI2PCIe Duo on Windows capture workstations. You can also use these procedures to install firmware updates. For Linux systems, see DVI2PCIe Duo on Linux.
Before you get started:
- Have all required cables, components, and adapters (if needed), see What's in the box?.
- Ensure your capture workstation meets the System requirements.
- Have a video source, such as a camera, computer, tablet, or phone and ensure that the content isn't HDCP protected. For Windows systems, ensure there's audio and video on the same source cable
- Internet access to download drivers from the Epiphan website.
- Administrator privileges for your capture workstation.
- (Optional) Have already installed the video capture card in your capture workstation, see Install the capture card.
Install the video grabber drivers
We recommend installing the video grabber drivers after installing the capture card; however, you can install the drivers before you physically Install the capture card in the capture workstation.
- Log into your capture workstation using an account with administrator privileges. If you're workstation is on a domain, ensure that you log into the local administrator account on the workstation and not an account on the domain.
- Using a web browser on your capture workstation, go to your video grabber's
For Windows 10 operating systems, choose either the 64-bit or 32-bit driver as required for your particular operating system. If you don't know which driver version you need, see this Microsoft knowledge base article for help https://support.microsoft.com/en-us/kb/827218.
- When the download is complete, open the download destination folder.
- (Optional) Close any unnecessary windows and shut down programs that are running on the workstation. Note that overly restrictive security software can block the installation of device drivers. In that case, consult your system administrator for the procedures to allow the driver update on the capture workstation.
- Extract all driver files and install the drivers and the Epiphan Capture Tool on your Windows workstation.
- Right-click on the .zip file and Extract All.
- From the extracted files folder, right-click on setup.exe and select Run as administrator.
- Click Install and follow the prompts to install the drivers. The Epiphan Capture Tool is installed at the same time as the drivers.
Installation may fail for computers inheriting security permissions from a Windows domain, even when the installer is run as administrator. In that case, contact your local IT team for assistance with installation.
- Restart the capture workstation after the installation completes.
Install the video codec for Windows and set video compression options
For Windows operating systems, we recommend installing the K-Lite (Mega) video codec pack. This codec pack adds video compression options for recording video using the Epiphan Capture Tool. Recording video without compression consumes a large amount of disk space, especially when recording at higher resolutions and isn't recommended. We've tested and found that codec x264vfw in this codec pack is the better choice for use with your video grabber.
To install the K-Lite (Mega) video codec pack on your Windows capture workstation:
- Log into your capture workstation using an account with administrator privileges and launch the Epiphan Capture Tool.
- From the Tools menu, select Options... and ensure that Display format on the Display tab is set to RGB 24 bits per pixel (default).
- Using a web browser on your capture workstation, download the K-Lite (Mega version) video codec pack (32-bit and 64-bit versions are included):
- Locate the executable file that was downloaded, then double-click the file and follow the prompts to install the K-Lite (Mega) codec pack for your Window's version. Use the Normal installation mode and accept the default options. Click Finish when the codec pack has finished installing.
- From the Tools menu in the Epiphan Capture Tool, select Options... and click the Recording tab.
- From the Recording tab, set the Record as field to Video and click Select Codec.
- In the Compressor drop down, select x264vfw - H.264/MPEG-4 AVC compression and click OK.
- Click Apply to save your changes. Click OK until you've exited all the configuration menus.

For most common installations, use the default settings for the video compression codec. You are not required to configure the video compression parameters.
Connect the video source
Now that the drivers and video codec are installed, you're ready to begin capturing!
If you haven't already installed your capture card, see Install the capture card.
You can connect a DVI source directly to the capture card's DVI In port using a standard DVI cable. To connect a VGA source, use a VGA to DVI cable. To connect an HDMI source, use the HDMI to DVI adapter (provided).
Optionally, you can use a high-quality VGA or DVI splitter to split the VGA or DVI signal between an external monitor and the frame grabber in order to control the output signal quality.
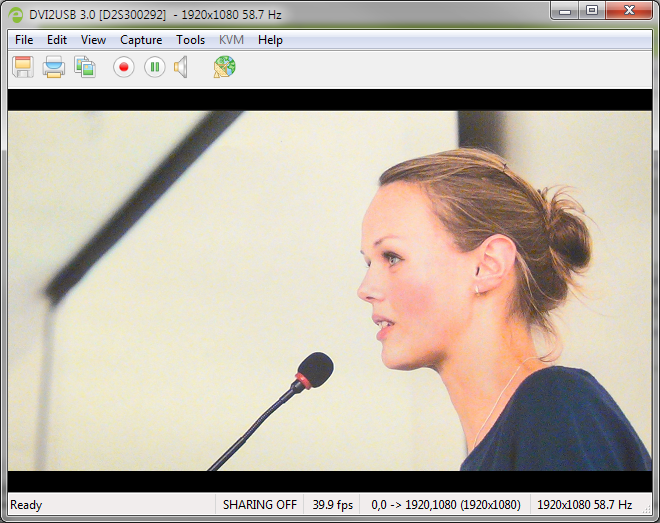
Capture video using the Epiphan Capture Tool
If needed, read Epiphan Capture Tool for information on how to launch the capture tool.
You can also use third-party capture applications to capture video from DVI2PCIe Duo. Consult the documentation that came with the third-party capture application to select the device.
- Start the Epiphan Capture Tool; your video source is immediately detected (if you see a No Signal message, disconnect and reconnect the cables to make sure they are all seated correctly).
- (Windows only) If you want to capture audio from the video grabber, click the Enable Audio button in the toolbar; it's style changes to show audio is enabled. (If your source doesn't have audio or if you want to use a different audio input method, select Capture » Audio Input Device to select your audio source.)

- Use the red record button to start recording. On Windows, the Save dialog opens. Specify the filename and folder to save your file.

- When you are done capturing, use the pause (Windows only) or stop buttons to pause or stop recording.

- Use your operating system's file browser (Windows Explorer or Finder) to find your saved capture file.
Windows only: HDMI audio capture may fail if your device has an old or incorrect EDID loaded. See Update device EDID.
What’s next?
Now that you have done a basic recording, you might like to know more about the following topics:
