
Set static IP address
Webcaster X2 generally uses DHCP to acquire an IP address on your network. From time to time, you may find you need to assign Webcaster X2 a static IP address instead.
- An IP address identifies your device on your network. It can be set in one of two ways, either dynamically allocated from your router (using DHCP) or statically set by you to a specific value.
- You may need to use a static IP address because you don't have a DHCP server, or because your device needs to be in a specific subnet on your network to have access to Facebook and YouTube.
- If you don't know what static IP address to use, speak with your network administrator.
To assign a static IP address you need:
- Your Webcaster X2
- An HDMI display (that supports 1080p video) connected to your Webcaster X2
- A USB mouse connected to your Webcaster X2
- (OPTIONAL) a USB keyboard connected to your Webcaster X2
Show me!
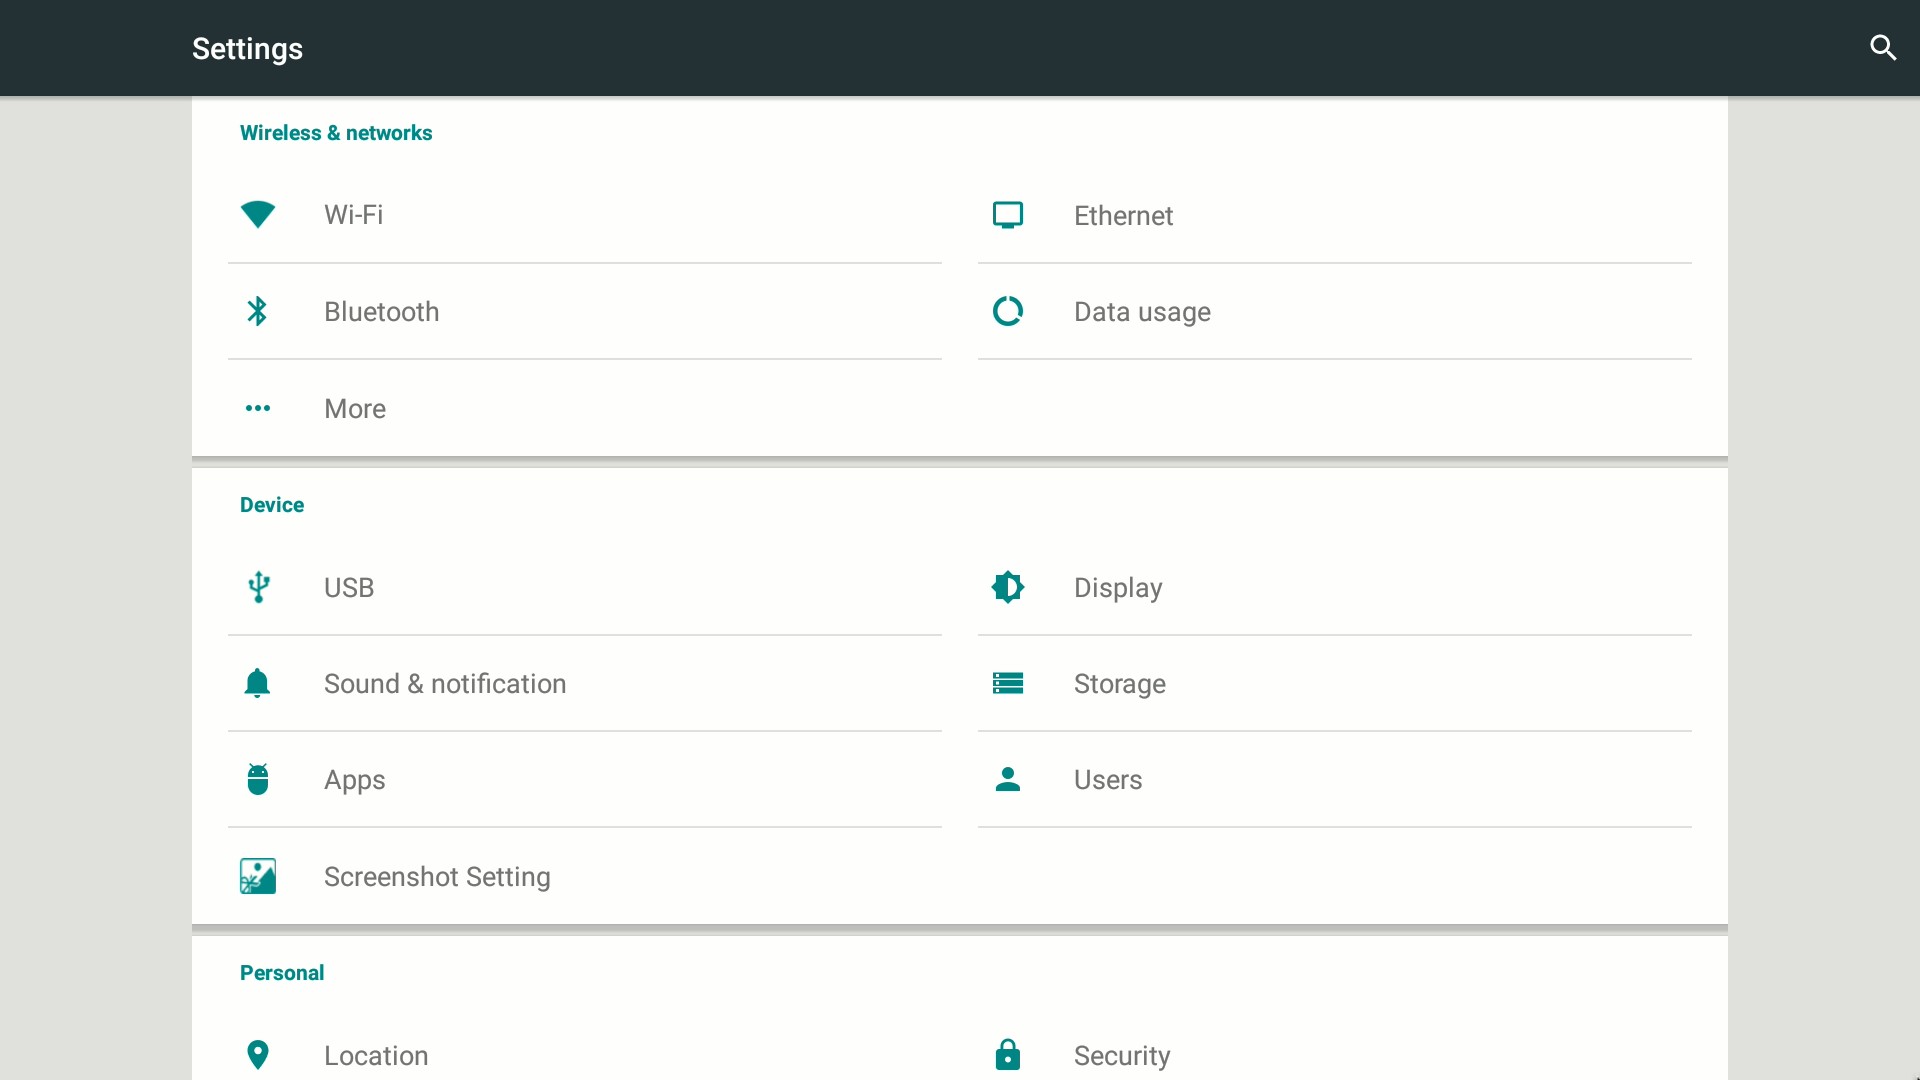
- Open the system settings page by clicking the Settings icon
 at the lower right corner of the screen; the system settings screen opens.
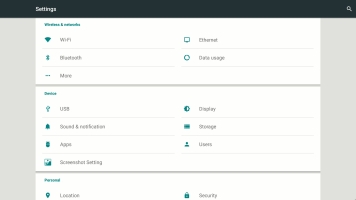
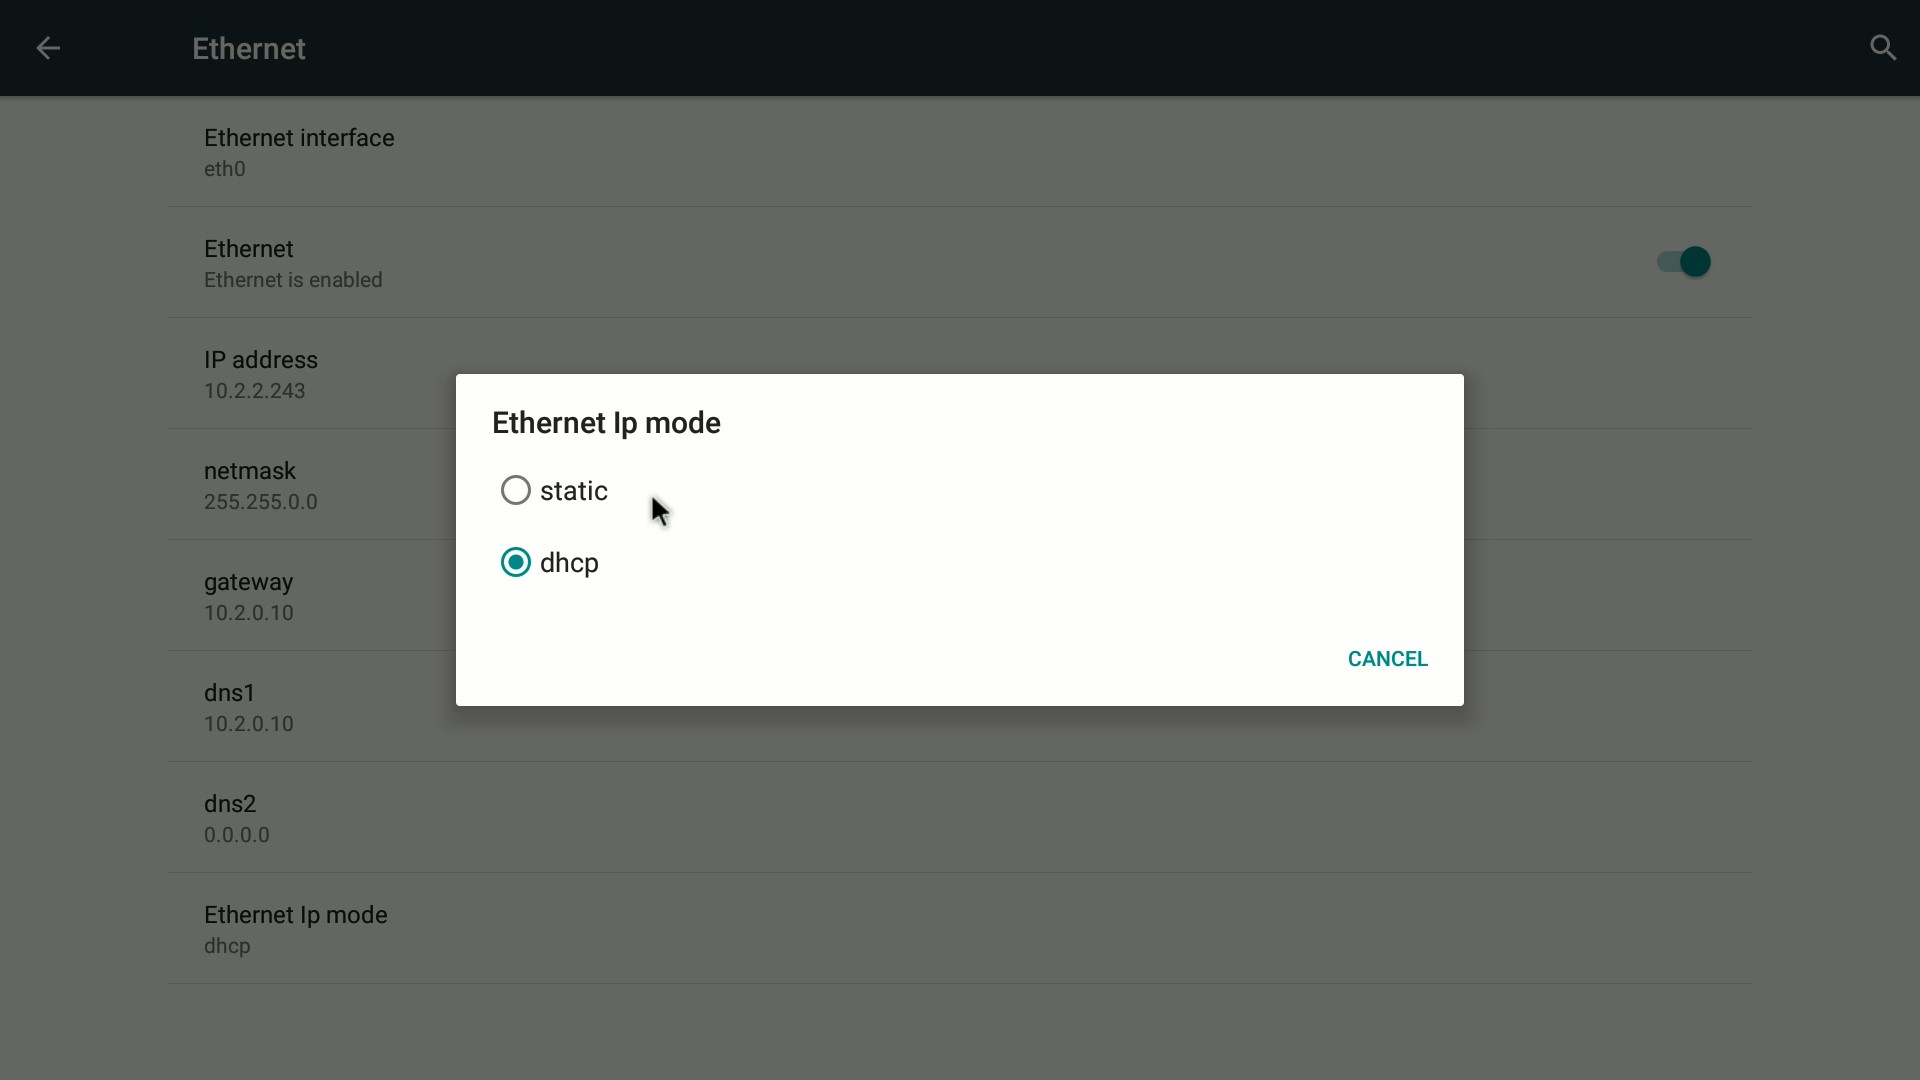
- Click Ethernet from the list at the top of the page; the Ethernet options are displayed.
- Click Ethernet IP mode from the Ethernet options list; the dialog box opens.
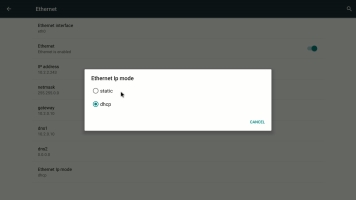
- Click Static.
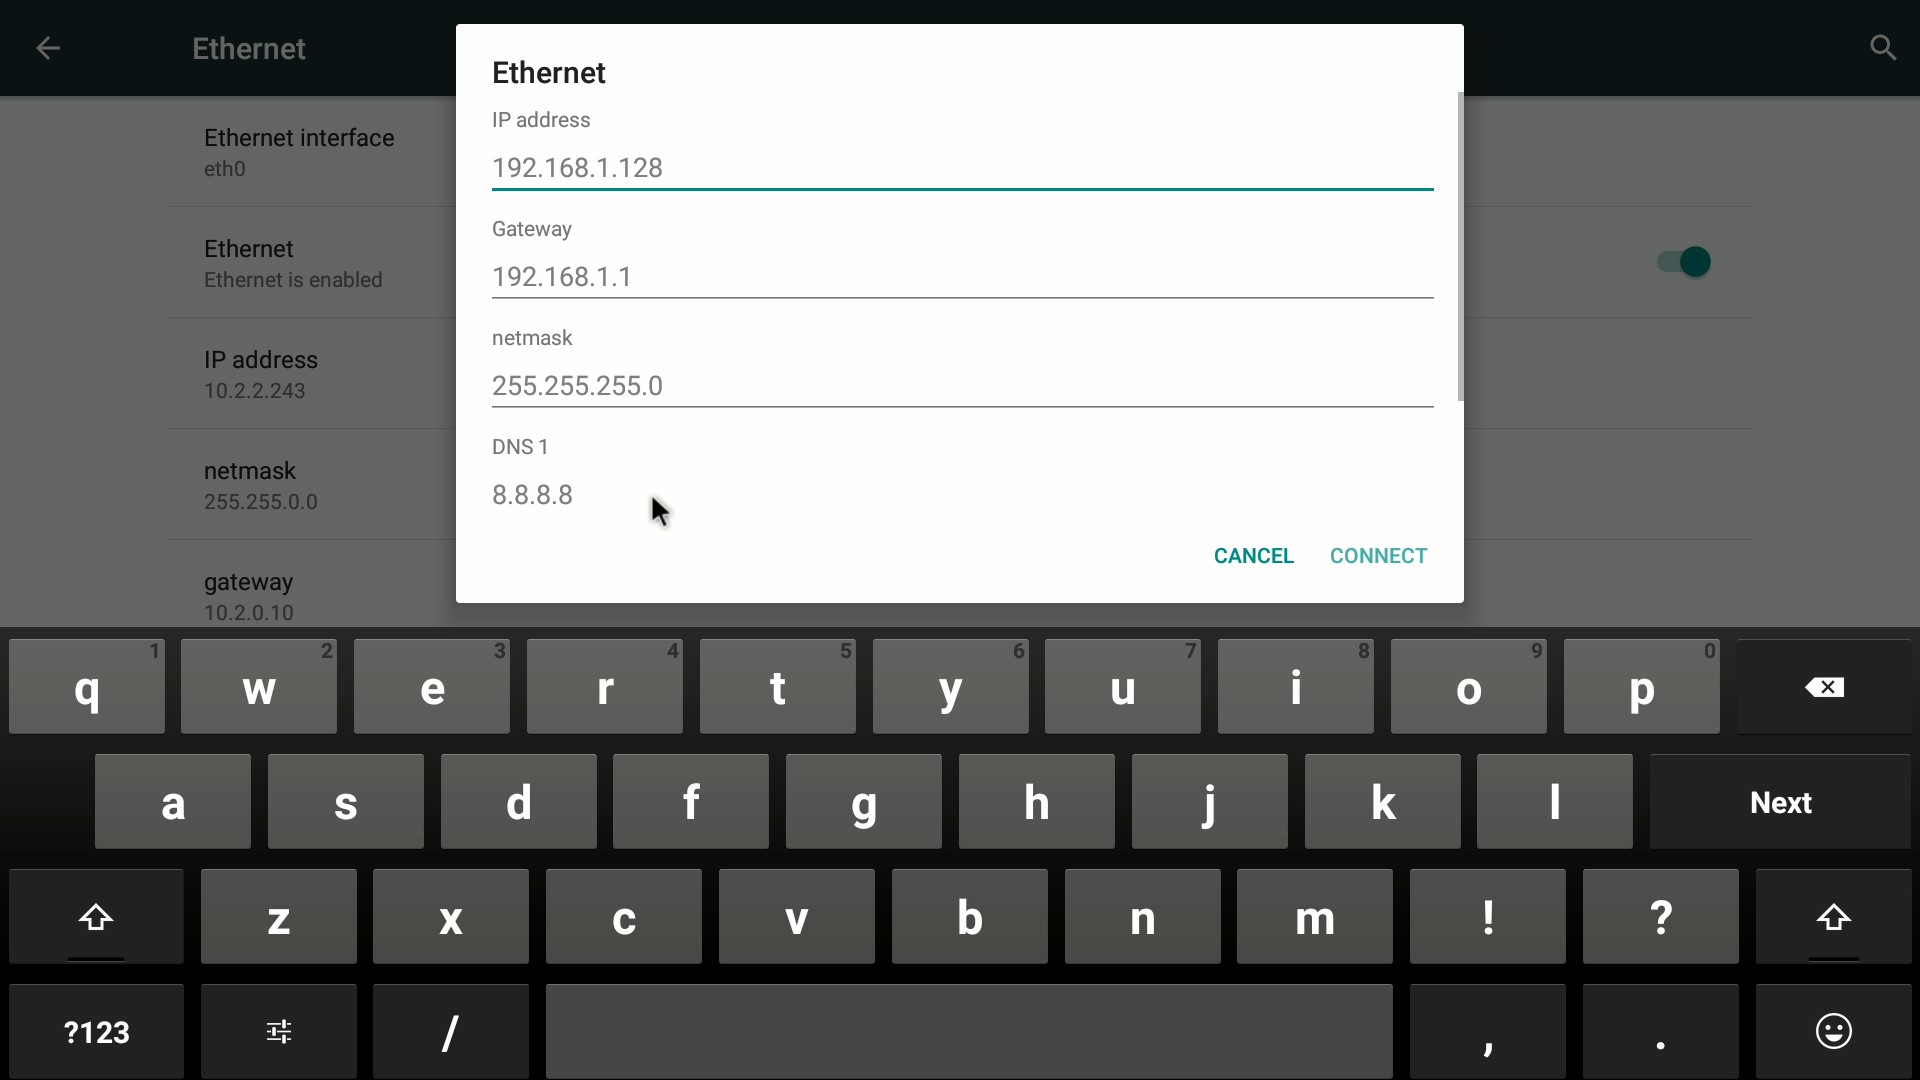
- Use your USB keyboard or the on-screen keyboard to enter your static IP address details.
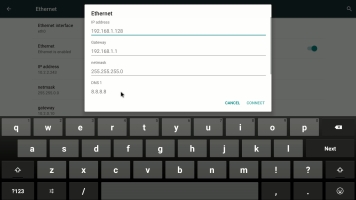
- When you have finished entering your changes, click Submit (or click Cancel to abandon your changes).
- Click the right mouse button to exit the system settings screen.
To revert to DCHP IP address allocation, follow the same steps, but choose DHCP from the Ethernet IP mode dialog.
Webcaster X2 currently doesn't support using a web proxy.