About configuration presets
Configuration presets are groups of settings that get applied to the system, leaving other important settings intact. They make it easy to manage multiple Pearl-2 setups in shared spaces, like a studio, and ensures a consistent setup each time you go to use Pearl-2. You can even export a configuration preset and upload it to another Pearl-2 system.
Configuration presets are not cross compatible between different Pearl models or between Pearl systems and Unify projects.
The system's settings are divided into the following configuration groups. You can choose to include any number and combination of configuration groups in a preset and create as many different configuration presets as you need.
Pearl-2 configuration group list
|
|
System |
|
Inputs |
|
Automatic file uploads |
|
|
Network |
|
Channels |
|
EDID |
|
|
Output ports |
|
Touch screen |
|
CMS |
|
|
Epiphan Edge |
Pearlconfiguration group list
- System
- Network
- Inputs
- EDID
- Channel
- Automatic File Upload
- Content Management System
- Epiphan Edge
- Front screen
- Output port
You can create and apply any saved configuration preset from the Configuration menu when you select Maintenance using the Admin panel.
It's important to note that configuration presets are applied over existing settings. They affect only the settings groups included in the preset. All other settings are unaffected. Read the Configuration preset considerations section carefully to understand caveats around using configuration presets.
Example of presets in action
You could upload custom background images to Pearl-2 in advance of a conference and create custom channel configuration presets for several different keynote speakers, each with a different setup, and then apply them later when you need them.
For example, you could create two configuration presets called Session 1 and Session 2. Each session could include things like custom backgrounds, images and logos, channels and layouts, metadata, streaming settings, and automatic file upload (AFU) locations. Then download those presets to your local computer so you can upload them to your entire fleet of Pearl-2 systems.
Channel configuration includes any applied backgrounds and image files. If these files aren't present when the configuration preset is saved, the save function will fail. Be careful when deleting background images and logo files.
At the conference, simply apply the configuration preset that you need for the appropriate session using the Admin panel
| Session 1 preset | ||||
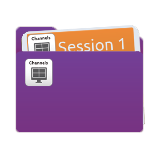
|

|

Session 1 presenter data and background image |

|
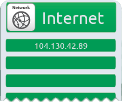
plus the conference IP address |
| Session 2 preset | ||||
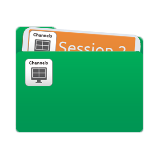
|
|
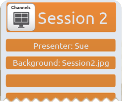
Session 2 presenter data and background image |
|
plus the conference IP address |
After applying a configuration preset, recorded files from the previous session remain present on the system. If AFU is configured, the recorded files continue to upload even after the new configuration preset is applied (if AFU is not yet complete), but the channels reflect the newly loaded session's background file name and presenter name.
