Using KVM
It's easy to control any target devices with KVM2USB 3.0.
Here's what you need:
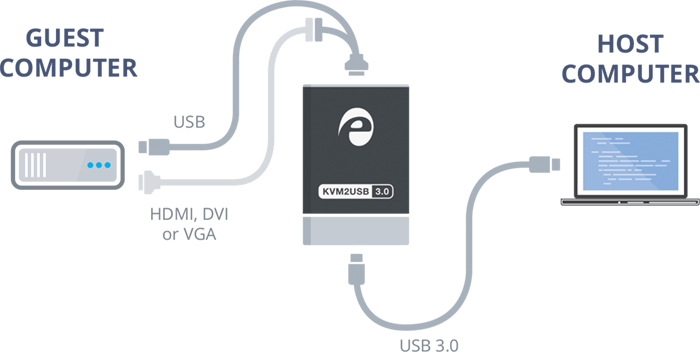
- Your KVM2USB 3.0 with the cables and adapters that ship with it
- A host computer running Windows or Linux (see system requirements for additional details)
- A target computer (running any OS) that outputs HDMI, DVI or VGA video and works with a USB keyboard and mouse
- A video cable (DVI, HDMI, or VGA) for your target computer
To connect your KVM2USB 3.0:
- Connect the male end of the KVM cable to your KVM2USB 3.0. Tighten the thumbscrews for a good connection.
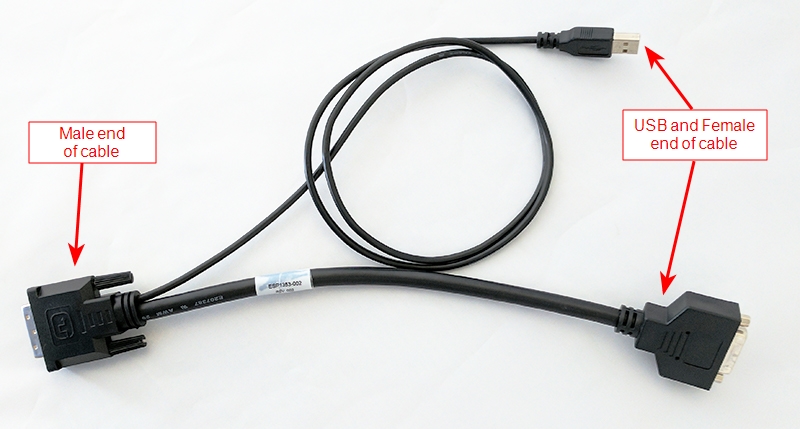
- If your target computer uses HDMI or VGA video output, connect the HDMI to DVI or VGA to DVI adapter to the female end of the KVM cable. Tighten the thumbscrews.
- Use an appropriate video cable to connect your target system's video output port to the female end of the KVM cable or to the adapter you connected to the KVM cable.
- Connect the USB portion of the KVM cable to an available USB port on your target computer.
- Connect the blue USB 3.0 cable to the bottom of KVM2USB 3.0 and to a USB 3.0 port on your host computer.
-
Windows host:
- Download and unzip the KVM software from the Epiphan Video website.
- Launch the KVM application: KvmApp.exe.
-
Linux host:
- Download the KVM app from the Epiphan Video website.
- Modify permissions to add executable permissions to the KVM app.
- Launch the KVM application: kvmapp.
-
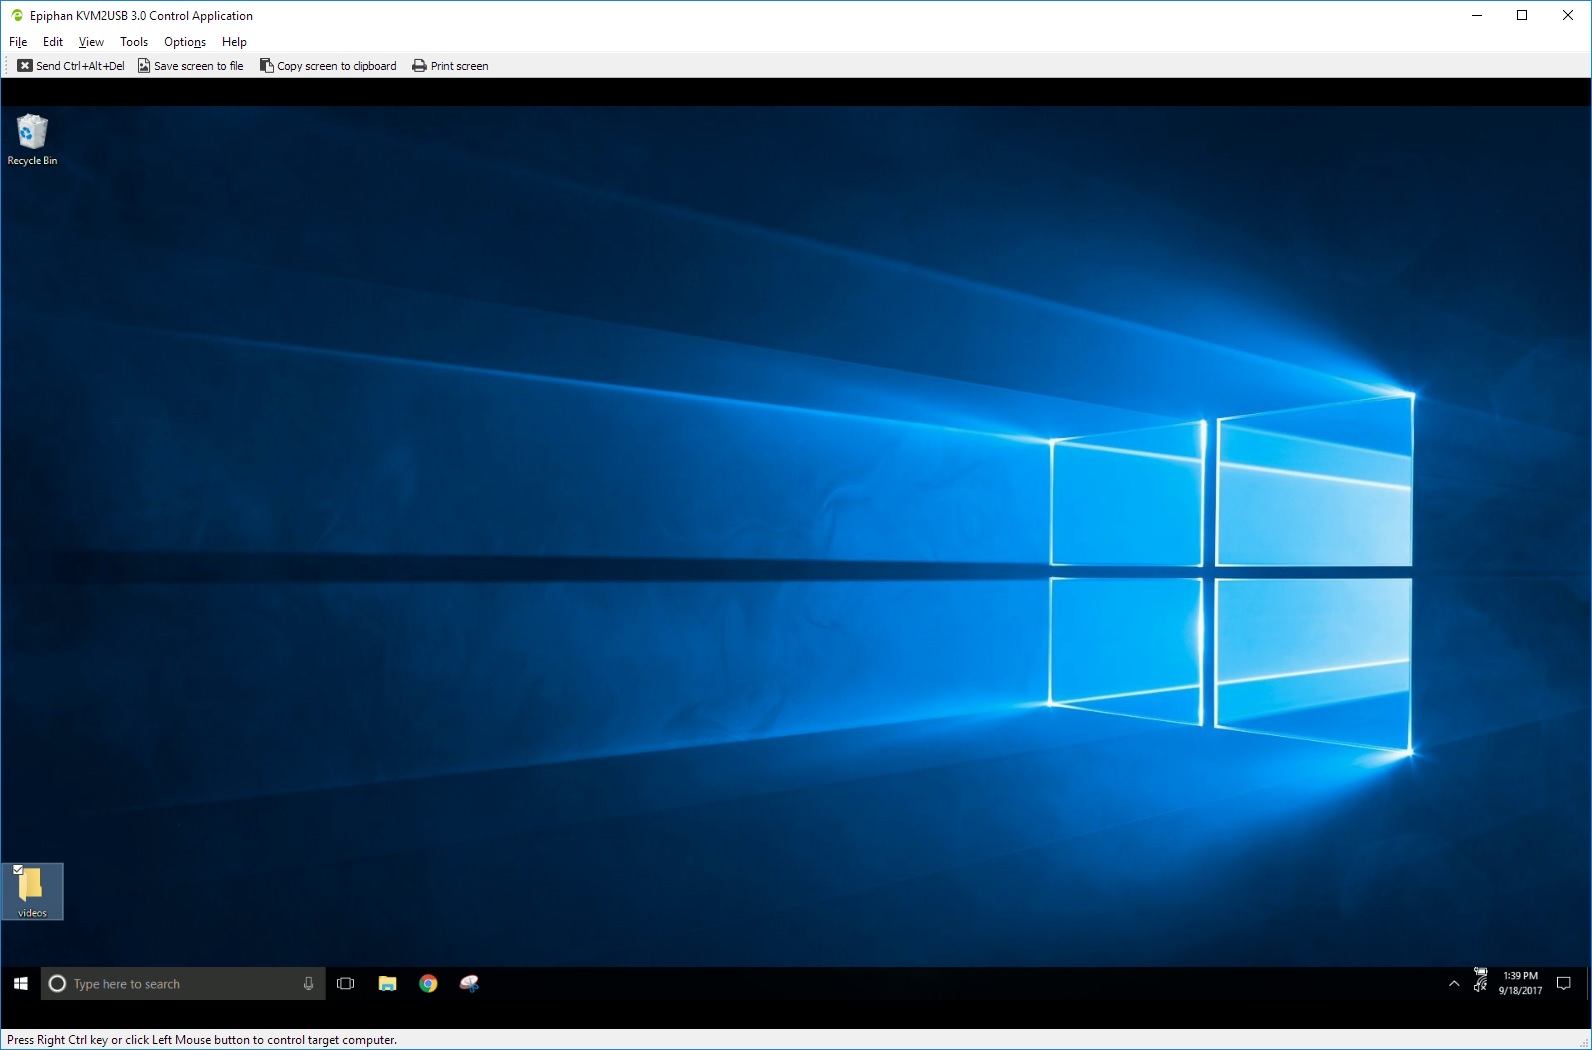
Click anywhere on the viewport to begin; your mouse and keyboard now control the target computer.
- Control your target computer as if you were using a keyboard and mouse connected directly to it.
- See special instructions for the Windows KVMApp and Linux kvmapp, including how to send special key strokes.
-
When you're done, exit control mode by pressing the Host key. By default, the Host key is the right-Ctrl key.

The Host key can also be used instead of the left mouse button to start a control session. You can change which key is used as the Host key.
