Our Webcaster X2 encoder comes with all the essentials to start live streaming fast. But we got to thinking: how much more can you get out of it?
We started brainstorming the kinds of Webcaster X2 accessories that can help take your live streaming production to the next level. Here are six great Webcaster X2 accessories to consider.
1. Add a battery and go mobile!
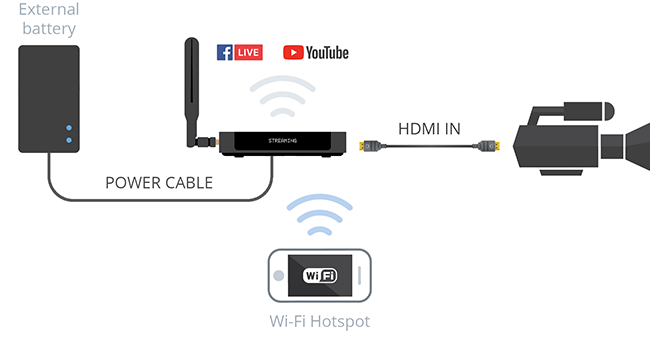
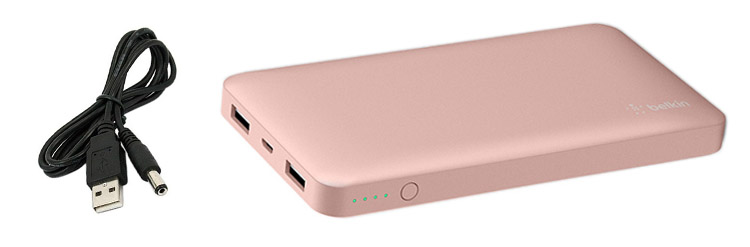 Adding an external battery (aka power bank or battery charger) to your streaming arsenal can be a real game changer. Using it as a power source for the Webcaster X2 allows you to live stream high-quality video on the go and from any location. To make this happen all you’ll need is the external battery and a USB to barrel type N power cable. The Wi-Fi could come from your smartphone once you turn on personal hotspot sharing. All connected equipment fits into a backpack, so you’re light and mobile.
Imagine being able to create a professional broadcast of a live show, a concert, or a sporting event, all on a very modest budget. This setup is perfect for live streaming outdoors or at any event that requires some moving around to follow the action.
Here are a few quick tips on choosing a battery and going mobile with your Webcaster X2:
- When choosing an external battery, be sure to pick up a robust and reliable one. The important factor here is the amperage per USB port, which should be a minimum of 3 Amps. We recommend this tested Belkin model, rated at 4.8 Amps. The capacity is also important to note. For example, a fully charged 10000mAh battery can power Webcaster X2 for about 3 hours.
- We also recommend getting a reliable USB cable that will be able to maintain the required amperage. We found that this 22 gauge Adafruit power cable works well. For both the battery and the cable keep in mind that Webcaster X2 requires 5 V DC.
- Consider the amount of cellular data you may need for your stream. For example, streaming 720p at 2 Mbps would amount to 15 MB of outgoing data per minute.
- Consistent bandwidth is another important factor. We suggest testing out the internet speed at your filming location in advance so you know exactly what you’re working with. The general rule for the minimum upload speed is 1.5 times the bitrate. For example, a good stream at 720p resolution with a maximum bitrate set to 4000 kbps (4 Mbps), a minimum stable upload speed of 6 Mbps is required.
Check out our How to go Mobile with Webcaster X2 tutorial for an in-depth look at how to live stream on the go.
Here is some sample footage we streamed using this external battery setup:

Live from Carp Fair – with Webcaster X2
2. Troubleshoot on the go with a wireless mini keyboard/mouse combo
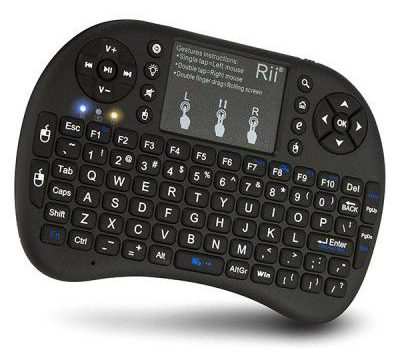 This is a great lightweight alternative to using a separate mouse and a (bulky!) full-size keyboard to configure your Webcaster X2. A wireless keyboard/mouse combo literally fits into the palm of your hand. Portable and small, it’s easy to pack and very easy to operate. It comes with rechargeable batteries and a USB dongle that is stored in a compartment inside the keyboard (so you’ll never lose it).
There are quite a few varieties of wireless keyboard/mouse combos, and most are compatible with the Webcaster. We tried out the Rii i8+ Mini Wireless Keyboard and it proved to be a worthy investment.
If you also have a USB camera connected to Webcaster X2 (see accessory #4 in our list) – the keyboard can become your live stream switcher. Using keyboard shortcuts, switch between individual views, change to a side-by-side view, or even create a picture-in-picture layout.
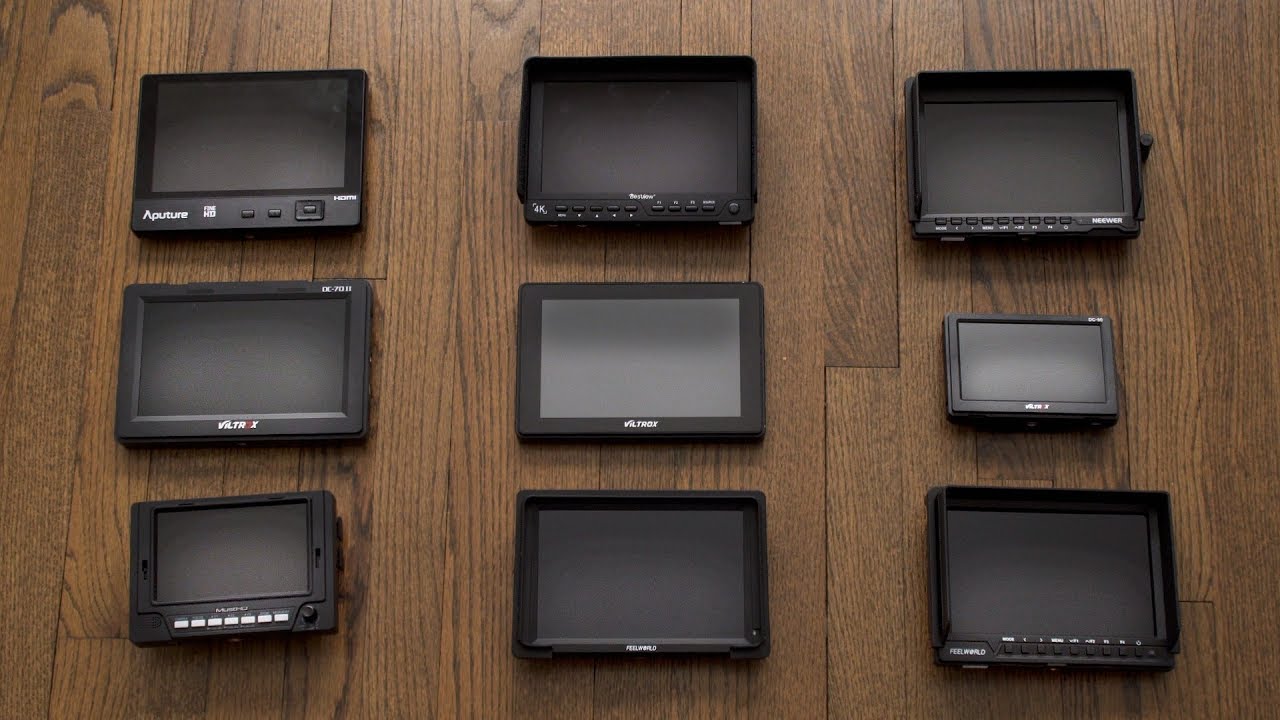
3. Monitor your stream with a portable display
 With an HDMI display connected to Webcaster X2 during your live show, you always know exactly what you are delivering to your audience and you can fix any issues on the fly. Webcaster’s display UI allows you to see in real time the comments, reactions, and the number of viewers your stream is getting.
This is perfect for those who are streaming on the go or moving around a lot with their live stream. Field monitors are portable and lightweight, which brings down the total weight of your video kit.
Field monitors do need DC power to operate, but many models support standard camera batteries. This means you can use your monitor anywhere and not worry about finding an electrical outlet. Be sure to check for this feature and maybe pick up an extra set of compatible batteries. The monitor also needs to support 1080p video in order to work with Webcaster X2. We tested this Bestview S7 4K monitor and it proved itself to be a reliable device in many of our tests.
Here is a great video review of some of the best budget field monitors out there:
9 Camera Monitors Under $200!
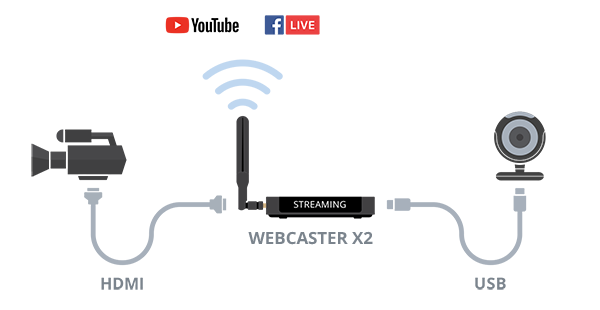
4. Add a second USB camera and do live switching
This is probably one of my favorite Webcaster X2 accessories. Webcaster X2 has a feature that lets you connect and stream a USB camera in addition to (or instead of) an HDMI camera, creating what is essentially a two-camera setup. Using special keyboard shortcuts, you can switch between the two camera views, or even create picture in picture layouts! This can really elevate the production value of a live show.
Having that USB camera option also means that your HDMI signal could be coming from something other than a camera. For example, you could be capturing a computer screen with a presentation over HDMI and use the webcam for a talking head commentary footage.
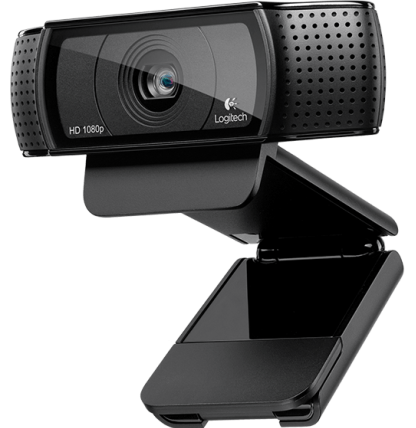
Most USB cameras work well with Webcaster X2. Signals of up to 720p are supported. We tried one of the most popular webcams on the market right now, the Logitech c920, and it worked great.
The USB camera feature is currently a Beta feature on Webcaster X2, so be sure to enable it in the Preferences menu. Check out what live switching using Webcaster X2 actually looks like in this Live @ Epiphan episode about the multicam feature.
5. Get pro audio into your live stream
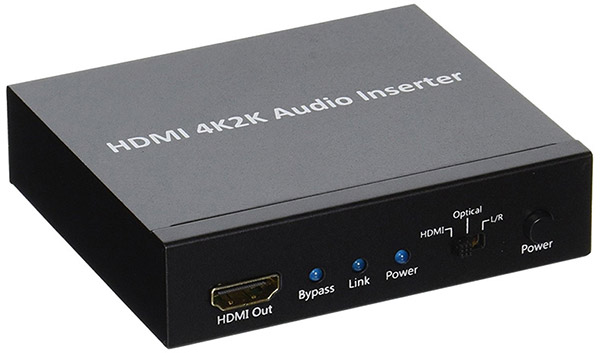
An audio inserter comes in handy when you want to use a different audio source than the one embedded in your HDMI signal. This device allows you to replace the HDMI audio signal with one inserted through an analog, stereo 3.5 mm TRS or a digital optical input. This produces a combined HDMI video+audio output to go right into your Webcaster X2. Using an audio inserter means that you can have premium sound coming into your live stream from a high-quality microphone or even a professional mixer. This also means that you have the flexibility to add any analog 3.5 mm audio to your video stream. An audio inserter can also be a life saver if you’d already invested in a camera that does not support audio output over HDMI.
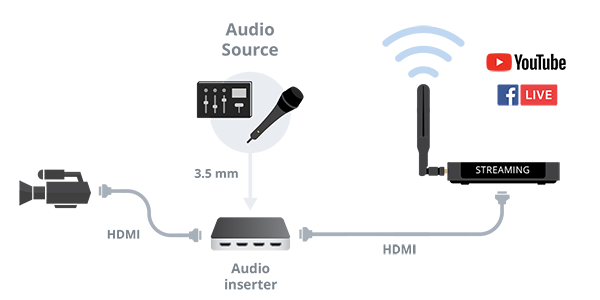
Let’s consider live streaming a lecture as an example use case of an audio inserter. A laptop with slides is the HDMI source, while the audio comes from a mic worn by the lecturer. We would use an audio inserter to combine the video HDMI with the audio from the mic, and send a single AV HDMI signal to Webcaster X2.
We’ve had success with the Monoprice Blackbird 4K Series HDMI Audio Inserter, a robust and reliable device supporting 4K resolution and HDMI sampling rates of up to 192 kHz. When thinking about purchasing an audio inserter, keep in mind the following:
- An inserter does not mix the two audio inputs (it is not a sound mixer). You must select either the HDMI IN sound or the additional sound input.
- The device requires its own 5 V DC power supply (power adapter included in the box).
- Be sure to check for supported audio inputs – some inserters only support RCA L/R audio.
Check out this episode of Live @ Epiphan to learn more about audio inserters:

Pro Audio for Webcaster X2 + How to Stream the Eclipse
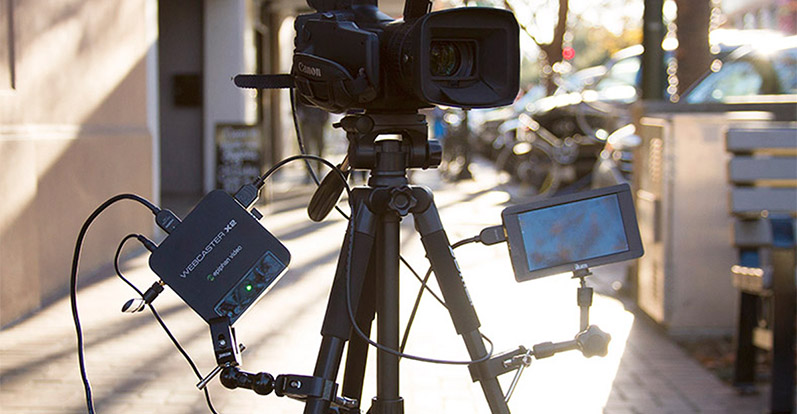
6. Get mounting hardware and make a pro live-streaming rig
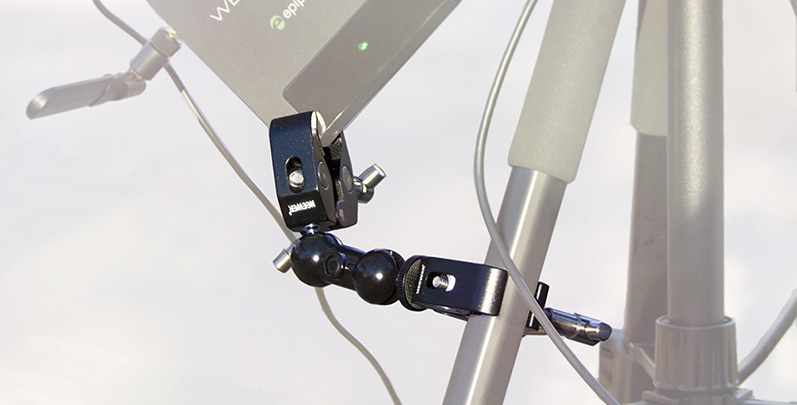
Mounting hardware is a great tool for keeping all your streaming equipment in one place and neatly organized. You can create a portable streaming rig by mounting your camera, Webcaster X2, external battery, and confidence monitor onto a tripod. As a result you will get a stable camera, tangle-free cables, mobility, and fast access to Webcaster X2.
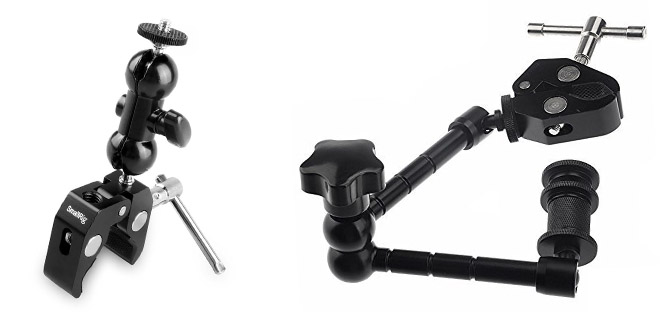
We’ve used a ballhead arm and two clamps to mount Webcaster X2 and its external battery, along with a magic articulating arm with a clamp to mount a confidence monitor onto a tripod. You can mix and match these mounts to create your own custom fastening device, and they are a lot of fun to play around with. This rather modest financial investment can make a live streamer’s life a lot easier (and make you look really professional on set).
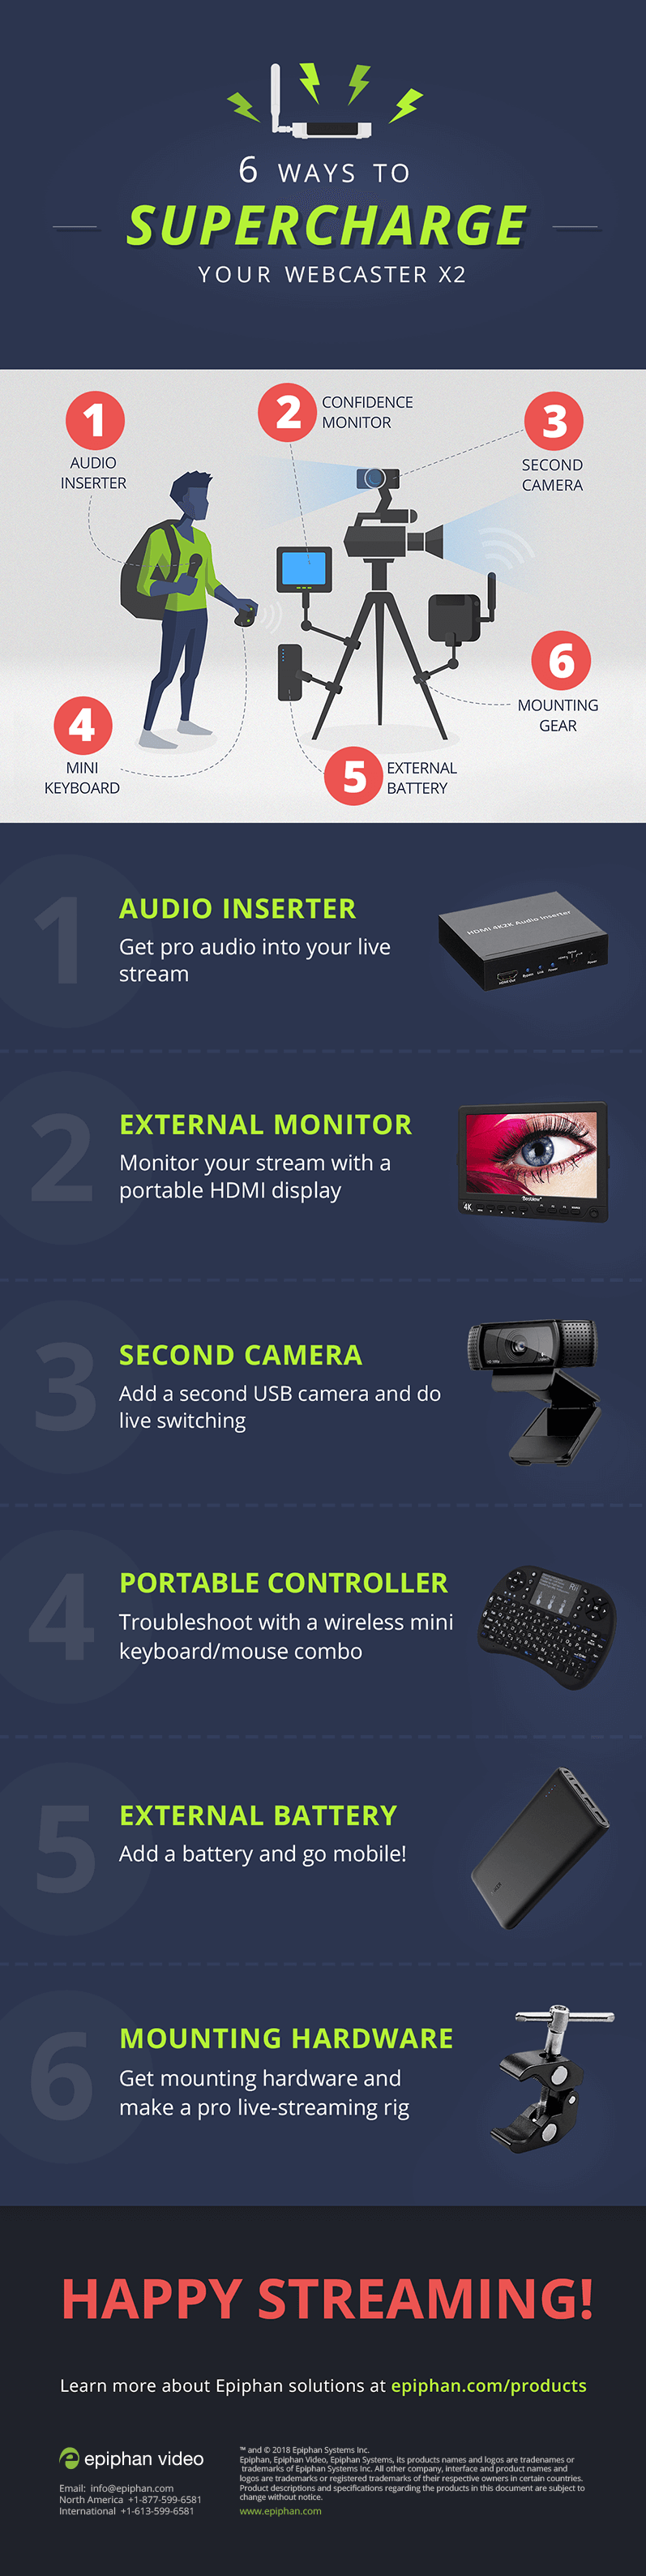
Finally, here is an infographic to help you remember the 6 ways to supercharge your Webcaster X2!
There we go, those are some (but definitely not all) of the ways you can supercharge a Webcaster X2. We really hope this article inspired you to try new and more interesting setups with your live streaming device. Please feel free to use the comment section and share with us your favorite live streaming accessories, or perhaps include a description of how you were able to supercharge your Webcaster X2. We always look forward to discovering new Webcaster X2 accessories.
Thanks for reading and good luck with your future live streams!

the Belkin 10000 mah battery seems to be capable of 2.4 amps from usb outlet fro a total of 4.8 amps but not at least 3 amps from at least one!
Does this really work and for how long?