Update
BeLive is no longer a supported destination by Webcaster X2
Webinars are educational webcasts streamed live over the Internet to an audience. Although they first emerged as a remote learning tool, today webinars are widely used as powerful marketing tools. Let’s talk about how to create a webinar.
Their business objectives span from raising brand awareness to collecting leads, product promotion, and direct sales. The power of webinars lies in their ability to create genuine engagement and build trusting relationships.
Naturally, having a business objective for a webinar is very important. However, if your webinar is essentially just a dressed up sales pitch – people will likely tune out (and never come back). Here are 3 basic rules that will help your webinar succeed:
• Bring value, solve a problem
First and foremost, a webinar should solve the viewer’s problem and provide them with valuable information. Be sure to clearly define what the value of the webinar is. The viewer is giving you their valuable time. Respect that.
• Be a storyteller, keep it interesting
Think about using a variety of media to convey your message. Have fun and entertain. Does this feel like you’re putting on a show? Well, that’s exactly what you are doing!
• Interactivity is crucial
Remember that you’re having a conversation with your audience. Webinars are a great opportunity to create personal connections. Interactivity will also be key for keeping your viewers stimulated.
How to create a webinar worth watching
Now, let’s move on and talk about the actual instructions of how to create a webinar everyone will love. We’ve boiled it down to these six steps:
1. Plan your webinar
Determine the goal
Figure out the purpose behind the webinar. Are you promoting your product or service? Is this going to be a demonstration? Who is the target audience for this webinar? Again, focus on solving a problem and bringing value to your audience. Make it worth their time! Decide on the call to action. What do you want the viewers to do after they are done watching?
Ideally, determine how you will be tracking the results of your webinar. If you want to geek out on planning and tracking webinar results – check out this awesome planning checklist.
Set the date and time
Studies show that Tuesdays, Wednesdays, and Thursdays are the best days to host a webinar. Ideal time: morning or right after lunch (10 a.m.–2 p.m.). If your demographic spans across time zones – consider that as well. You will want to start preparing for the webinar about 1 month in advance.
Choose a compelling title
Once your goals are set and you know what your webinar is about, choose a title that people will care about. Make it very clear which problem you will be solving with this webinar. Catchy titles like “Creating a foolproof live stream setup: top 5 best practices” tend to do well.
Choose your webinar format
There’s a number of ways you can conduct a webinar. Here are some popular options:
Single/dual expert presenters
Even though you can do a webinar with a single presenter, we strongly suggest co-hosting a webinar. Two presenters tend to do better because there is a more natural conversation flow. Even if one of the hosts pauses for a moment, the other can carry on the show. Alternatively, one person can be an anchor, only introducing the presenter and moderating questions, while the other person acts as the expert. This format works great for most webinars.
Interview style
You can bring in an expert guest and ask them questions. This style can often encourage more active audience participation: They will also want to ask questions. You can either invite the guest into your physical studio (if possible), or bring them in remotely over the Internet. If you are planning on bringing in outside guests, keep in mind that coordination with them will take some time and effort.
Panel of experts
A moderated panel discussion on a specific topic can be very dynamic and offer a variety of voices and perspectives. This talk-show style webinar can get a little complicated but is very powerful when done right.
Q&A webinar
In a Q&A webinar, the audience asks questions via social media or chat, and you reply in real time. This is a good way to convey that your company is open and eager to help.
Product demo
If your goal is to promote a product, then you can choose the product-demo or tutorial format.
Create a script and prepare visuals
Now that you know the topic of your webinar, outline the talking points for the live presentation. A presentation deck is a good way to convey information during a webinar. Avoid presentations that are text only – they bore people to death. Add some graphics and don’t use too much text per slide. Think about which other materials or video sources you may want to bring in. We will later discuss how to bring in video sources from a technical point of view.
Keep branding in mind. Ideally your presentation slides should reflect your company colors, and your video frame should contain your company logo.
2. Market it
This step is often overlooked, but it is actually very important. It’s important to create maximum buzz around your webinar. Viewers won’t be able to find it without your active help. Begin your marketing about 2 weeks before the event.
Email invitations
Send out an invitation email blast to your mailing list. The first email should go out about 2 weeks before the webinar. A good rule of thumb is one invitation followed by two reminders. The final reminder should be sent out the morning of the webinar.
Registration page
Create a landing page with a registration form (a countdown clock is always a nice touch!). It’s important to understand who your audience is, so you want to collect as much information as possible. Registration will also allow you to capture leads for later follow-ups.
Spread the word
Promote your webinar on social media. Write a blog about it. Remind people about it!
Some webinar platforms, like Bigmarker, are able to automate this step for you, scheduling the webinar ahead of time, sending out invitations and reminders, and even making scheduled posts to social media.
3. Set it up
The type of gear required and your setup will depend largely on the complexity of your webinar. The technical setup for a webinar consists of 3 major parts:
- What will you be showing visually? (video component)
- Where will the sound be coming from? (audio component)
- Where/how will you be streaming? (webinar platform/encoding component)
Video
How many video sources are you planning to bring in? Will you be sharing your computer screen? Will you be bringing in a remote guest? Are there product shots you will be showing? These are some of the questions to think about.
The most basic (and probably the most popular) scenario for webinars is to capture the full-screen presentation slides on a computer, with the presenter’s voice in the background. In a more interesting scenario, we see the presenter via webcam in a picture in picture layout. Switching between different layouts will give your webinar a more dynamic feel, making it more interesting to watch.
Check out this episode of the Live @ Epiphan show to learn how to capture a device screen for a webinar:
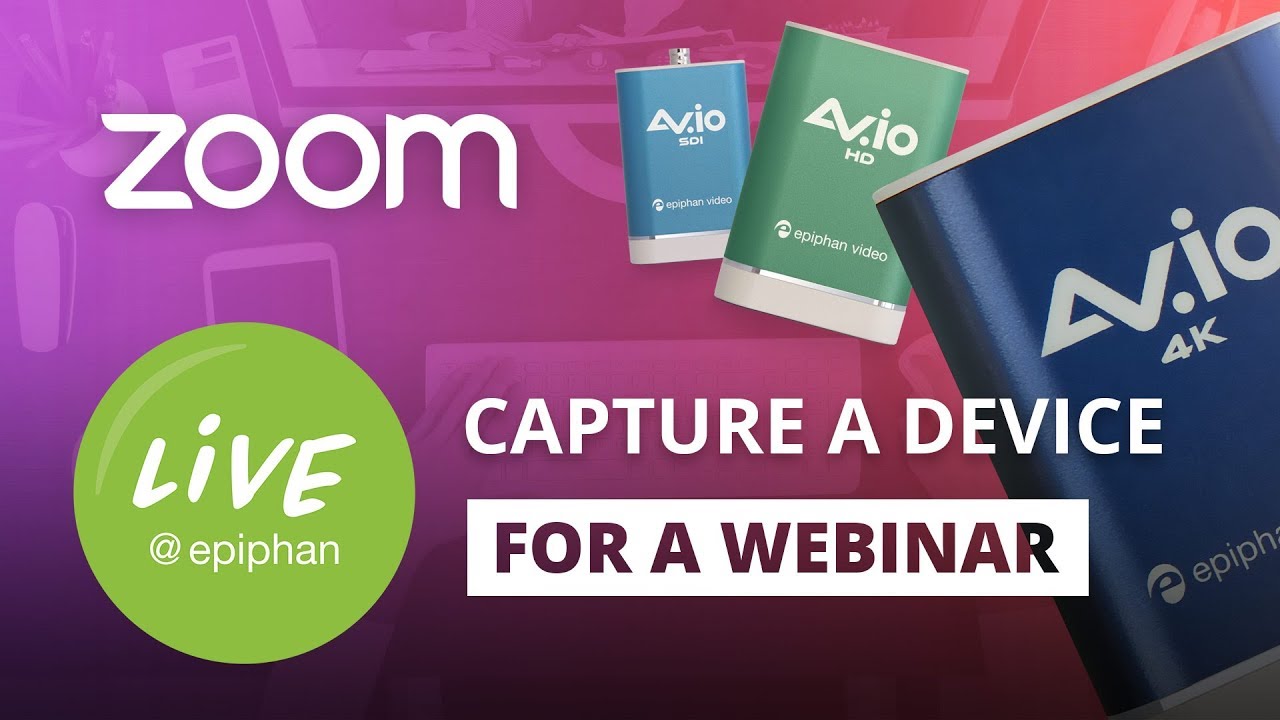
How to Capture a Device Screen for a Webinar
If you are bringing in a guest or have multiple remote presenters, think about how you will be bringing them in. Ideally, each presenter will be equipped with a web camera. You can connect with them via software like Skype and then broadcast that window screen on your computer. Alternatively, you can use tools like Belive.tv and GoToWebinar to seamlessly bring in a guest speaker.
If you want to host a webinar with higher image quality or are planning to do a product demo, consider using an HD camera. You can simply connect it with your computer using a USB capture card. Having better video quality can really set your webinar apart from the rest.
Audio
Good audio is one of the most important components of a successful webinar. In addition to ensuring the room you are in is quiet, make sure that you are using high-quality microphones. If you are bringing in a guest or have multiple remote presenters, each one of them should have a relatively good microphone. It would be very distracting if the host had good audio quality while the guest’s audio was terrible. Audio quality and levels should be figured out during the testing stage. Additionally, if you are bringing in a remote guest, you will need an earpiece in order to avoid echoes.
Laptops generally do not have high quality built-in mics. Here are your options as far as audio improvement goes:
- Use a higher-end 3.5 mm jack headset with a mouthpiece: A directional microphone will provide better sound than an omnidirectional built-in laptop mic. Also if you have a guest on the line, you will need to be wearing either a headset or an earpiece in order to hear your guest, but not have him echo in your studio.
- Use a USB microphone like Blue Yeti – simply connect it via USB to have better audio.
- Use a lavalier mic like Sennheiser 3.5 mm or XLR – a lavalier or lapel mic clips on to your shirt and gives a very crisp quality to your voice.
- To get the absolute best audio, use XLR microphones and an audio mixer to level out everyone’s audio. Some people talk louder. Especially useful when bringing in a guest over the network.
Webinar platform and encoding
There are different ways of getting your webinar to go live.
Webinar platforms
You can use special webinar services like GoToWebinar, BigMarker, Zoom, Livestorm and others: They include a wide range of features, including sharing anything on your screen at any time, bringing in remote guests, passing presenter controls to between remote co-hosts, telephone dial-in, in-webinar polls, and more. They handle all the invite and reminder emails so you don’t have to. They also provide detailed analytics and a recorded VOD version after the webinar. This full-service approach can yield good results and a very high level of engagement, but it can also be rather pricey.
Most of these webinar platforms rely on using only a computer to go live. If you want to bring in an additional video source (such as an HD camera), you will need to use a USB capture card in order to connect that source to your computer.
Live streaming platforms
You could also use live streaming platforms like YouTube or Facebook Live to conduct your webinar. If you’re only using your webcam and slides in your webinar, you can go live using only your computer.
However, if you are capturing footage from two or three HD video sources (e.g., computer slides and two HD cameras), your computer may have a difficult time processing all that. Your computer might become very laggy, especially if you are also planning on using your computer for other things like monitoring comments. For this situation, you may want to use a dedicated hardware encoder like Pearl Mini. You simply connect your video sources to the hardware encoder and configure it to stream to YouTube or Facebook (or both!).
Even though YouTube and Facebook Live are not the most sophisticated webinar tools (e.g., lack of analytics and automation), they do have a few advantages. One is price: they are virtually free. Another advantage is an unlimited number of simultaneous live viewers as well as easy access to the platform. Both of these services also have a great live chat, making communicating with your audience quick and easy. The video automatically becomes VOD after the webinar is complete. We host our own webinars on YouTube.
From there, the combinations are endless.
Sample setups
- The Simple Webinar
The setup: Single presenter shares her own computer screen with presentation slides. Webcam captures talking head (picture in picture), headset with microphone captures audio (3.5 mm jack). Webinar streamed to YouTube, to Facebook via Belive.tv, or a CMS like Kaltura.
Good for: informational webinars where dry facts are what’s important.
- Panel-discussion style webinar.
The setup: Usually consists of 1 host/moderator and 3-4 experts. Each expert, equipped with a headset microphone and sometimes a webcam, dials in from a remote location. The moderator controls the flow of the webinar my leading the discussion and asking questions.
More often than not, these types of webinars do not show the video of the guest, we only hear their voice. Webinars like these could be streamed using most webinar platforms (GoToWebinar, Zoom, etc.), or using a service like Belive.TV, which allows you to go live on Facebook with up to 4 simultaneous guests.
Good for: covering a complex topic and getting lots of angles.
- High quality webinar with remote guest
The Setup: A host and a remotely located guest. Each has an HD camera and desktop mics, which comes into the computer using AV.io. Guest is brought in using Webinar software. Guest uses laptop to switch slides. PIP layout. Streaming to an online audience.
Good for: A high quality interview with video. When presentation really matters.
- High quality multiple video input webinar
The setup: Two presenters, 2 HD cameras, and 1 laptop with slides. The hosts are wearing high-quality lapel mics. All video and audio sources are connected to a Pearl Mini encoder. Pearl Mini streams to YouTube, Facebook Live, or any other CMS.
Good for: product demos and multimedia webinars, which require multiple video angles/inputs and some switching between them.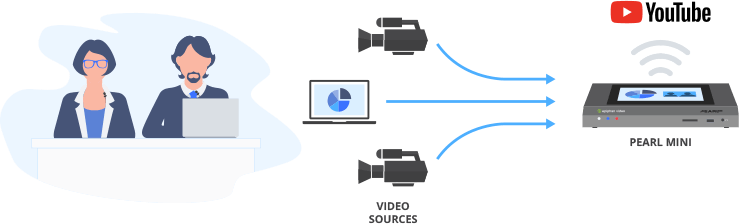
Renting vs Buying equipment
Much of the equipment listed above can be really pricey. Think about how frequently you are planning on conducting webinars. If it’s closer to once a year, then renting equipment might be the way to go. You can rent great microphones for just $5–8 dollars a day. If you are planning on hosting monthly webinars, buying gear is the better option.
Don’t do it alone
In theory, you can run a webinar in proud solitude. However, practice shows that it’s just much easier to do it with at least one production assistant. Find someone who would be willing to be your technician for the time of the webinar.
4. Test and dry run
Test your setup
We continue to relentlessly stress how important it is to test all aspects of your setup before going live. Be sure to test your equipment setup, your audio, your webinar platform, and your internet speed.
- Perform an internet speed test. If possible, allocate a dedicated LAN line with sufficient bandwidth for your webinar (that no one else can tap into). Remember that you need at least 5x bandwidth of all your outgoing audio and video bitrate.
- If this is your first time doing a webinar, create an unlisted/private event on your webinar platform and test going live. Be sure to do a full sound test as well, and pay special attention to the audio when watching back the test piece.
- If you are bringing in a remote guest, set up a call with them a few days in advance and briefly run through the interview. Make sure that both your and your guest’s audio quality and levels match.
Rehearse
Know your talking points well, but don’t over-rehearse. You don’t want to end up burning through your best material, rendering the actual webinar dry and lifeless. Same advice goes for you and your co-host.
If you are flying solo, practice going through your slides/images/other materials. If you have an assistant who is helping you do the switching, practice the switches between various media with them. Make sure you are on the same page as far as content goes.
Keep track of time
During your dry run, keep an eye on the clock. Note how much time you spend on each talking point, and don’t be afraid to cut down your material for the sake of time. Ideally, your introduction should last about 5 minutes, followed by 25–30 minutes of actual webinar material, leaving another 10–15 minutes at the end for audience questions and free-form discussion.
On the day of
Get in early. We promise you that things that worked yesterday may not work today. Try your best to stay calm and just be ready for hiccups. If there’s a remote guest, connect with them at least 15 minutes before the start time and briefly test audio again. Ensure all noisemakers are off.
5. Run your webinar!
Introductions
Start with a quick 5 minute introduction. Why are you doing this webinar? It’s a good idea to tell a story instead of just stating the dry facts. You have 5 minutes to hook your audience with a compelling story. Introduce your host or co-host and get to the good part.
Don’t forget about your audience
Remember that the main purpose of your webinar is to establish a connection with your audience. You are doing this for them. At the beginning of the webinar, have a quick look at who is in the audience. You don’t have to call out everyone by name, but acknowledging the crowd is always good for building that connection. Make time and encourage people to ask questions at the end. Ask the audience for their input whenever possible and keep them engaged. Don’t be afraid of the more complex questions: They could be a great way to start an offline conversation with a potential customer. If a question is too complex to answer live, encourage the viewer to contact you after the show (or be the one to contact them). Don’t forget about that call to action.
Stay on schedule
Try your best to stay within the time frame. Respect your viewers’ time.
Have fun
Things may go wrong. Hiccups will inevitably happen. Your audience will forgive you as long as you are having a good time. Have an extra set of batteries ready and just roll with it.
6. Debrief and follow up
After the webinar, get together with your production team and debrief. Make note of what went right and what could be improved upon. Only practice gives invaluable knowledge that you can use in the future. For example, the biggest thing we’ve learned from running our own webinars is that having a co-host really helps in moving the show along.
Send a follow-up email to your audience within 24–48 hours. Thank them for joining your webinar and include a call for action. Share the VOD version with those who could and could not attend.
Be sure to go over and analyze attendance and retention data for your webinar. Track the results of your webinar. How many leads were you able to collect? Did very few people sign up? Perhaps the subject wasn’t universal enough or the title could’ve been catchier. Did people start leaving after 30 minutes? Perhaps the material was delivered too slowly or the presentation could’ve been more interesting.
In Conclusion
We hope these tips were able to help you learn how to create a webinar. Remember that practice is the best teacher. We wish you the best of luck with your future webinars! Be sure to watch our video on how to create a webinar to learn more.
How to setup high quality webinar streaming