
This article explains how to capture live streaming video to your PC and record it using DVI2USB 3.0– a video grabber solution specially designed for capturing signal from a VGA, DVI or HDMI™ (non HDCP) video source. Standalone video grabbers are a portable alternative to streaming capture cards. Epiphan’s portable video grabbers provide live capture through a USB connection to the PC or laptop and do not require additional power supply. In this example the DVI2USB 3.0 USB 3 frame grabber is used.
What you need
To use DVI2USB 3.0 for video capture on Windows, you need the following:
- A Windows laptop or PC
- An Epiphan DVI2USB 3.0 video grabber (or another Epiphan video grabber)
- A DVI source to capture (a camera, another computer, or any DVI source)
Step 1: Download the Epiphan Capture tool and drivers
Download the Epiphan capture tool and drivers from Epiphan Systems’ web site.
- Browse to the main product page and select the DVI2USB 3.0 product page.
- Select the Downloads tab and download the software and drivers for your system.
If prompted, save the .zip file to a location on your computer. Otherwise, the file is automatically saved to the Downloads folder. - In the folder where the .zip file was saved, right-click the .zip file and choose Extract All.
- Select a destination folder for the extracted files and click Extract. The files are extracted from the archive.
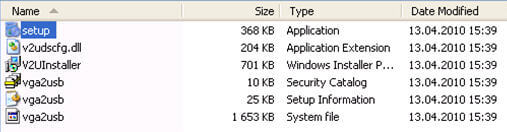
- In the folder with the extracted files, double-click the setup file. Allow the app permission to make changes to your device if prompted.
- Click Next in the Software Setup Wizard and read the End User License Agreement. Select I Agree to the terms and click Next to continue.
- Choose the default installation folder or browse to the folder where you’d like to install the software and click Next. Click Next again to start the installation.
- Click Close to exit the wizard after installation is complete. The Epiphan Capture Tool shortcut appears on the desktop.
Step 2: Connect the video capture device
Now you need to connect the video capture device using cables included in the package.
- Connect your video source to the DVI2USB 3.0 using the DVI cable. If your video source is not HDMI or VGA, use the provided conversion cable or adapters.
- Connect your computer to the DVI2USB 3.0 using the USB cable. Windows automatically detects and adds the video capture device to your system. If an earlier version of Windows doesn’t automatically add the device, you may need to run the New Hardware Wizard to add the video capture device to your system.
Step 3: Streaming Video Capture
- Double-click the Epiphan Capture Tool icon on your desktop to start the application.
- In the Tools menu, select Options and click the Recording tab.
- Specify the encoding codec settings and click OK when you’re done.
- Set Record as to Video.
- Click Select Codec, choose a video compression and click OK.
- Turn on your DVI video source if it’s not already on.
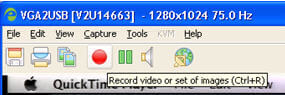
- From the Epiphan Capture Tool, click the Record button.
If the record option is unavailable, close the Epiphan Capture tool and restart the app as an admin on your computer.
- Select a location for the recorded video file on your computer and click Save. Recording does not start until you click Save.
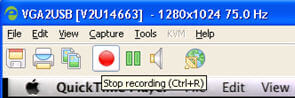
- To stop recording, click the Record button again.
The Result
The captured video from your DVI source is saved as a file to the location that you chose on your Windows computer.