
Epiphan video grabbers let you capture and record VGA or DVI video or HDMI™ video with audio and make it appear like a external camera source to QuickTime Player or QuickTime Player Pro. With this feature, you can use QuickTime Player to record videos. QuickTime Player Pro offers more advanced features and options, whereas QuickTime Player Pro is simpler to use for smaller resolutions with fewer options. Details on how to upgrade your QuickTime Player to PRO can be found at Apple’s official website.
Step 1: Connect the video source to your video grabber
Connect the video grabber to your MAC and start QuickTime Player. In order to record video using QuickTime Player, the most recent Epiphan device software and drivers must be installed. To confirm the frame grabber is capturing images and video , you can use the Epiphan capture tool to ensure this step is setup and working correctly
Step 2: Configure QuickTime Player QT versions 10.2 and up
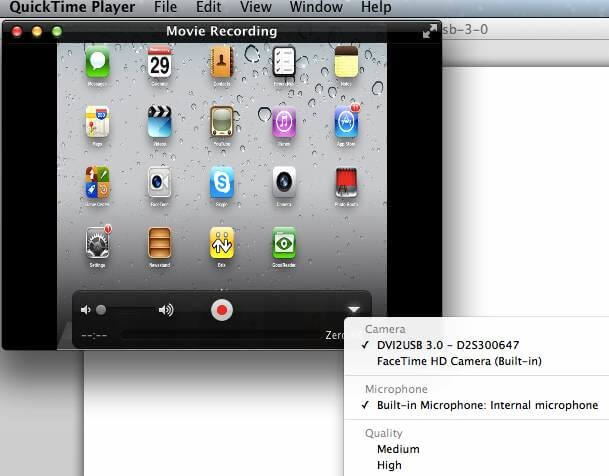
This example is using QuickTime 10, a DVI2USB 3.0 video grabber capturing the external display from an iPad 2. Launch QuickTime 10- Select New Recording and press the triangle to choose the video source as per the screen shots below. For QuickTime 7, please see Step 2 specifically for QT 7
Step 3: Start Recording VGA, DVI, HDMI with QuickTime Player 10
Press the red button to start/stop recording
Step 4: Configure QuickTime Player Version 7
QuickTime 7- Previous versions of QuickTime Player (pre 10.x) required the user to Navigate to Preferences under the QuickTime Player drop-down menu.

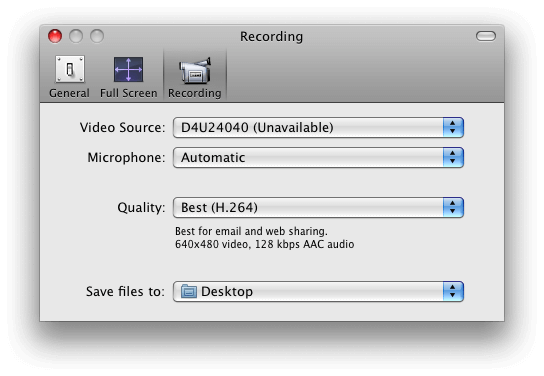
Navigate to the Recording tab. Select frame grabber to capture from audio source (if needed), quality of video, and location to save to. Exit the Settings window.
Step 5: Record video with QuickTime 7
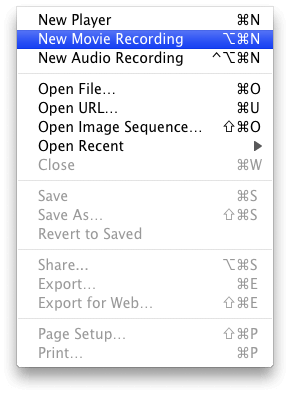
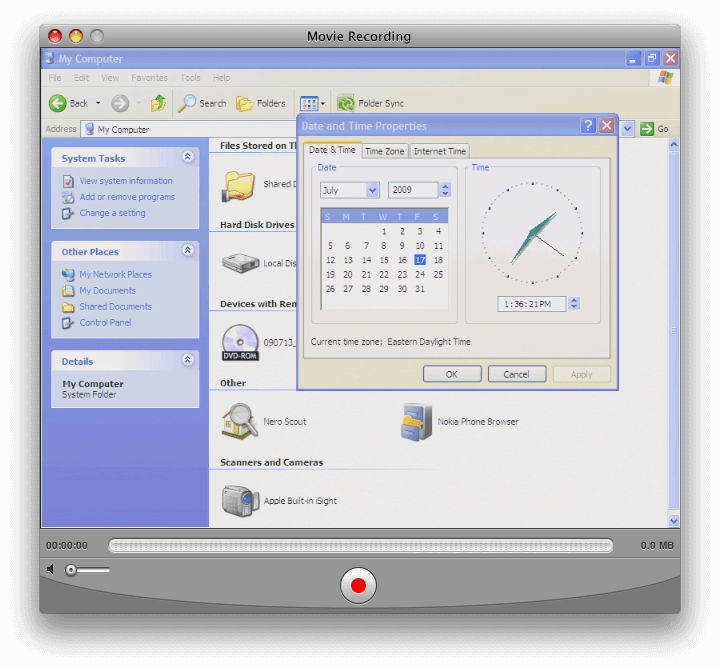
Select New Movie Recording from the File menu. A preview window should open.
Click on the red circle in the lower part of the window to start the recording.
Click on the black square (stop button)to finish recording. If your recording is successful, a QuickTime player window should automatically open with your recording.
