
NEW! Check out KVM2USB 3.0, our next-generation portable KVM console over USB.
Connect to VGA, DVI and HDMI sources, over a faster USB 3.0 connection in full HD!
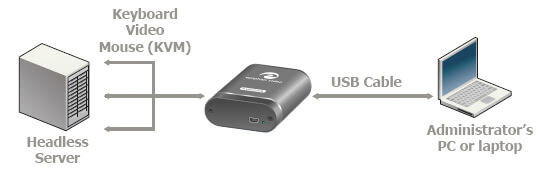
Learn moreThis instruction explains how to use a laptop as the keyboard and screen for a headless a server using the KVM2USB solution. When you connect this frame grabber to any computerized machine with a VGA output and a laptop, it emulates keyboard, mouse and monitor allowing you to perform administering quickly and easily. KVM2USB transfers the image from the host machine to the laptop and simulates the keyboard and mouse outputs of the laptop.
KVM2USBcan be used for multiple operations on the headless server such as selecting a different operating system, interrupting boot up, running the server in different operation modes (if it is supported by the server) and configuring the headless server BIOS settings. In our example the laptop is running Windows.
Hardware Required
You will need the following equipment:
KVM2USB unit
Transfers information from the server’s VGA and PS/2 outputs to a laptop. Allows administering a headless server. Laptop Displays information captured by KVM2USB. Server administering is available using its display, keyboard and mouse.
KVM Cable
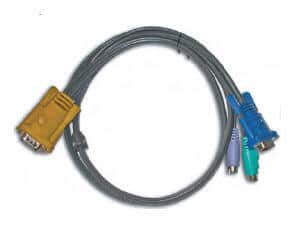 Connects to the server’s VGA and PS/2 outputs and the KVM2USB’s input. PS/2 to USB adapter Used if a server does not feature PS/2 outputs. USB “A” Plug to USB Mini “B” Plug 5 pins cable Connects KVM2USB to a laptop.
Step 1: Install necessary software
Download Epiphan Capture Tool and drivers from the Epiphan Systems’ web site.
- Make sure your laptop is connected to network.
- Browse to the KVM2USB product page on the Epiphan’s website
- Download the latest version of the drivers and Epiphan Capture Tool that will run on the laptop.
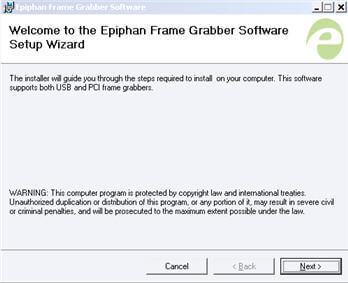
- Unzip the downloaded folder and start the Epiphan Frame Grabber Software Wizard.
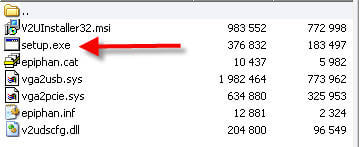
- Select the installation folder.
- Confirm the installation.
Step 2: Connect the equipment
Now you need to connect the KVM2USB hardware.
- Use the USB cable to connect KVM2USB to your laptop.
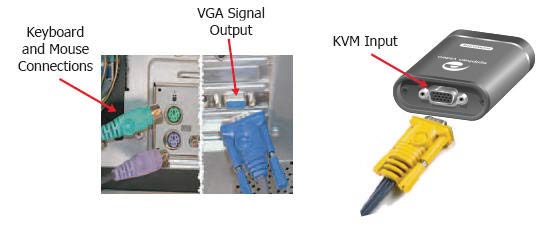
- Use the KVM cable to connect KVM2USB to a server.
Tip: If the server features mouse and keyboard PS/2 ports, connect the yellow connector of KVM cable to KVM2USB’s KVM input and the black connector – to the server’s VGA output. Connect the purple and green PS/2 connectors to the server’s PS/2 outputs. Note that if the server has only USB ports for mouse and keyboard connections, you should use the PS/2 to USB adapter to connect these ports to KVM cable.
Step 3: Set up the application and manage the server
To use KVM2USB you should perform the following: set the KVM triggering event and start the KVM mode. First of all start the Epiphan Capture Tool that you have installed as described above. Setting the KVM triggering event This option allows setting an action that initiates entering and exiting KVM mode. Note that this keyboard key or mouse combination should not be used by another application on the management PC or on the server
- Start the video capture application.
- From the Tools menu select Options and select the KVM tab.
- Select a combination that you would like to use to start KVM operation.
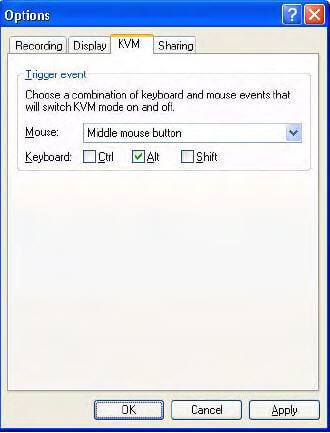
- Select OK to save your changes.
Starting KVM mode When KVM mode is on, you can manage the server from your laptop.
- Select Enter KVM Mode from the KVM menu.
- Use the KVM trigger event mouse and keyboard combination to start KVM mode. The server’s display appears in the video capture application window.
- If KVM stops functioning, use the Reconnect KVM command from the KVM menu .
Result
The steps described above explain how to manage a headless server using KVM2USB and a laptop.